Nupay - PIX
This page presents all information related to the Nupay connection using PIX as payment. Use the following buttons to navigate to the desired section.
General Information
Refunds
Voids
Installments
Chargebacks
Testing Guidelines
Integration Configuration
Production Environment
Connecting with Yuno
Mandatory fields when integrating via Yuno:
General information
Countries:

Currencies:
BRL
Minimum amount:
Maximum amount:
Purchase TRX:
Shoppers can pay with Pix when shopping online.
Support for recurrency:
No
Webhoorks:
Yes
Refunds
Refund support:
Yes
Partial refunds:
Yes
Multiple refunds:
Yes
Time to request refund:
A refund can be sent at any moment, there is no maximum deadline.
Time to process refund:
Voids
Void support:
No
Installments
Capability to define the installments when creating the payment:
No
Chargebacks
Notifications of chargebacks:
No
Testing guidelines for sandbox environment
Necessary fields for testing:
Limitations/Specifications for testing:
Test steps
To make a payment using PIX, you should follow the steps:
- Create Customer
- Create Checkout Session
- Create One Time Token / Get the token from SDK
- Create Payment
Instead of a redirect URL, the Create Payment response provides a QR code image (payment_method.payment_method_detail.bank_transfer.provider_image). After creating the order, you must complete and test the payment and access the NuPay sandbox dashboard with your Nubank credentials. Once logged in, you can approve the transaction in the 'Activities' section.
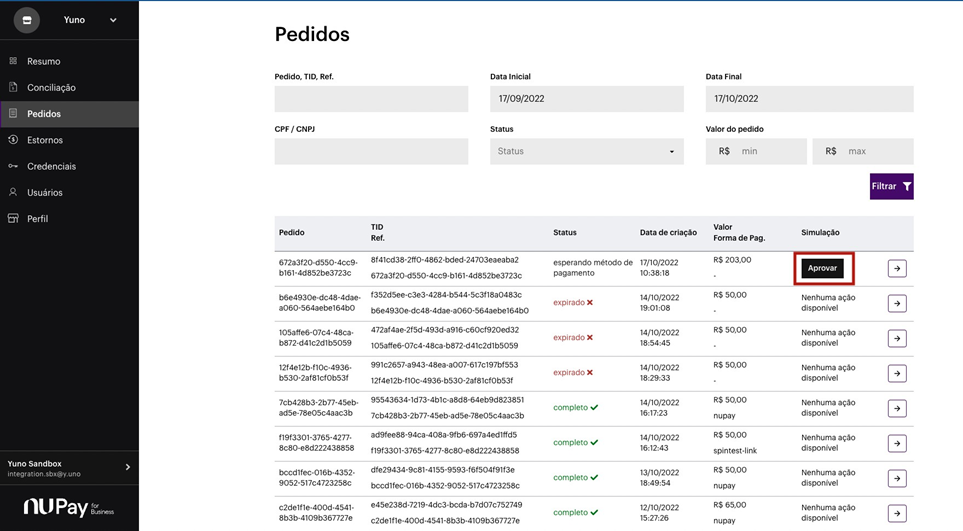
After approving the payment, its status will change to completo on the NuPay sandbox dashboard. You can check the payment status using the Retrieve Payment by ID. If the payment were approved, the Retrieve Payment by ID response would provide the status SUCCEEDED, and sub_status APPROVED.
Integration configuration
Credentials and steps to obtain them:
Dashboard configuration:
- Log in to dashboard.y.uno.
- Click Connections and then select NuPay.
- Click Connect.
- Introduce Name, Token and Key.
- Click Connect
Configuration of webhooks in partner:
Production environment
Specific procedure for a merchant to go live:
Updated 4 months ago