How it works
If you are a developer, you can use our Direct Flow to continue using your checkout and connect to our services using only a server-to-server connection. Your company must be PCI-certified to use our server-to-server card payments service. Please forward your AOC certification to your account manager before beginning the implementation.We always recommend using Yuno’s SDKs over Direct Flow integrations. Yuno’s SDKs are PCI-compliant and simplify the payment process by managing all complexities, including fraud prevention, 3DS, and payment provider-specific requirements. Direct Flow requires merchants to handle these aspects manually, increasing complexity and risk.
status and sub_status as the main reference for the payment’s state. A payment could have different transactions associated with it, so by focusing on the payment status/sub_status, you can have the latest state regardless of how many transactions were made, giving you clear input for decision-making. With this integration, you can also enroll credit cards for future purchases (also only available for PCI-compliant merchants).
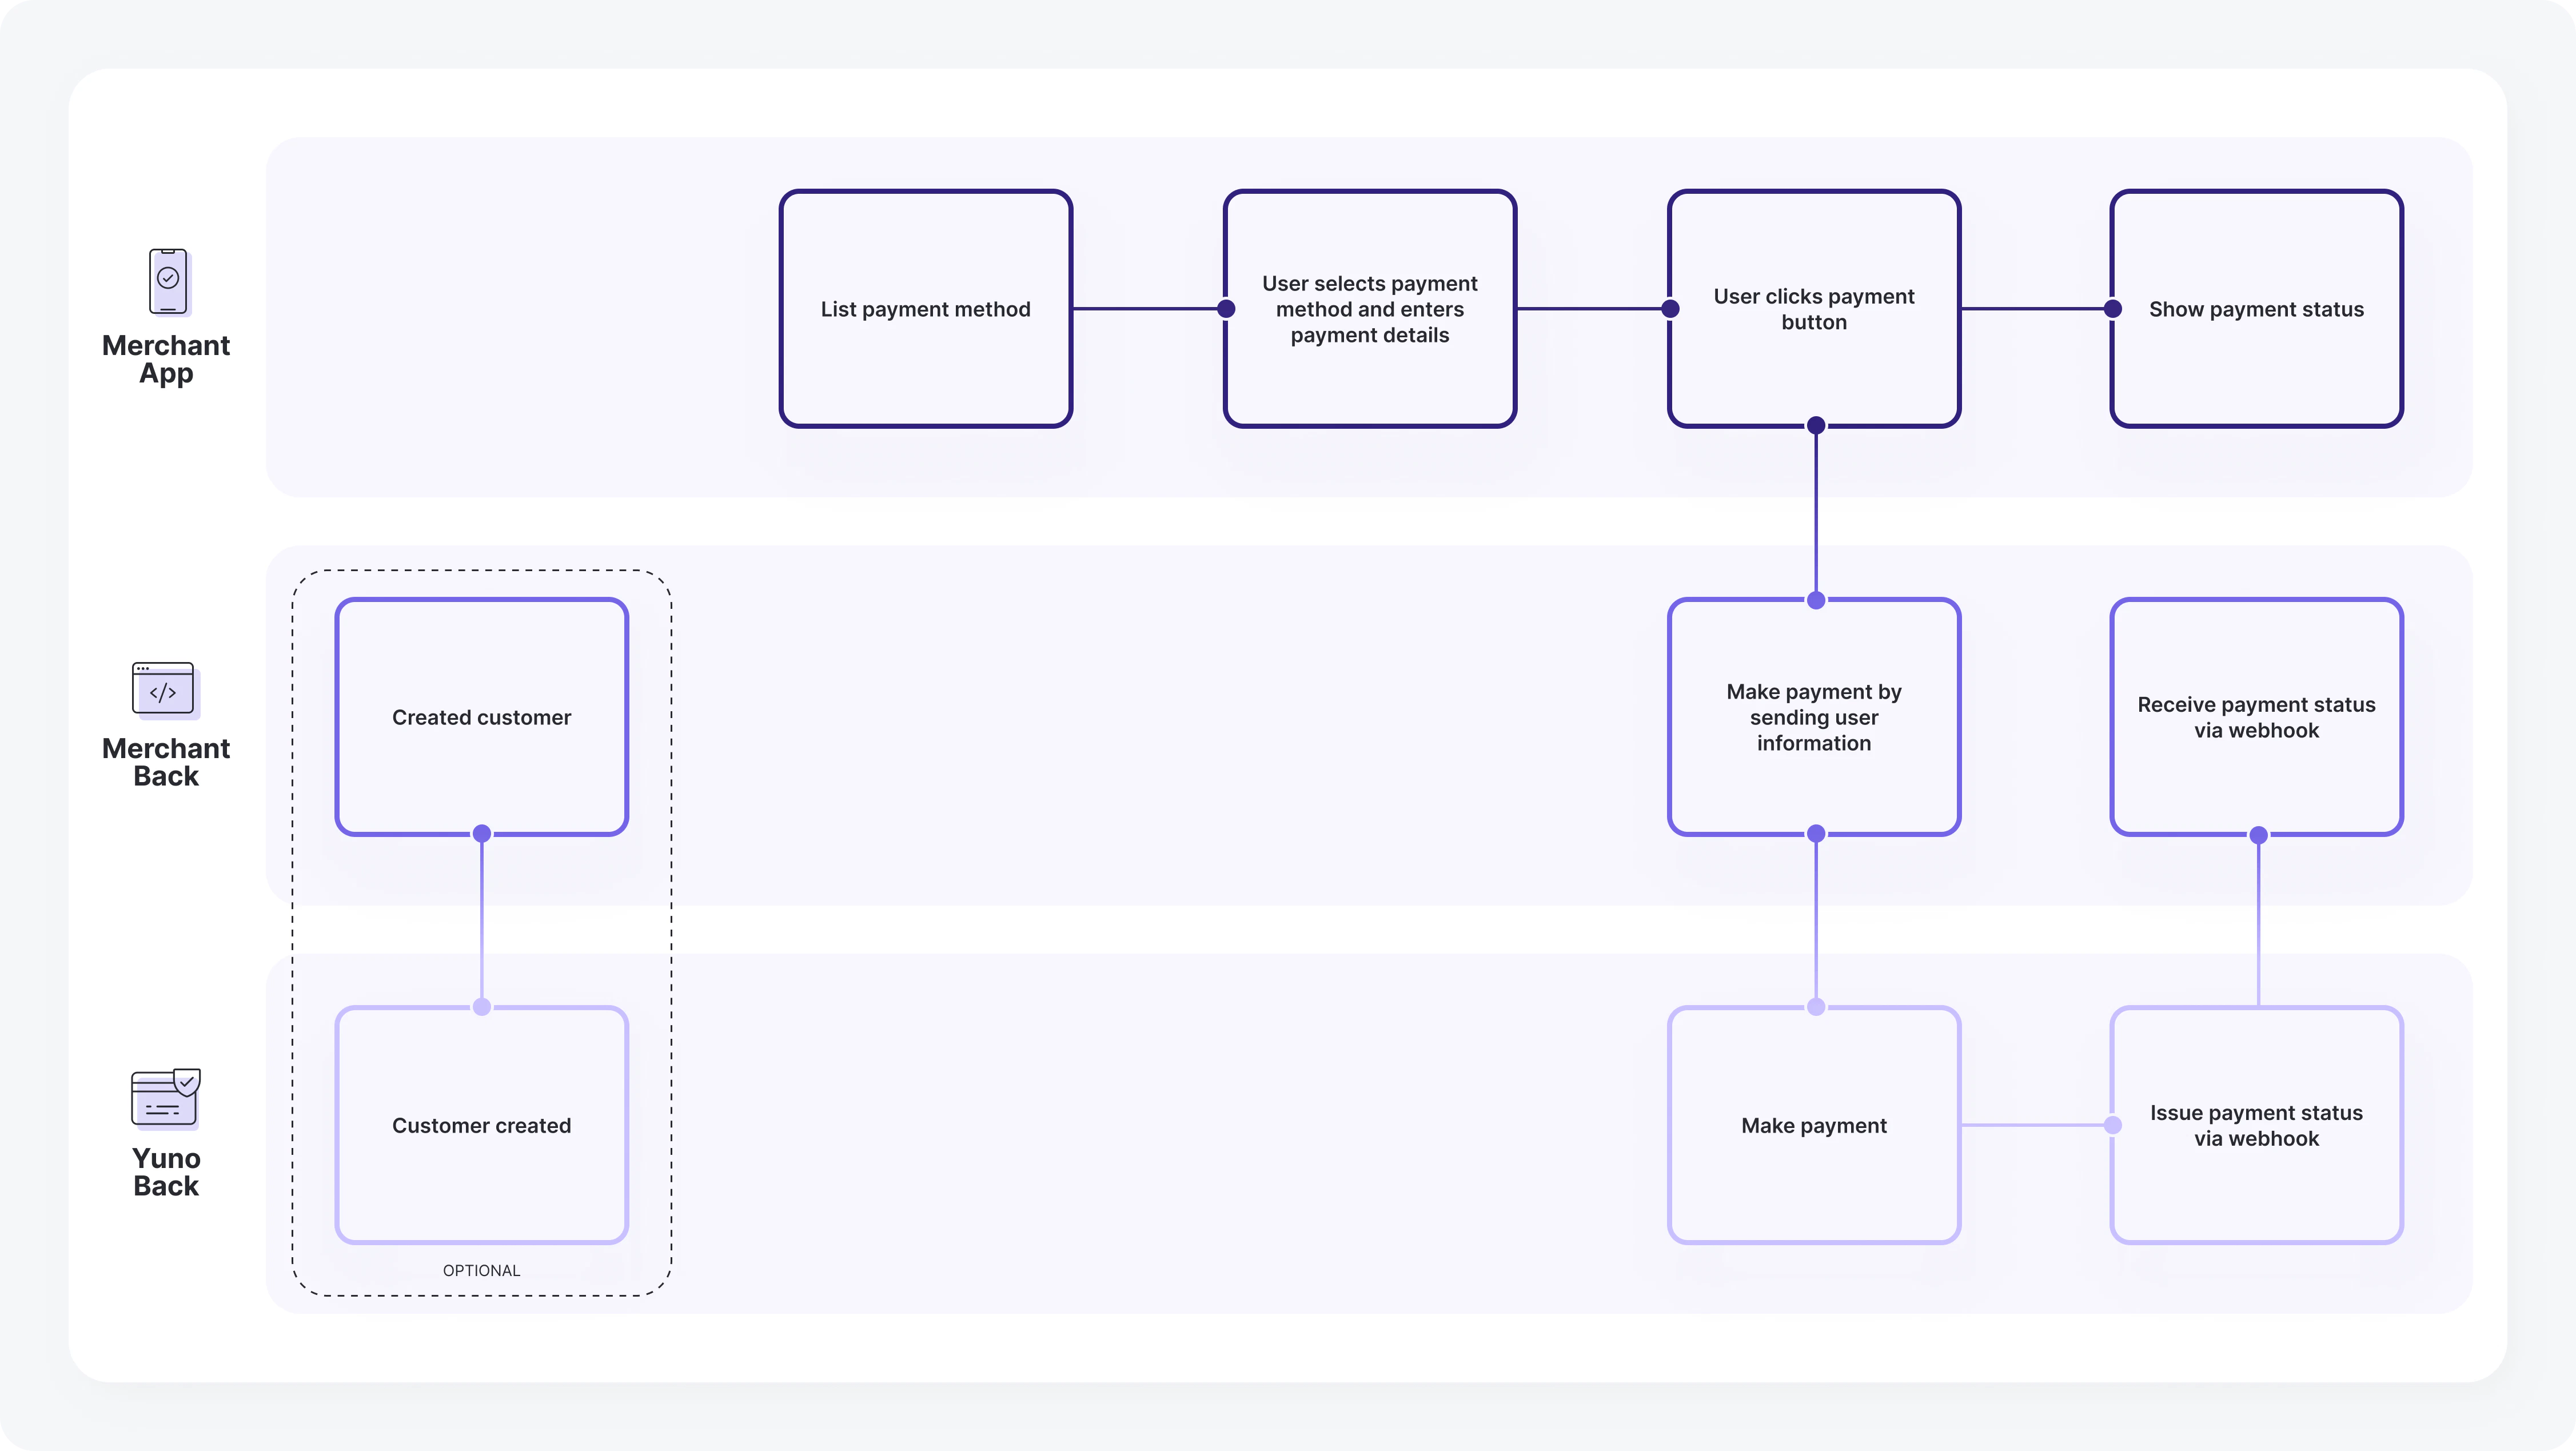
Payment
1
Create a customer
[Optional]: The first step is to create a customer to associate payment methods. Use the Create Customer endpoint to receive a unique ID.
- You can skip this step if the customer already exists.
- You can also send customer info directly in the payment without creating an object.
2
Create the payment
Display the enabled payment methods in your Yuno account. Once selected, create a payment containing order details, customer info, amount, and more using the Create Payment endpoint.
- Reference the examples section for implementation details.
- Use a
vaulted_tokenfor previously enrolled methods.
DIRECT vs REDIRECT Workflow
While using the Direct integration in Yuno, you have two availableworkflow options:
- DIRECT: We return the raw response from the providers so you can build the experience however you like with the unfiltered data.
- REDIRECT: While we also return the direct response from the providers, we additionally offer merchants the possibility to use a redirection link provided by Yuno where we handle the payment experience just for that payment. You can find such a URL in the
payment_method.detail.redirect_urlfield in the payment’s response.
Important Add-ons
- Webhooks: We recommend configuring Webhooks in your Yuno dashboard. Webhooks are the best way to ensure your system stays up-to-date with payment progress and status. Since event notifications are triggered automatically, your system won’t need to perform repeated requests to Yuno.
-
Device Fingerprints: The customer’s device fingerprints are used for fraud prevention purposes. They are usually generated by using third-party JavaScript in the checkout. If you are using a Direct integration and want to support fraud providers in the payment flow, you can use this object to specify the necessary information. For integrations using Yuno checkout, the value is obtained automatically, so do not send this field.
-
-
three_d_secure_setup_id: Use our JS only to get the
three_d_secure_setup_idand then handle the payment as an only API integration. The Direct workflow is only available for PCI-compliant merchants. It provides a straightforward way to create a payment and validate user information, requiring the merchant to perform just one request to create the payment. To successfully implement the Direct integration, follow the steps outlined in the Payment section above and provide the required information as instructed. This service is not necessary for 3DS implementation using Yuno’s SDK.
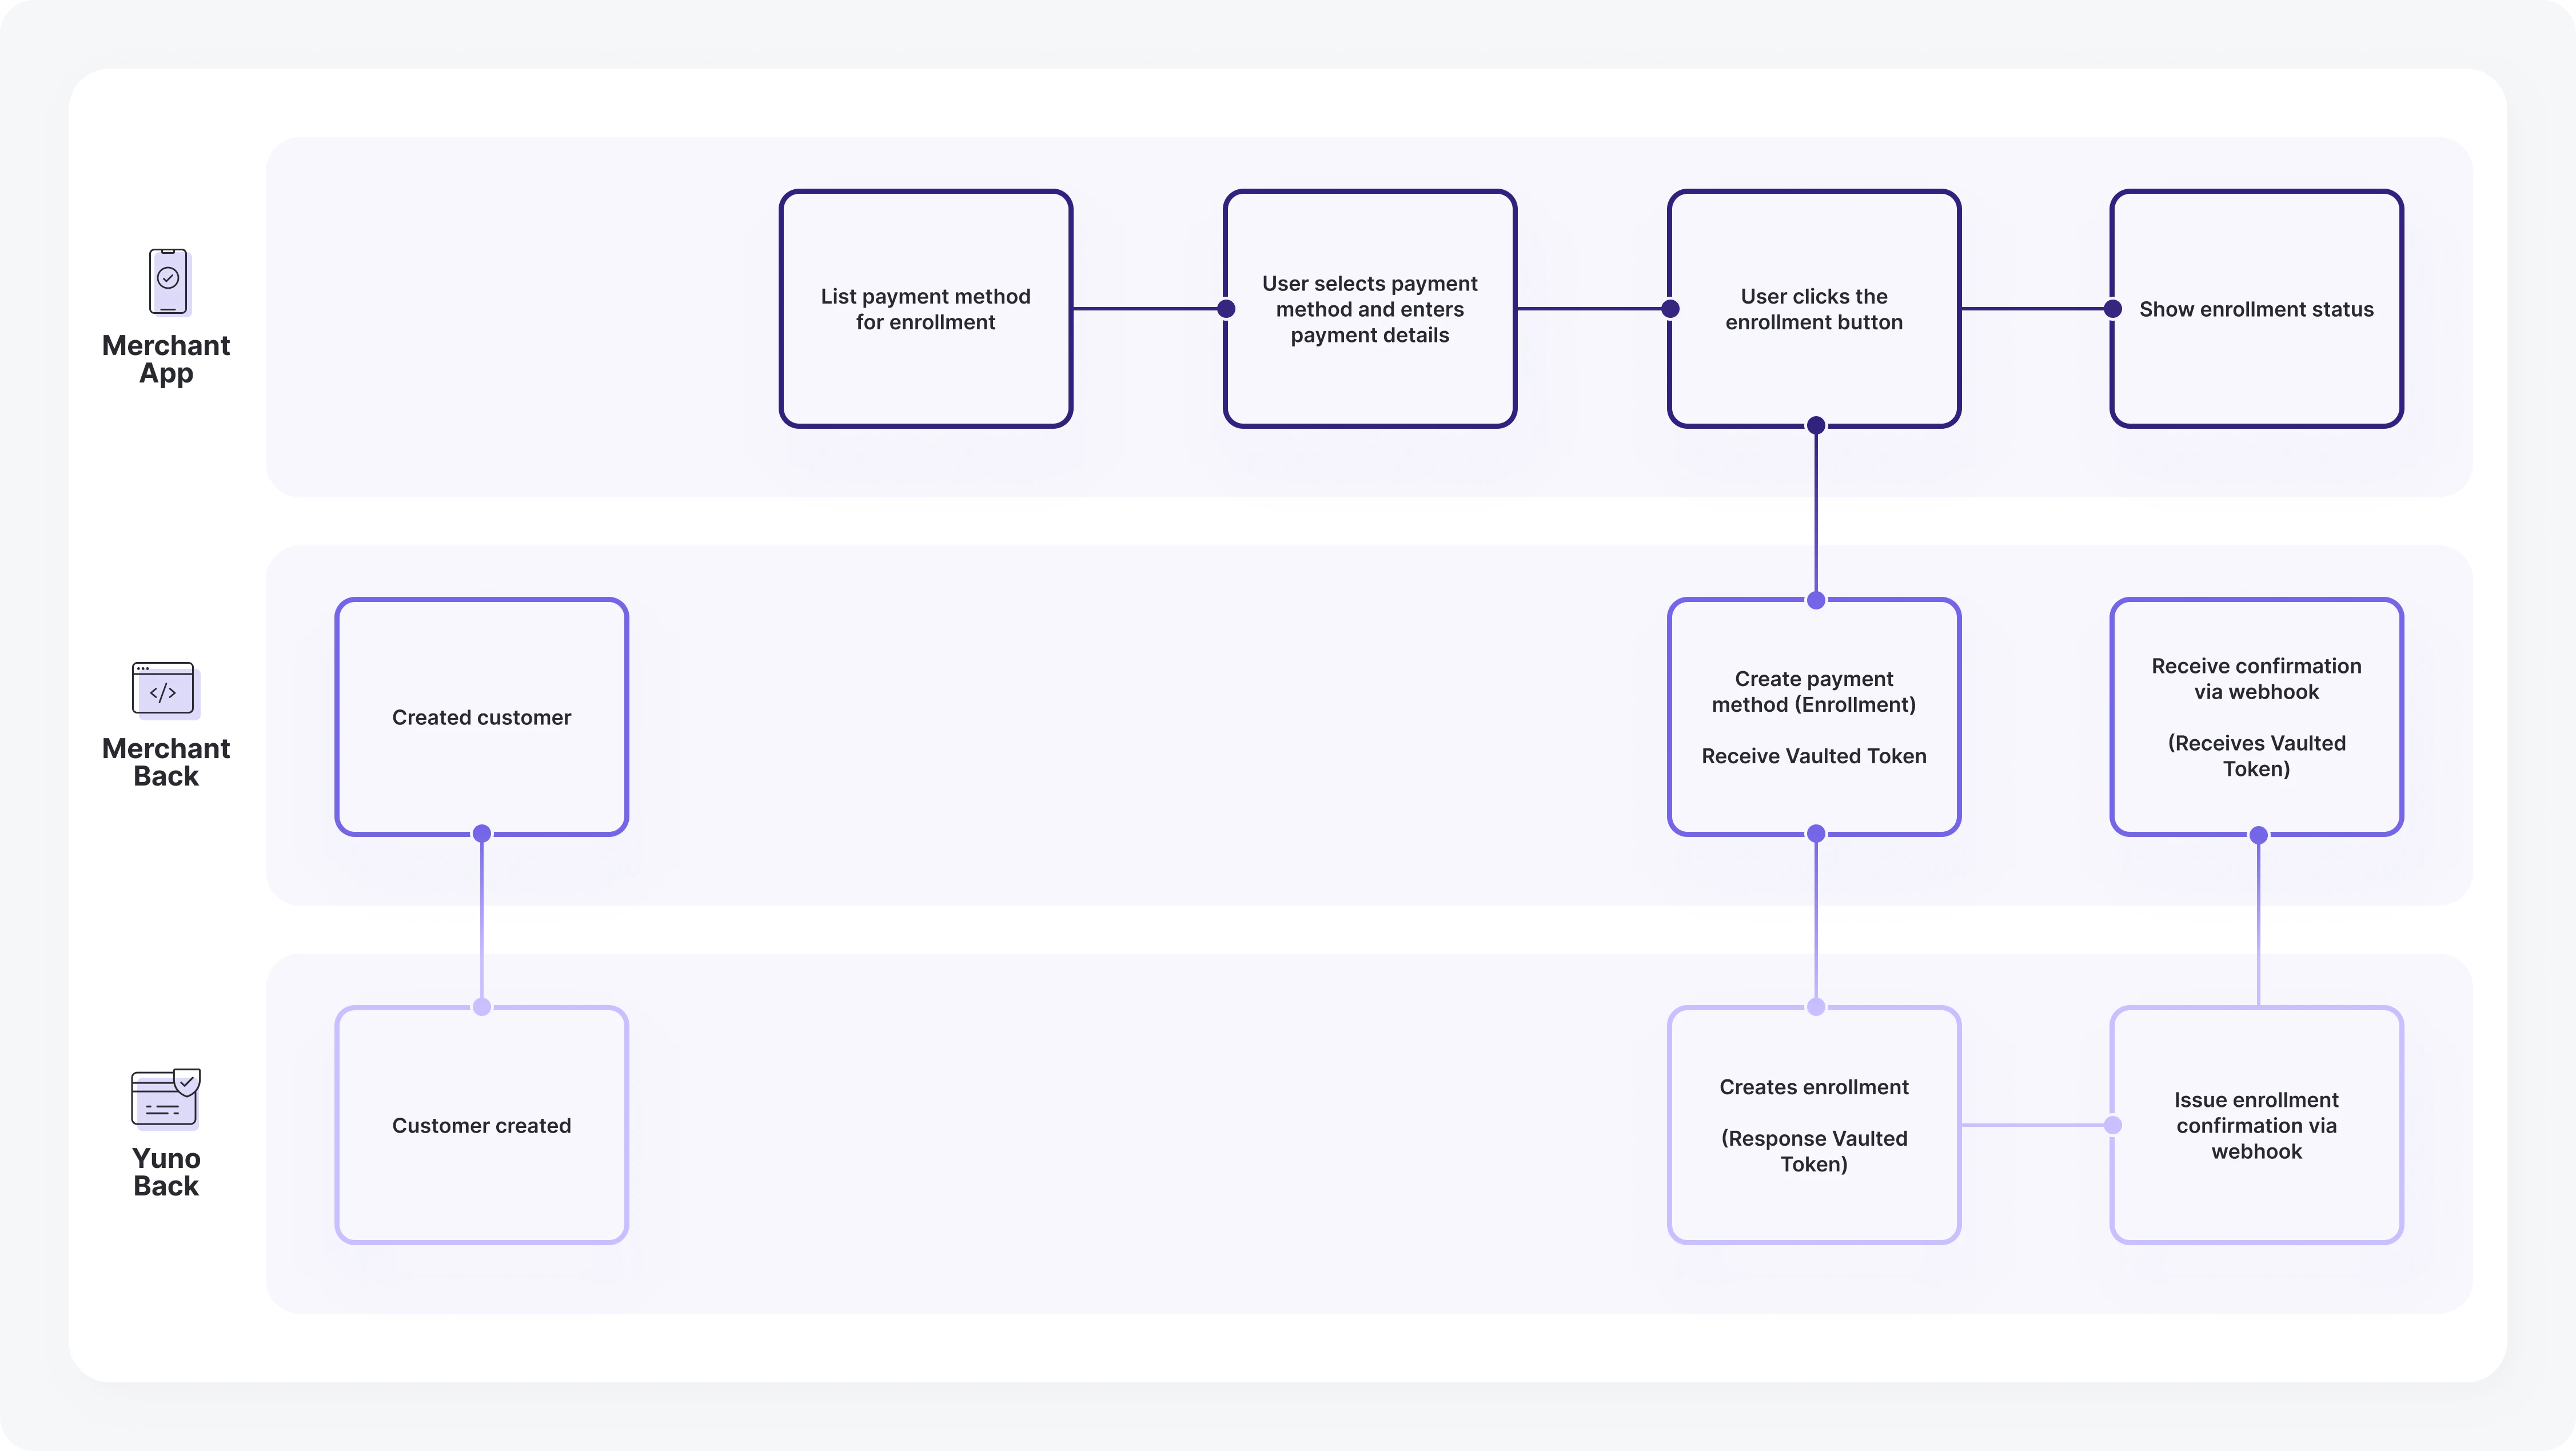
Enrollment
1
Create a customer
Associate payment methods by creating a customer (if not already existing) using the Create Customer endpoint.
2
Enroll a payment method
Direct Flow IntegrationThis feature is only available for enrolling Cards for PCI compliant merchants.
vaulted_token for future purchases.