Testing cards for 3DS flow
Use the scheme-specific cards below to validate 3DS in sandbox. In the preview environment, a simulator mocks the Directory Server (DS) and Access Control Server (ACS) so you can test both frictionless and challenge outcomes. Each table shows the card number with expected 3DS2 results and 3DS1 VERes (Verification Response)/PARes (Payer Authentication Response) responses. Use the one-time password (OTP) codes at the end to complete challenge scenarios.Amex
Amex
| Card Number | Expected Response 3DS 2.x | Expected Response 3DS 1.x DS (VERes) | Expected Response 3DS 1.x ACS (PARes) |
|---|---|---|---|
| 341502098634895 | AUTHENTICATED_APPLICATION_FRICTIONLESS | ENROLLED_Y | TRANSACTION_STATUS_Y |
| 348638267931507 | BROWSER_CHALLENGE | ENROLLED_Y | TRANSACTION_CHALLENGE_OTP |
| 345695399207589 | NOT_AUTHENTICATED_APPLICATION_FRICTIONLESS | ENROLLED_Y | TRANSACTION_STATUS_N |
| 349531373081938 | APPLICATION_CHALLENGE | ENROLLED_Y | TRANSACTION_STATUS_N |
| 342316317472410 | APPLICATION_CHALLENGE_SDK_TRANS_ID_INVALID_FORMAT | ENROLLED_Y | TRANSACTION_STATUS_N |
| 347899129656655 | AUTHENTICATED_BROWSER_FRICTIONLESS | ENROLLED_Y | TRANSACTION_STATUS_Y |
| 345197771649926 | NOT_AUTHENTICATED_BROWSER_FRICTIONLESS | ENROLLED_Y | TRANSACTION_STATUS_N |
| 372021106351394 | BROWSER_CHALLENGE | ENROLLED_Y | TRANSACTION_CHALLENGE_OTP |
| 3734123412340000 | NOT_AUTHENTICATED_BROWSER_FRICTIONLESS | ENROLLED_Y | TRANSACTION_STATUS_N |
| 3434567891111005 | BROWSER_CHALLENGE | ENROLLED_Y | TRANSACTION_CHALLENGE_OTP |
| 3794521996036850 | BROWSER_CHALLENGE | ENROLLED_Y | TRANSACTION_CHALLENGE_OTP |
Mastercard
Mastercard
| Card Number | Expected Response 3DS 2.x | Expected Response 3DS 1.x DS (VERes) | Expected Response 3DS 1.x ACS (PARes) |
|---|---|---|---|
| 5333259155643223 | AUTHENTICATED_APPLICATION_FRICTIONLESS | ENROLLED_Y | TRANSACTION_STATUS_Y |
| 5306889942833340 | BROWSER_CHALLENGE | ENROLLED_Y | TRANSACTION_CHALLENGE_OTP |
| 5328720384582224 | NOT_AUTHENTICATED_APPLICATION_FRICTIONLESS | ENROLLED_Y | TRANSACTION_STATUS_N |
| 5267648608924299 | APPLICATION_CHALLENGE | ENROLLED_Y | TRANSACTION_STATUS_N |
| 5187434643593002 | APPLICATION_CHALLENGE_SDK_TRANS_ID_INVALID_FORMAT | ENROLLED_Y | TRANSACTION_STATUS_N |
| 5512459816707531 | AUTHENTICATED_BROWSER_FRICTIONLESS | ENROLLED_Y | TRANSACTION_STATUS_Y |
| 5487971631330522 | NOT_AUTHENTICATED_BROWSER_FRICTIONLESS | ENROLLED_Y | TRANSACTION_STATUS_N |
| 5424184049821670 | BROWSER_CHALLENGE | ENROLLED_Y | TRANSACTION_CHALLENGE_OTP |
| 5204240438720050123 | BROWSER_CHALLENGE | ENROLLED_Y | TRANSACTION_CHALLENGE_OTP |
| 5250548692069390 | BROWSER_CHALLENGE | ENROLLED_Y | TRANSACTION_CHALLENGE_OTP |
| 5641523891636636 | BROWSER_CHALLENGE | ENROLLED_Y | TRANSACTION_CHALLENGE_OTP |
Visa
Visa
| Card Number | Expected Response 3DS 2.x | Expected Response 3DS 1.x DS (VERes) | Expected Response 3DS 1.x ACS (PARes) |
|---|---|---|---|
| 4556557955726624 | AUTHENTICATED_APPLICATION_FRICTIONLESS | ENROLLED_Y | TRANSACTION_STATUS_Y |
| 4916994064252017 | BROWSER_CHALLENGE | ENROLLED_Y | TRANSACTION_CHALLENGE_OTP |
| 4556104160382032 | NOT_AUTHENTICATED_APPLICATION_FRICTIONLESS | ENROLLED_Y | TRANSACTION_STATUS_N |
| 4024007189449340 | APPLICATION_CHALLENGE | ENROLLED_Y | TRANSACTION_STATUS_N |
| 4024007179872394 | APPLICATION_CHALLENGE_SDK_TRANS_ID_INVALID_FORMAT | ENROLLED_Y | TRANSACTION_STATUS_N |
| 4929251897047956 | AUTHENTICATED_BROWSER_FRICTIONLESS | ENROLLED_Y | TRANSACTION_STATUS_Y |
| 4716429323842524 | NOT_AUTHENTICATED_BROWSER_FRICTIONLESS | ENROLLED_Y | TRANSACTION_STATUS_N |
| 4234123412340003 | BROWSER_CHALLENGE | ENROLLED_Y | TRANSACTION_CHALLENGE_OTP |
| 4604633194219929 | BROWSER_CHALLENGE | ENROLLED_Y | TRANSACTION_CHALLENGE_OTP |
| 4485436455354151 | BROWSER_FRICTIONLESS_MISSING_DS_TRANS_ID | ||
| 4556962659911995 | APPLICATION_FRICTIONLESS_MISSING_SDK_TRANS_ID | ENROLLED_Y | TRANSACTION_STATUS_N |
| 4539837572943550 | BROWSER_FRICTIONLESS_MISSING_DS_TRANS_ID | ENROLLED_Y | TRANSACTION_STATUS_N |
| 4024007176265022 | BROWSER_CHALLENGE_MISSING_ACS_URL | ENROLLED_Y | TRANSACTION_STATUS_N |
| 4716125059847899 | THREE_RI | ENROLLED_Y | TRANSACTION_STATUS_N |
| 4556362626719763 | PROTOCOL_ERROR | ENROLLED_Y | TRANSACTION_STATUS_N |
| 4234123412340000 | AUTHENTICATED_BROWSER_FRICTIONLESS | ENROLLED_Y | TRANSACTION_STATUS_Y |
| 4234123412340006 | UNAVAILABLE_BROWSER_FRICTIONLESS | ENROLLED_Y | TRANSACTION_STATUS_U |
| 4234123412340007 | ATTEMPTED_BROWSER_FRICTIONLESS | ENROLLED_Y | TRANSACTION_STATUS_A |
| 4234123412340001 | NOT_ENROLLED | ENROLLED_N | |
| 4234123412340002 | NOT ENROLLED (VeRes is error 404 “Card account number not found in card ranges from Directory Server”) | ENROLLED_N (NOT APPLICABLE) | |
| 4234123412340100 | MISSING_ROOT | ||
| 4234123412340101 | MISSING_MESSAGE | ||
| 4234123412340102 | INVALID_MESSAGE | ||
| 4234123412340103 | MISSING_VERSION | ||
| 4234123412340104 | ILLEGAL_VERSION | ||
| 4234123412340105 | MISSING_URL | ||
| 4234123412340106 | ILLEGAL_URL | ||
| 4234123412340107 | MISSING_ENROLLED | ||
| 4234123412340108 | ILLEGAL_ENROLLED | ||
| 4234123412340109 | ILLEGAL_EXTENSION | ||
| 4234123412340200 | ERROR_CUSTOM | ||
| 4234123412340201 | ERROR_1 | ||
| 4234123412340202 | ERROR_2 | ||
| 4234123412340203 | ERROR_3 | ||
| 4234123412340204 | ERROR_4 | ||
| 4234123412340205 | ERROR_5 | ||
| 4234123412340206 | ERROR_6 | ||
| 4234123412340220 | ERROR_CUSTOM_WITH_DIFFERENT_MESSAGE_ID | ||
| 4234123412340250 | ERROR_50 | ||
| 4234123412340251 | ERROR_51 | ||
| 4234123412340252 | ERROR_52 | ||
| 4234123412340253 | ERROR_53 | ||
| 4234123412340258 | ERROR_58 | ||
| 4234123412340298 | ERROR_98 | ||
| 4234123412340299 | ERROR_99 | ||
| 4234123412340300 | IREQ_CUSTOM | ||
| 4234123412340301 | IREQ_ENROLLED_Y | ||
| 4234123412340350 | IREQ_50 | ||
| 4234123412340351 | IREQ_51 | ||
| 4234123412340352 | IREQ_52 | ||
| 4234123412340353 | IREQ_53 | ||
| 4234123412340354 | IREQ_54 | ||
| 4234123412340355 | IREQ_55 | ||
| 4234123412340356 | IREQ_56 | ||
| 4234123412340358 | IREQ_58 | ||
| 4234123412340398 | IREQ_98 | ||
| 4234123412340399 | IREQ_99 | ||
| 4234123412340400 | UNSUPPORTED_VERSION | ||
| 4234123412340401 | UNRECOGNIZED_CRITICAL_EXTENSION | ||
| 4234123412340402 | SERVER_ERROR | ||
| 4234123412340403 | TIMEOUT |
Diners
Diners
| Card Number | Expected Response 3DS 2.x | Expected Response 3DS 1.x DS (VERes) | Expected Response 3DS 1.x ACS (PARes) |
|---|---|---|---|
| 3095000000000000 | AUTHENTICATED_APPLICATION_FRICTIONLESS | ENROLLED_Y | TRANSACTION_STATUS_Y |
| 3095000000000001 | BROWSER_CHALLENGE | ENROLLED_Y | TRANSACTION_CHALLENGE_OTP |
| 3095000000000002 | NOT_AUTHENTICATED_APPLICATION_FRICTIONLESS | ENROLLED_Y | TRANSACTION_STATUS_N |
| 3095000000000005 | AUTHENTICATED_BROWSER_FRICTIONLESS | ENROLLED_Y | TRANSACTION_STATUS_Y |
| 3095000000000006 | NOT_AUTHENTICATED_BROWSER_FRICTIONLESS | ENROLLED_Y | TRANSACTION_STATUS_N |
JCB
JCB
| Card Number | Expected Response 3DS 2.x | Expected Response 3DS 1.x DS (VERes) | Expected Response 3DS 1.x ACS (PARes) |
|---|---|---|---|
| 3528000000000000 | AUTHENTICATED_APPLICATION_FRICTIONLESS | ENROLLED_Y | TRANSACTION_STATUS_Y |
| 3528000000000001 | BROWSER_CHALLENGE | ENROLLED_Y | TRANSACTION_CHALLENGE_OTP |
| 3528000000000002 | NOT_AUTHENTICATED_APPLICATION_FRICTIONLESS | ENROLLED_Y | TRANSACTION_STATUS_N |
| 3528000000000005 | AUTHENTICATED_BROWSER_FRICTIONLESS | ENROLLED_Y | TRANSACTION_STATUS_Y |
| 3528000000000006 | NOT_AUTHENTICATED_BROWSER_FRICTIONLESS | ENROLLED_Y | TRANSACTION_STATUS_N |
Ranges
Ranges
| Start range | End range | Scheme |
|---|---|---|
| 340000000000000 | 349999999999999 | Amex |
| 370000000000000 | 379999999999999 | Amex |
| 2221000000000000 | 2223000000000022 | Mastercard |
| 2223000000000024 | 2720999999999999 | Mastercard |
| 5100000000000000 | 5111111111111117 | Mastercard |
| 5111111111111119 | 5599999999999999 | Mastercard |
| 4000000000000000 | 4111110000000210 | Visa |
| 4111110000000212 | 4234123412339999 | Visa |
| 4234123412340000 | 4234123412349999 | Visa |
| 4234123412350000 | 4999999999999999 | Visa |
| 3000000000000000 | 3099999999999999 | Diners |
| 3528000000000000 | 3589009999999999 | JCB |
3DS2 OTP Codes
3DS2 OTP Codes
| OTP Code | Transaction Status | Transaction Status reason | ECI | authenticationValue |
|---|---|---|---|---|
| 1234 | Y | / | 01 | JAmi21makAifmwqo2120cjq1AAA= |
| 1111 | N | 01 | 01 | / |
| 2222 | R | 01 | 01 | / |
| 3333 | U | 01 | 01 | / |
| 4444 | A | 01 | 01 | Qm181okmdyqh6yQmYuq1890QAAA= |
3DS1 OTP Codes
3DS1 OTP Codes
| OTP Code | Transaction Status | CAVV | CAVV Algorithm | ECI |
|---|---|---|---|---|
| 1234 | Y | VGhpcyBpcyBhIHRlc3QgYmFzZTY= | 7 | 05 |
| 1111 | N | / | / | / |
Set up the 3D Secure connections
First, we’ll set up a 3DS-enabled connection in the Yuno dashboard. Log into your dashboard and navigate to Connections. In this case, we’ll use Yuno Test Payment Gateway as our provider, so we’ll look for it and click Connect.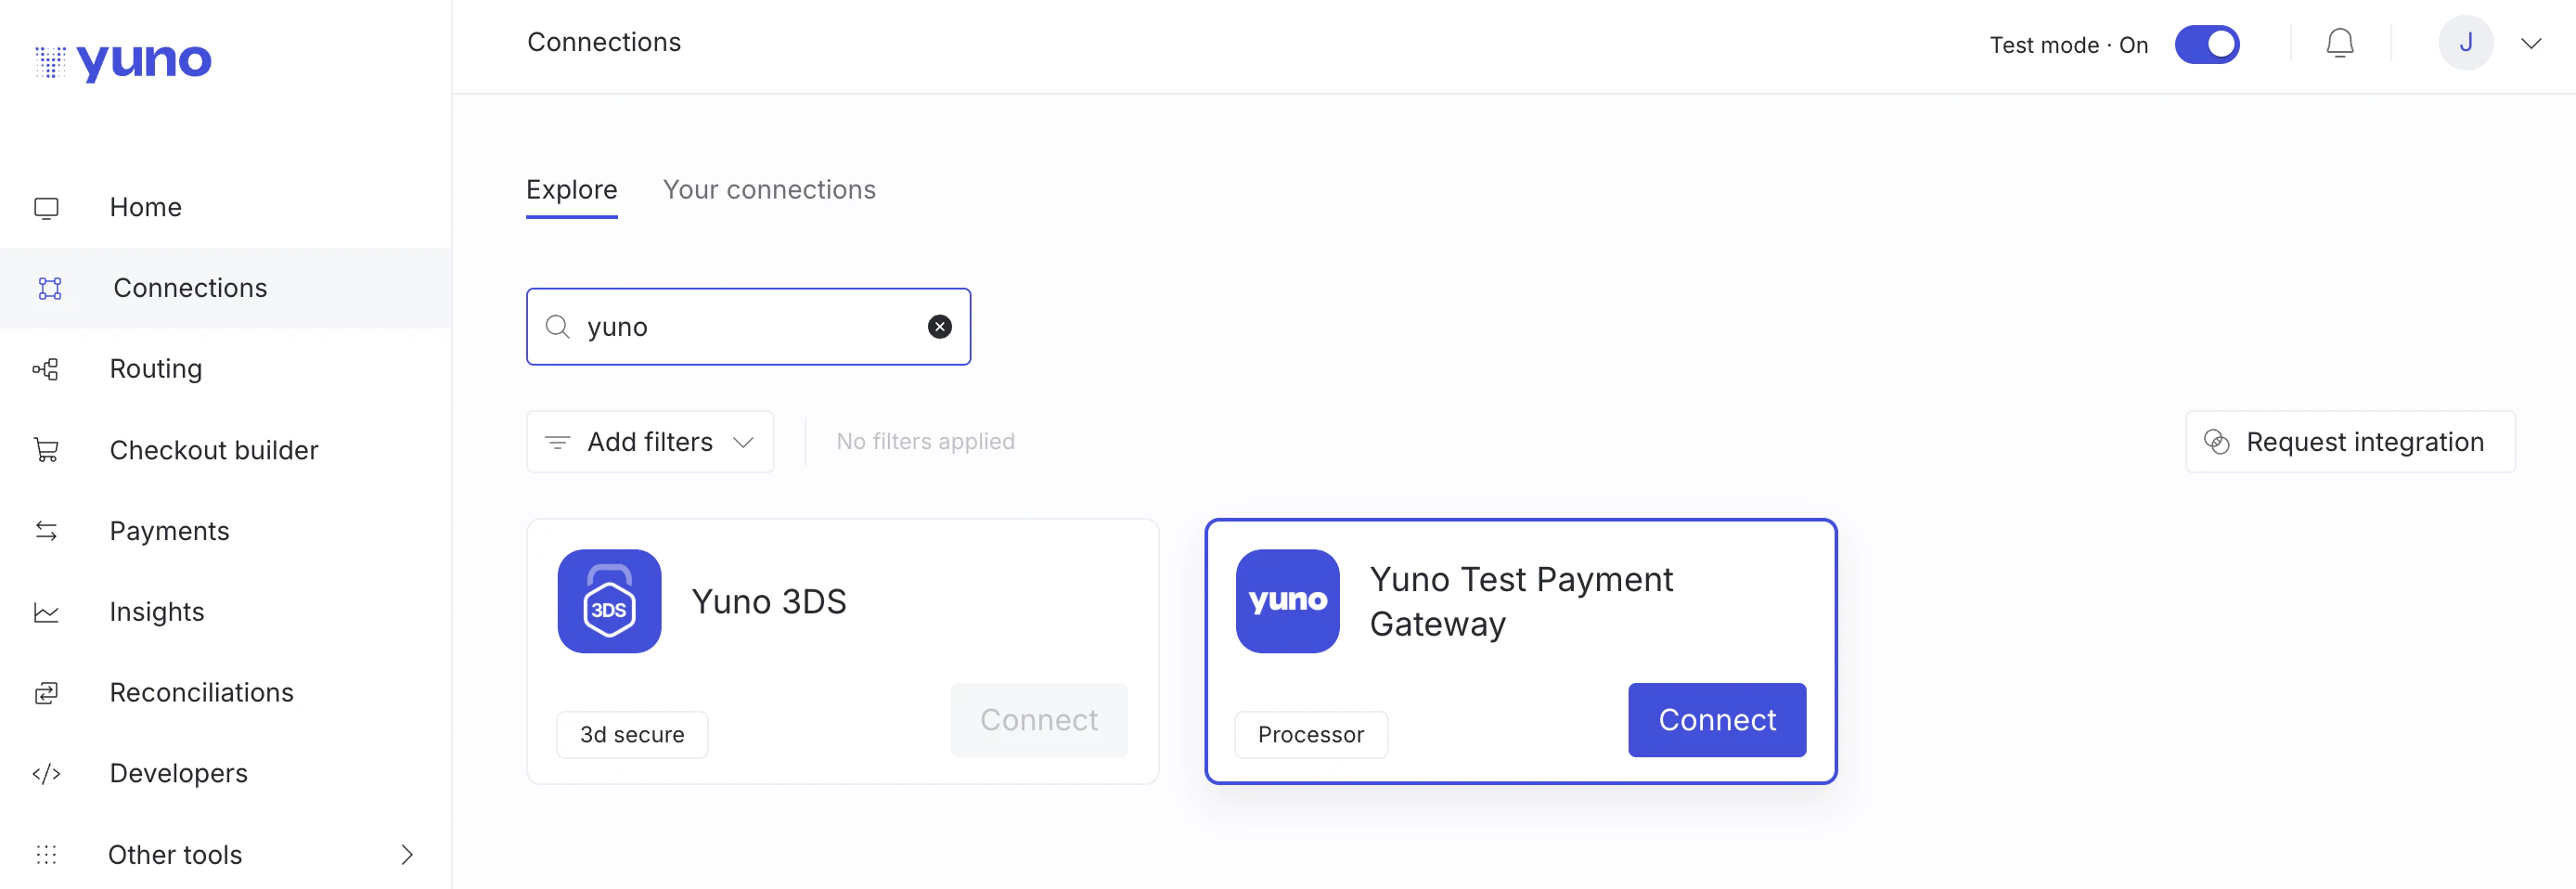
- Merchant Name
- Merchant URL
- Merchant Country Code
- MCC
- Brand
- Acquirer BIN
- Acquirer Merchant ID
- Merchant ID
- Processing Channel ID (optional)
- Acquirer Country Code
- SIRET (optional)
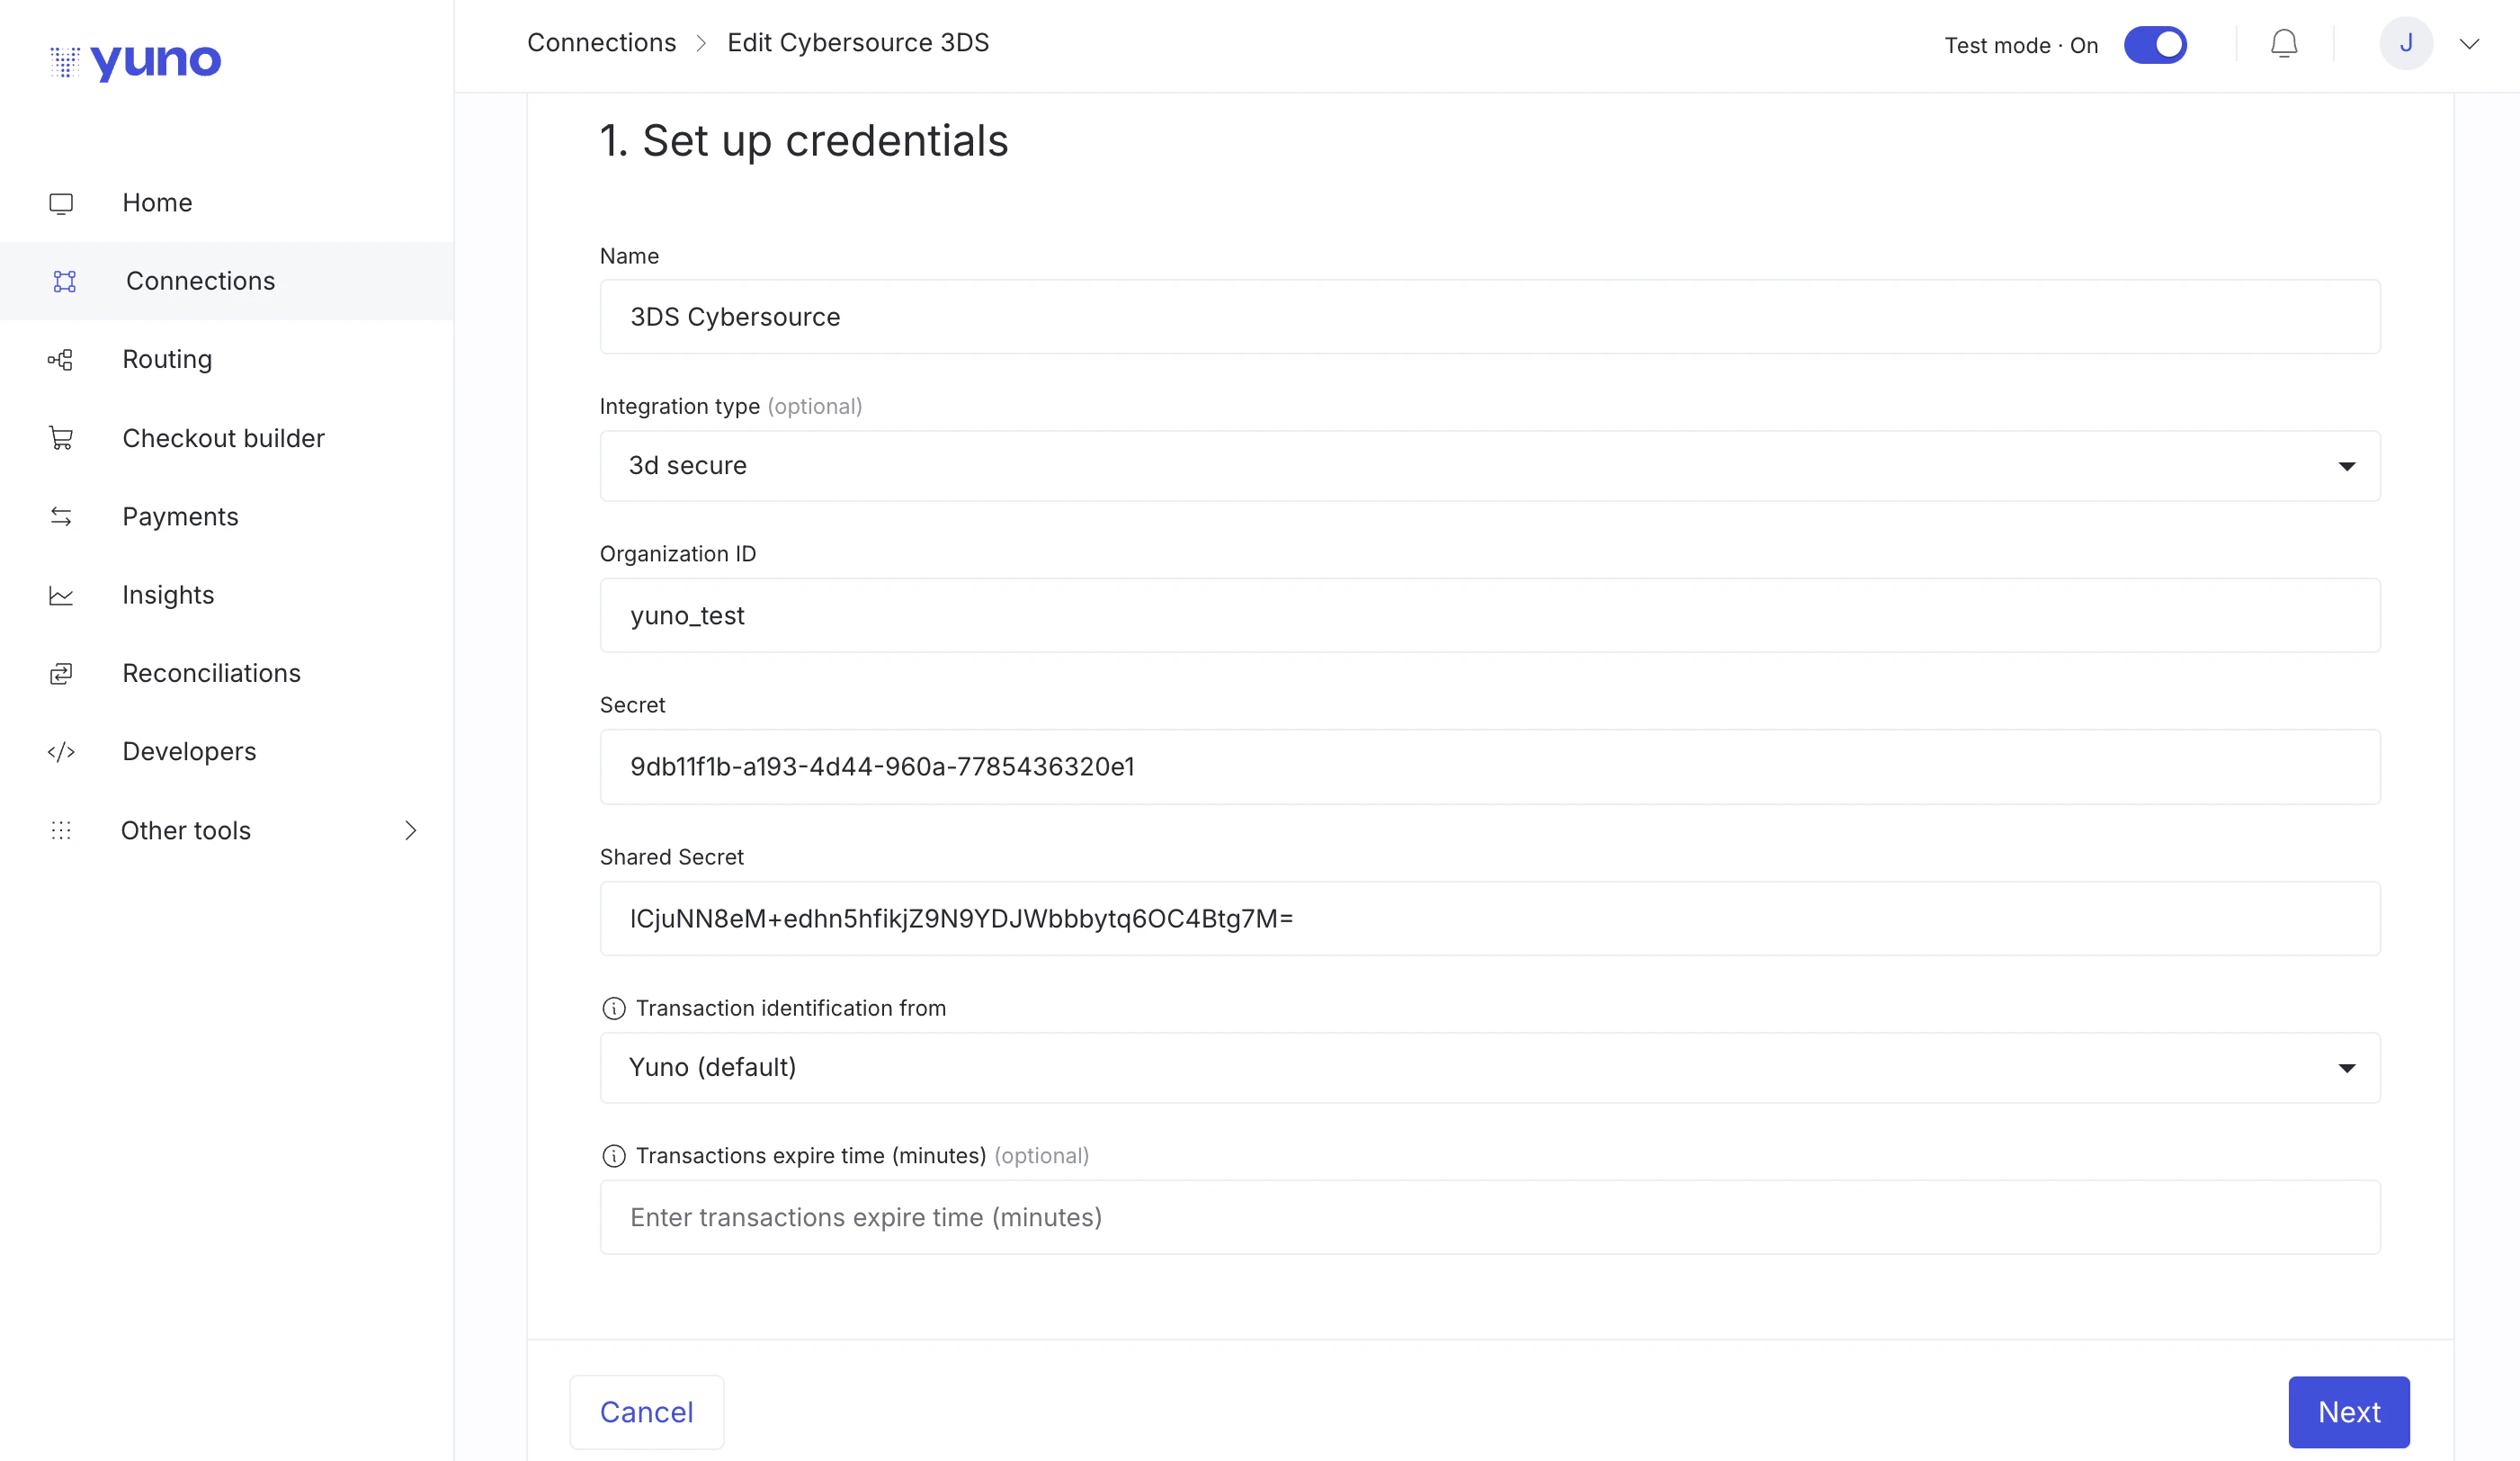
- Organization ID
- Secret
- Shared Secret
- Transaction identification from
- Transactions expire time (minutes) (optional)
Configure routing
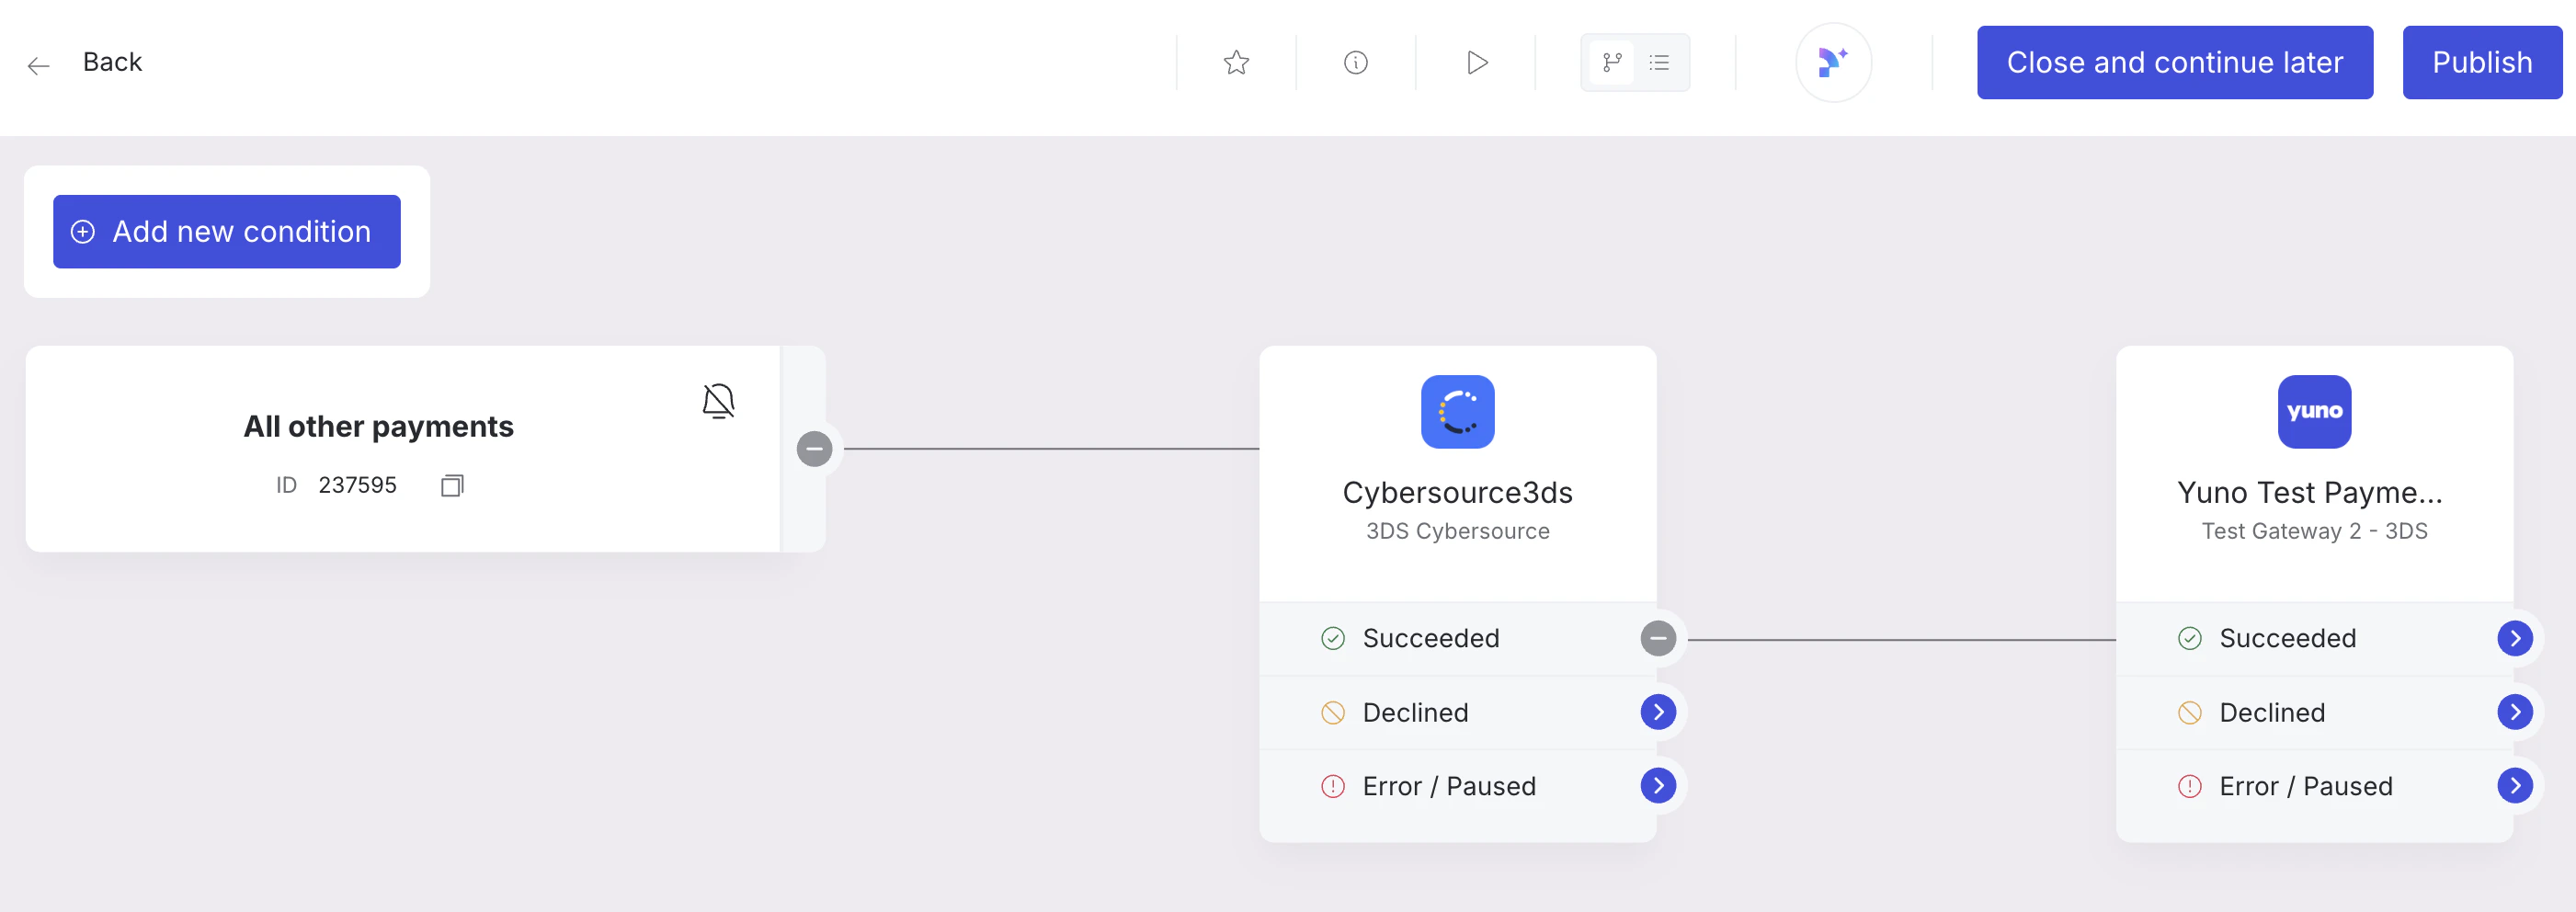
- Navigate to Routing and find the Card route in either the Published or Not Published tab. Click View or Set Up, then Create new route.
- Add a step to the route: select Cybersource 3DS (or your provider) and click Select.
- Then, for the “Succeeded” path, add Yuno Test Payment Gateway and click Select.
- Click Publish to save your changes.
Configure Checkout Builder
Navigate to Checkout Builder, enable the Card payment method, then click Publish settings to save your changes.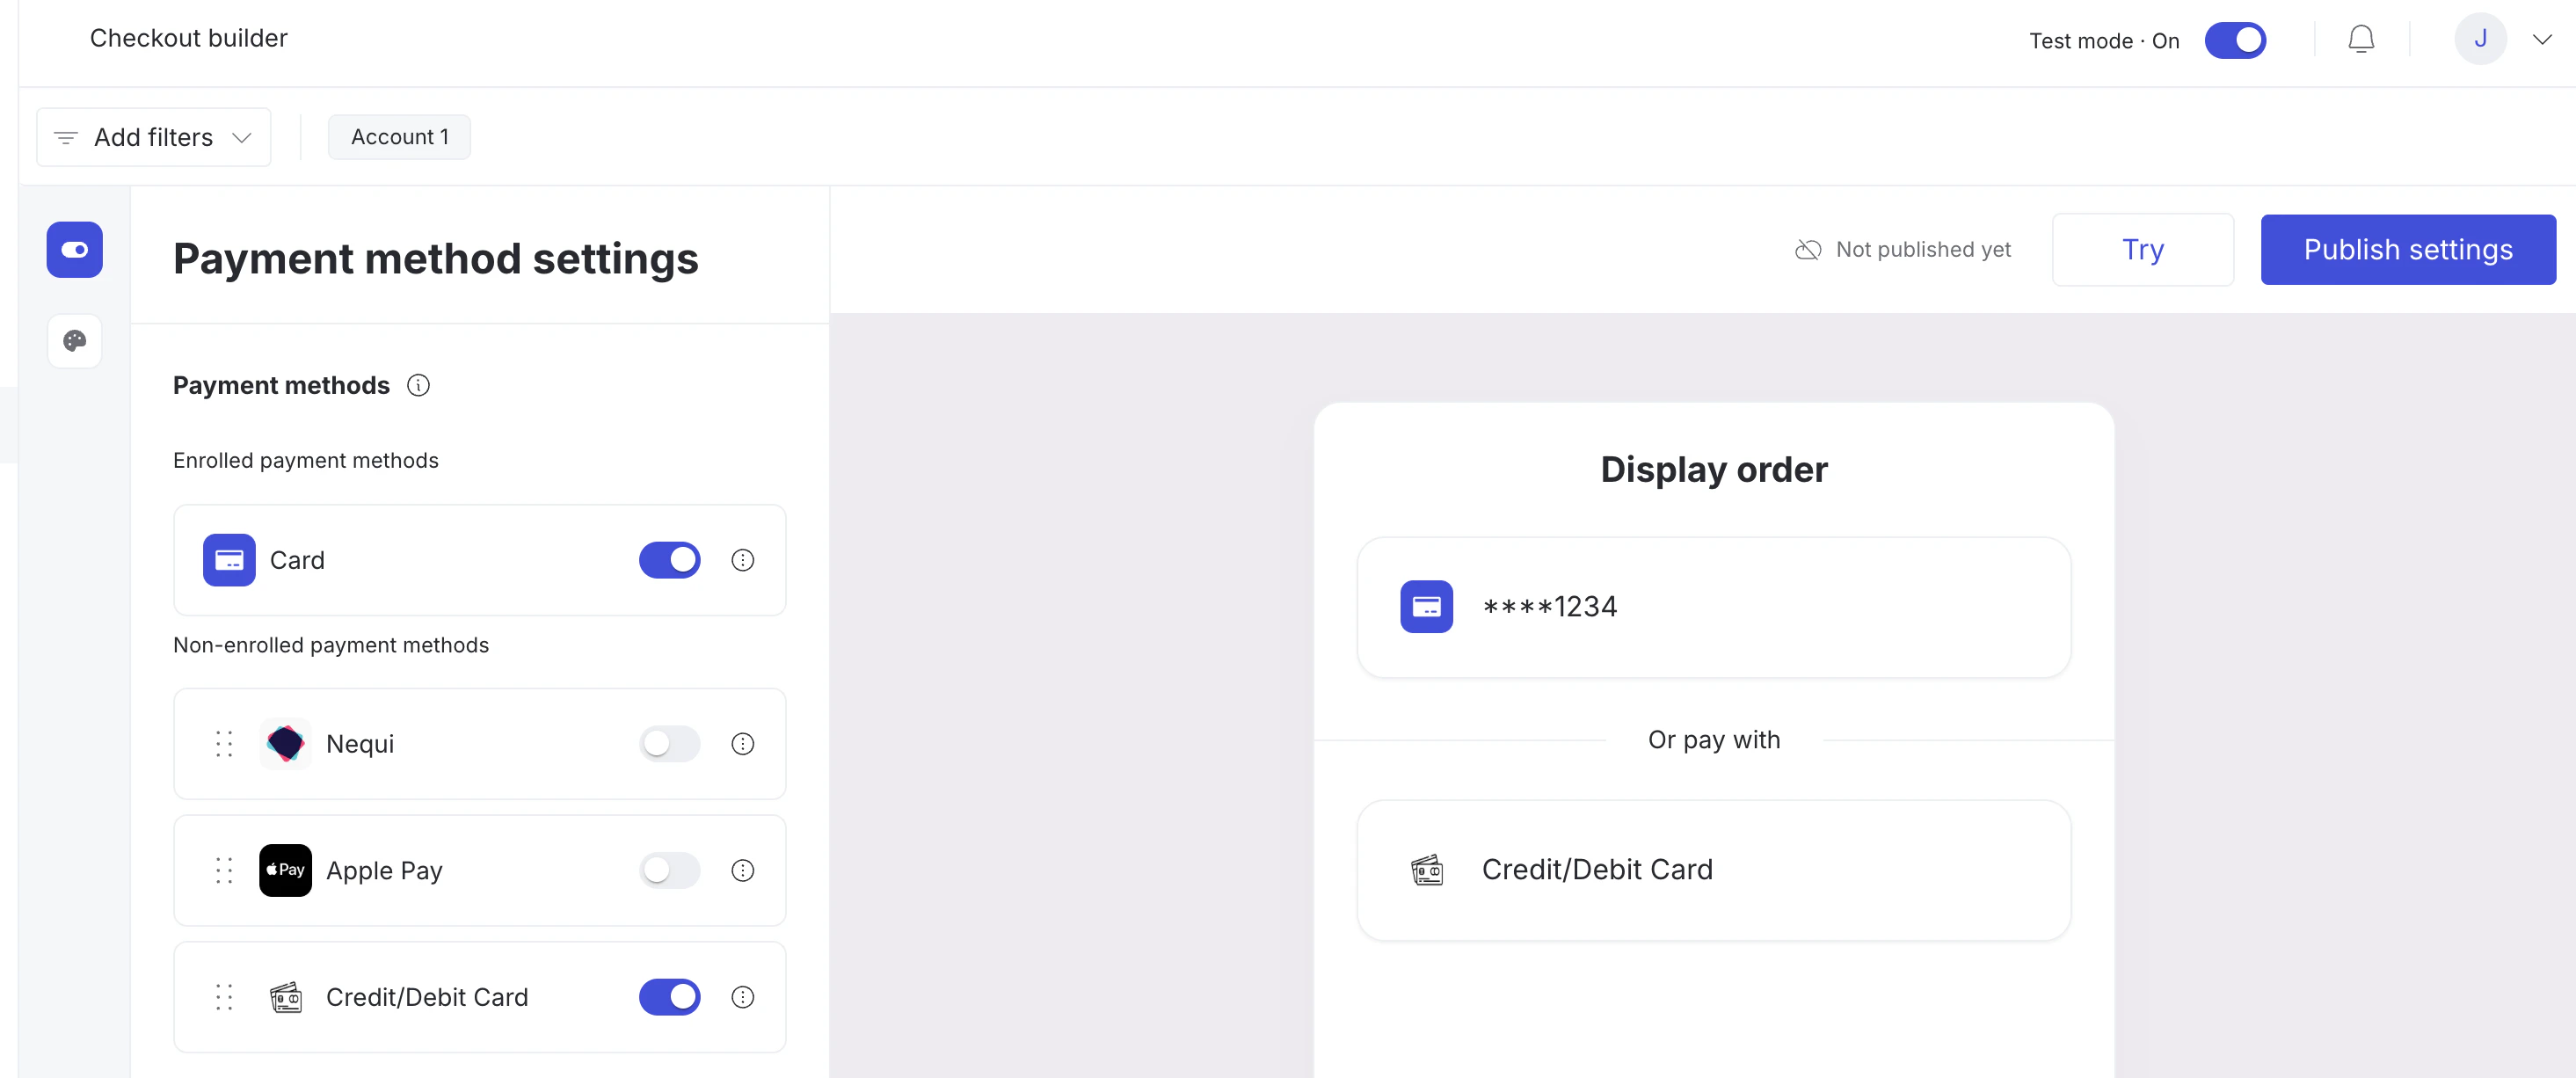
Testing 3DS with Yuno
You can test 3D Secure in three ways:- Yuno Testing Gateway: Use the gateway configured above (sandbox only).
- Yuno SDK: Create a payment in your application using the Yuno SDK.
- Yuno API: Use the Create Customer and Create Payment endpoints to run a 3DS flow.