Headless SDK (Enrollment)
Yuno's Headless SDK provides complete control over the checkout UX and UI, allowing you to enroll cards without requiring PCI compliance.
Enrollment workflow
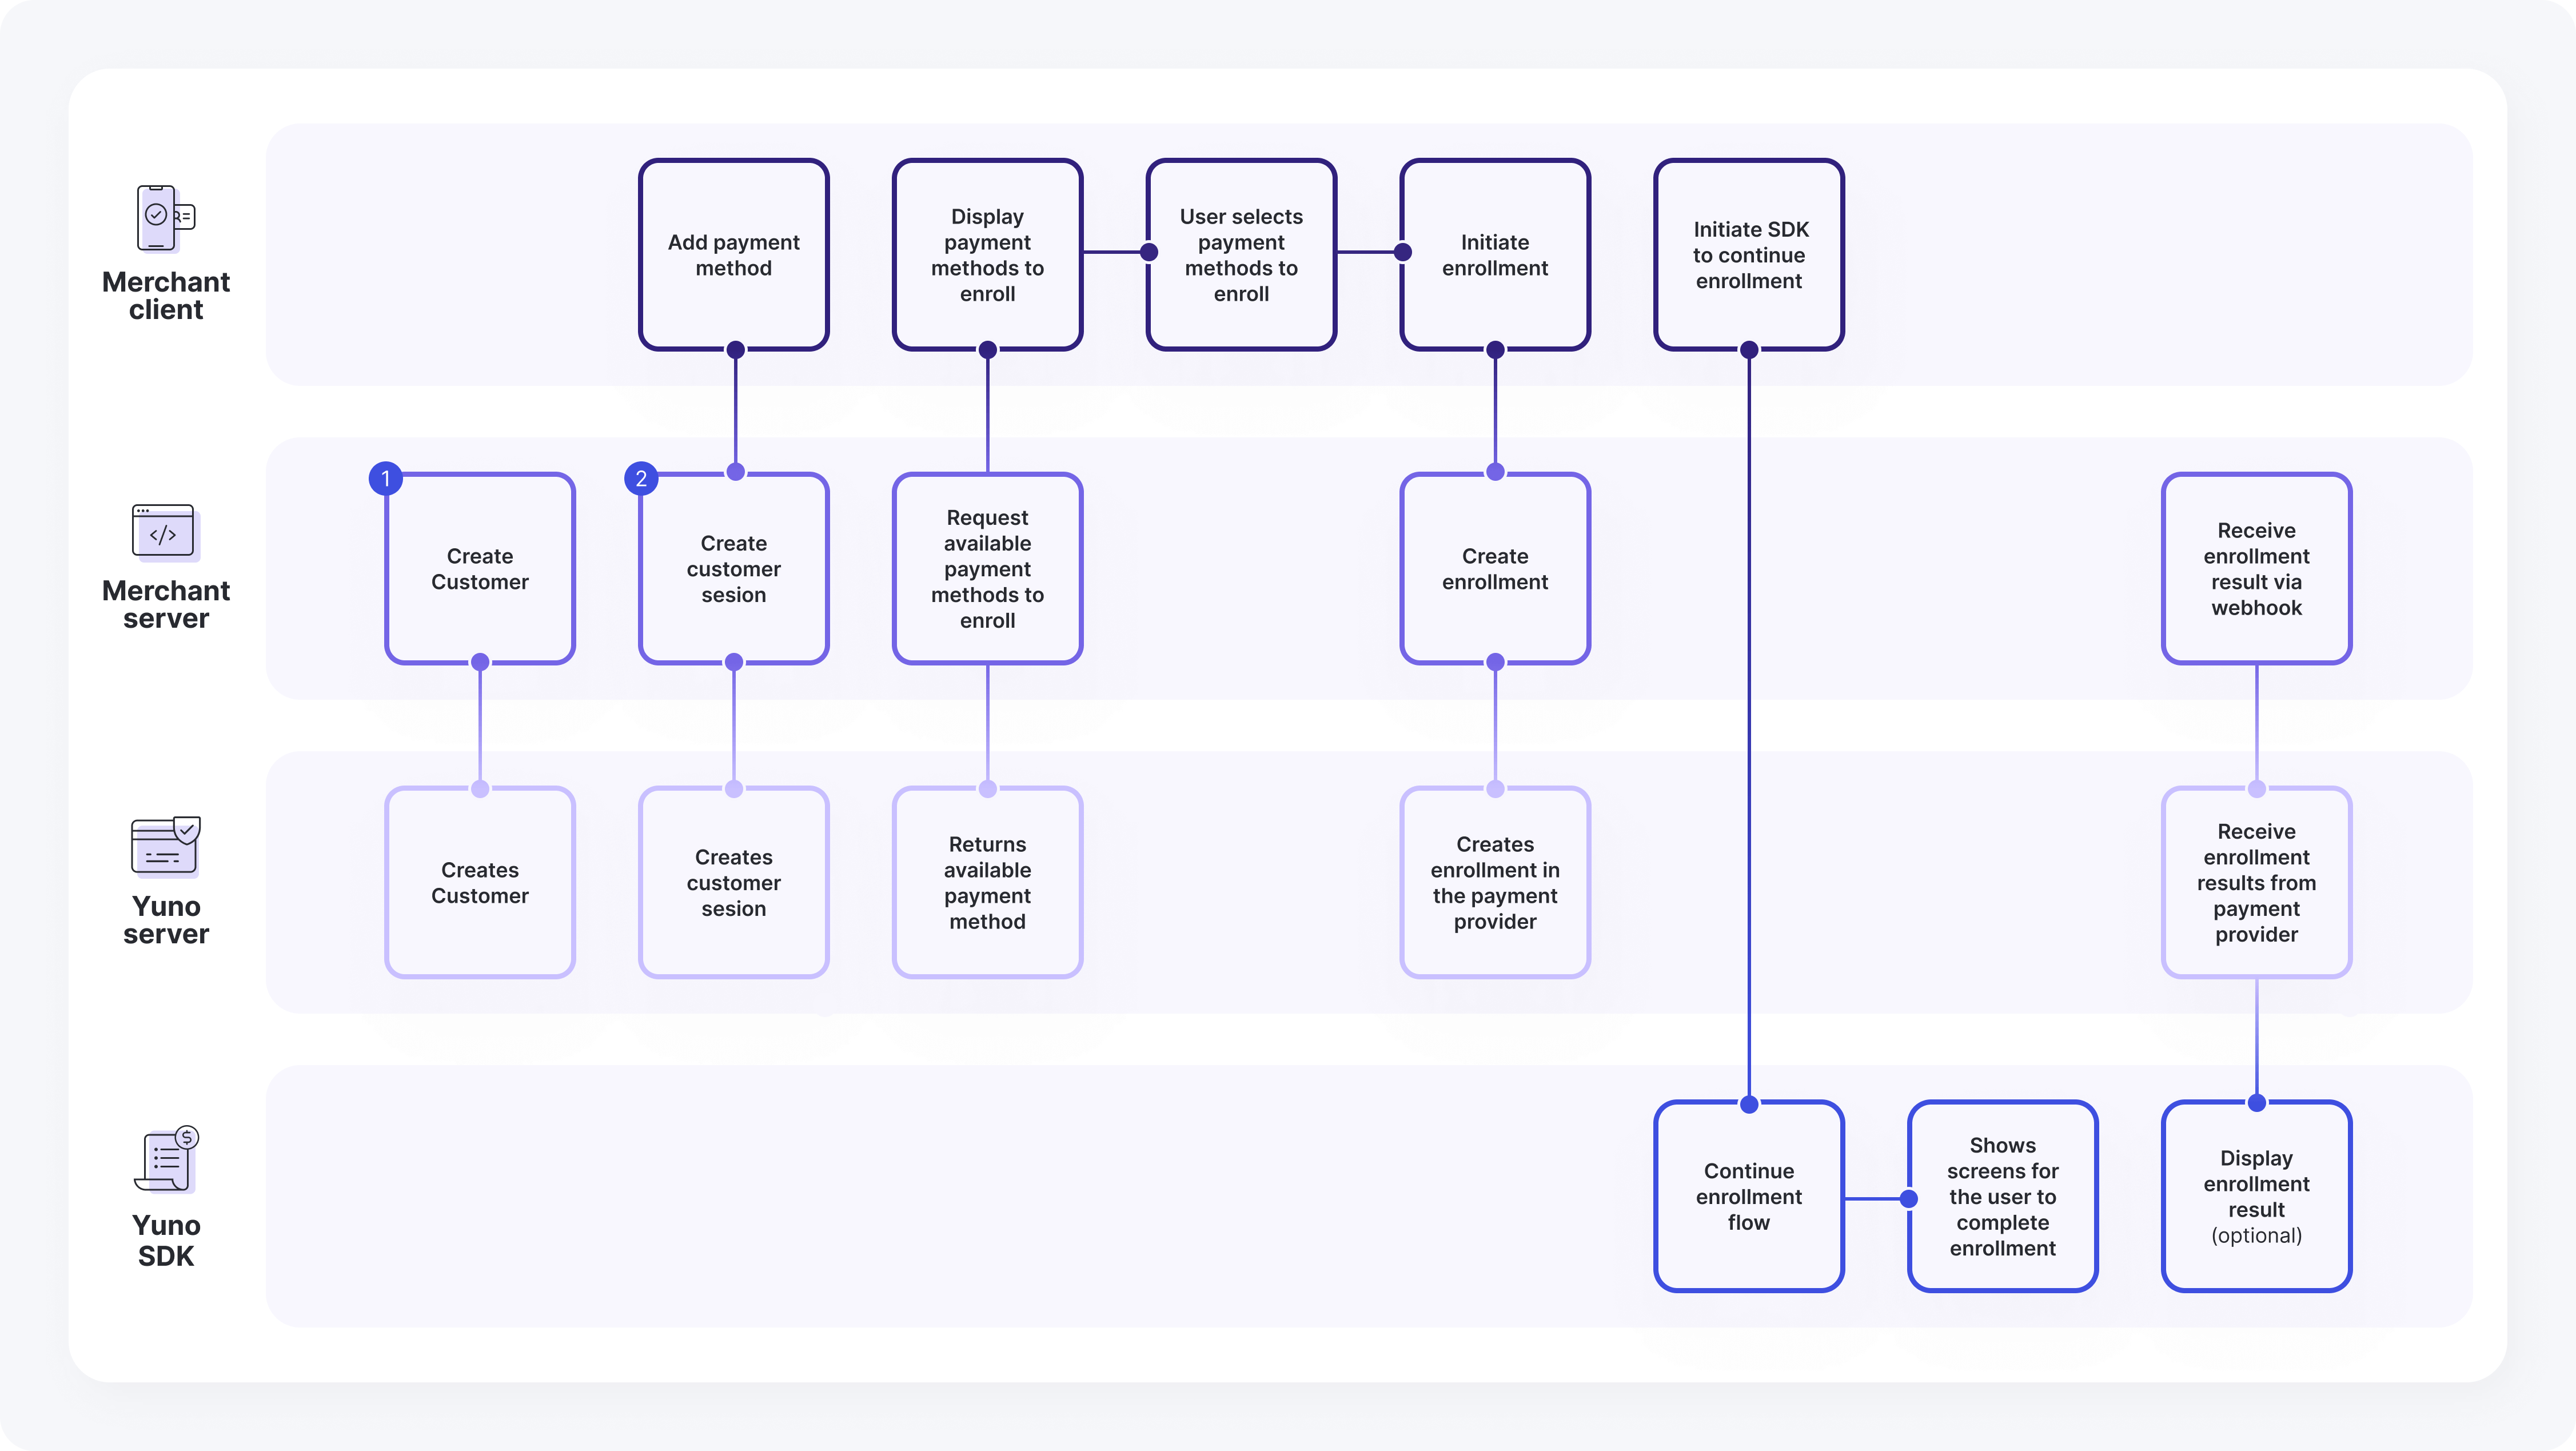
The diagram below illustrates the complete enrollment workflow. Each step is explained in detail in the following sections. For platform-specific implementation details, refer to the corresponding guide:

SDK Headless Enrollment Flow
This diagram illustrates the headless enrollment process using the SDK, detailing the interactions between the Merchant Client, Merchant Server, Yuno Server, and Yuno SDK. It outlines the steps for adding and enrolling a payment method, from user interaction to receiving enrollment results.
Merchant Client
The Merchant Client represents your frontend application that handles the user interface and enrollment flow. Its key responsibilities include:
- Add payment method
- Display payment methods to enroll
- User selects payment method to enroll
- Initiate enrollment
- Initiate SDK to continue enrollment
Merchant Server
The Merchant Server represents your backend application that coordinates between your frontend and Yuno's services. Its key responsibilities include:
- Create customer
- Create customer session
- Request available payment methods to enroll
- Create enrollment
- Receive enrollment result via webhook
Yuno Server
The Yuno Server handles all backend operations related to customer management, enrollment sessions, and payment method processing. Its main responsibilities include:
- Creates customer
- Creates customer session
- Returns available payment method
- Creates enrollment in the payment provider
- Receive enrollment results from payment provider
Yuno SDK
The Yuno SDK manages the enrollment flow on the client side, handling user interactions and enrollment completion. Its key responsibilities include:
- Continue enrollment flow
- Shows screens for the user to complete enrollment
- Display enrollment result (optional)
Complete Flow
The following steps outline the complete interaction flow between all components of the SDK Headless Enrollment integration, detailing how each request and response moves through the system:
- Merchant Server: Create customer --> Yuno Server: Creates customer
- Merchant Client: Add payment method --> Merchant Server: Create customer session
- Merchant Server: Create customer session --> Yuno Server: Creates customer session
- Merchant Client: Display payment methods to enroll --> Merchant Server: Request available payment methods to enroll
- Merchant Server: Request available payment methods to enroll --> Yuno Server: Returns available payment method
- Merchant Client: Display payment methods to enroll --> Merchant Client: User selects payment method to enroll
- Merchant Client: User selects payment method to enroll --> Merchant Client: Initiate enrollment
- Merchant Client: Initiate enrollment --> Merchant Server: Create enrollment
- Merchant Server: Create enrollment --> Yuno Server: Creates enrollment in the payment provider
- Merchant Client: Initiate SDK to continue enrollment --> Yuno SDK: Continue enrollment flow
- Yuno SDK: Continue enrollment flow --> Yuno SDK: Shows screens for the user to complete enrollment
- Merchant Server: Receive enrollment result via webhook --> Yuno Server: Receive enrollment results from payment provider
- Yuno Server: Receive enrollment results from payment provider --> Yuno SDK: Display enrollment result (optional)
Updated about 2 hours ago