VTEX
Yuno and VTEX have joined forces to simplify payment processes for merchants worldwide. This partnership aims to streamline the payment experience and provide merchants with various payment methods catering to their customer's preferences.

By integrating Yuno's payment orchestration platform with VTEX's e-commerce solution, merchants can easily manage payments and offer diverse payment options. Yuno ensures customers can choose their preferred payment method from local cards to digital wallets. Yuno's plugin allows your store to accept payments seamlessly without redirecting customers to external pages, enhancing the shopping experience and increasing the conversion rate.
Payments with two cardsTo enable your customers to pay using two cards in VTEX, you must contact the Yuno supporting team in advance.
Yuno's plugin for VTEX is PCI compliant, ensuring that Yuno meets rigorous security standards when handling card data. Merchants can have peace of mind knowing that their customers' payment information is handled with utmost security and privacy.
The seamless integration between Yuno and VTEX makes it easy for merchants to incorporate Yuno's payment orchestration system into their existing setup. This enables them to focus on delivering exceptional products and services while providing a smooth payment experience for their customers.
Payment methods available
The following payment method types are available in VTEX:
- Credit and debit cards: Visa, Mastercard, American Express, and other card networks
- Alternative payment methods: PIX, Boleto, and other local payment methods
- Digital wallets: Mercado Pago Wallet, PayPal, and other wallet solutions
- Buy now pay later: Installment options and BNPL solutions
Our team is actively collaborating with VTEX to ensure that all Yuno connections are made available to you as soon as possible. We are committed to expanding the available payment options to enhance your experience, so please feel free to reach out to your key account manager to find out more about the available payment methods in VTEX.
Plugin integration
To start using the Yuno plugin on your VTEX store, you will need two essential elements:
- A VTEX store.
You will use the Application Key and the Application Token from your store account. Check the VTEX Application Keys tutorials to understand how to set and access this information.- Application Key: a private key generated when the Yuno account became productive.
- Application Token: a productive public key generated when the Conekta account became productive.
- A Yuno account.
If you don't have a Yuno account, sign up at the Yuno Merchant Dashboard. You will use your Account ID, Public API Key, and Private API Key from your Yuno account. Access the Developers tab on the Yuno dashboard to access your credentials.
Once you have this information, you can register the Yuno plugin affiliation. Follow the steps outlined in the Configure Yuno as Provider page. After completing the configuration processes, you'll enable your clients on VTEX to access the Yuno checkout to make payments on their orders.
Workspaces
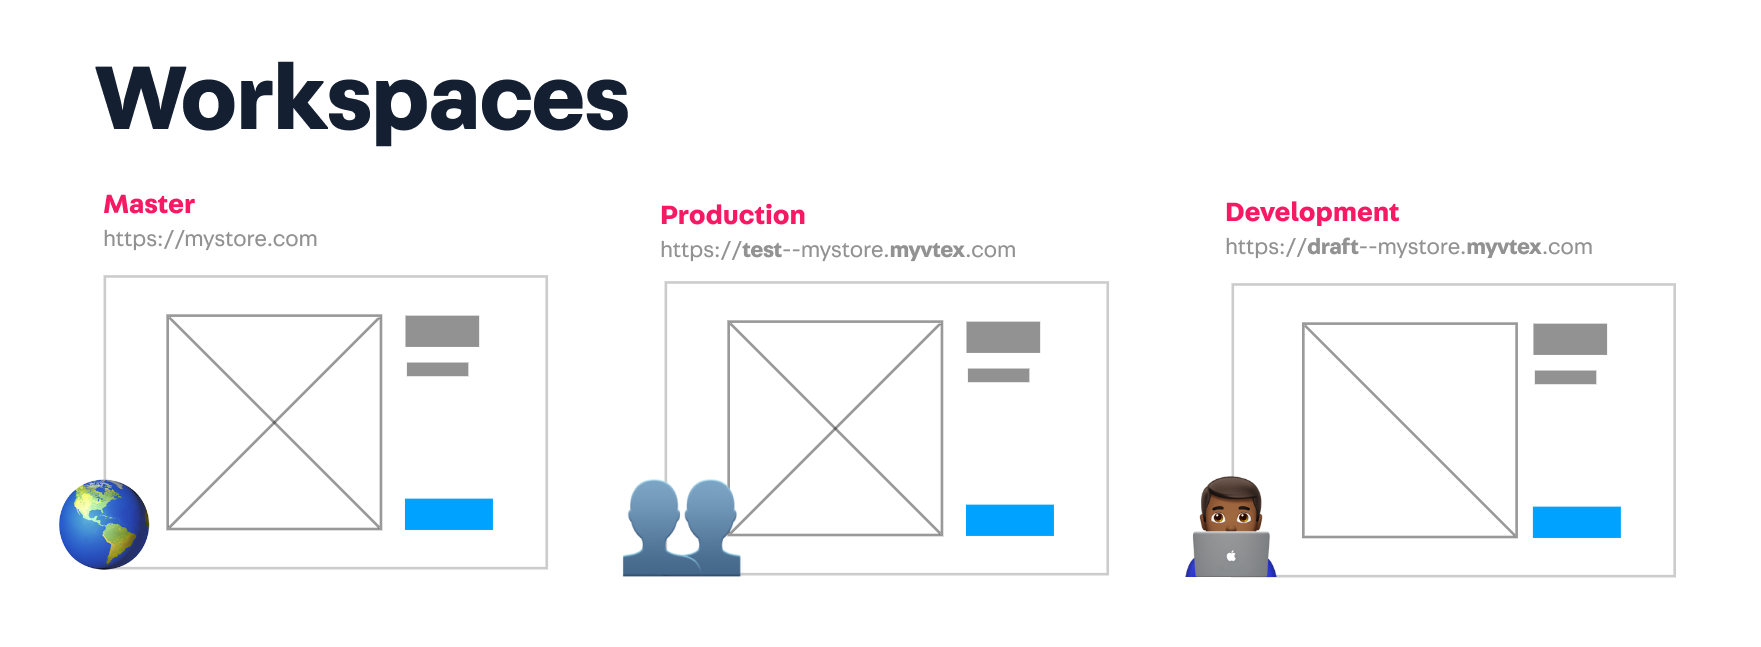
Workspaces are environments isolated from each other in terms of app development. They can be understood as different versions of the same VTEX account. In practice, changes performed in a particular workspace do not affect your store's live version or other developers' work. If you're used to working with git, think of workspaces as branches.
Workspace types
Development workspace: Mainly used by software developers to draft, build or extend VTEX IO apps and storefront themes. These workspaces provide more development freedom. They allow linking, installing, and publishing VTEX IO apps. They can't handle production traffic, be promoted to master, nor be used for A/B testing.
Production workspace: Mainly used by the quality assurance and development teams to validate VTEX IO apps. These workspaces support production traffic and can be used for A/B testing, but linking apps is forbidden. If desired, these workspaces can be promoted to master to become publicly available for all end-users.
Master workspace: A unique production workspace that reflects the content served to the end-users of a store.
Development and production workspaces can be accessed at https://{workspace}--{account}.myvtex.com.

Creating a workspace
Step 1 - Installing the VTEX IO CLI
Any development in VTEX IO begins and ends with the VTEX IO CLI, which works as a communication gateway between your store and the VTEX IO development platform. With VTEX IO’s CLI, you can use the terminal to log in to your VTEX account, manage workspaces, develop apps, and install new ones.
- Install the VTEX IO CLI on your machine by following this guide.
- Check if the installation was successful by running VTEX.
Step 2 - Logging in to your VTEX account
After installing the VTEX IO CLI in your machine, take the following steps to log in to your VTEX account.
- Log in to your VTEX account by running the following command:
vtex login accountNameReplace accountName with the name of your VTEX account.

- After running the command, a browser window will open and ask for your credentials. Enter the information required to log in to your account.
Step 3 - Creating a development workspace
When developing with VTEX IO, you'll use different workspaces. Workspaces are environments isolated from one another. They can be understood as different versions of the same VTEX account. In practice, changes performed in a particular workspace do not affect your store's live version or other developers' work.
When you log in to a VTEX account using the VTEX IO CLI, you are automatically in the master workspace, which is the version of your store available to end-users. Hence, to avoid changing your store's live version, you must create a development workspace.
- Create a development workspace by running the following command:
vtex use exampleworkspaceReplace exampleworkspace with a name of your choosing to identify your new workspace.
- Enter Y to create the new workspace.

After running this command, you'll be taken to the exampleworkspace workspace, and all your operations will now run in this specified workspace.
Step 4 - Accessing your store using a workspace
After creating a new development workspace, you can access this version of your store by going to: https://exampleworkspace--accountName.myvtex.com, where:
exampleworkspace- Name of the workspace that you've just created.accountName- Name of the VTEX account in which you are working.
Done! You're now ready to start developing your Pixel app!
Using a workspace in a connector
Now that you have a new connector ready to be used, you can test it entirely in the production flow using your store's Checkout.
The account must be allowed to test IO Connectors. This must be requested via ticket informing the name of the app and the account where the tests will be made.
A prerequisite for this procedure is to have products for sale at your store for testing. To place an order with your new connector:
-
Launch a beta version of your connector. E.g.:
[email protected]. If you need, check the Making your app publicly available article to learn how to create a beta version of your app. -
Install the beta version on master workspace. Wait for around 1 hour.
-
Go to
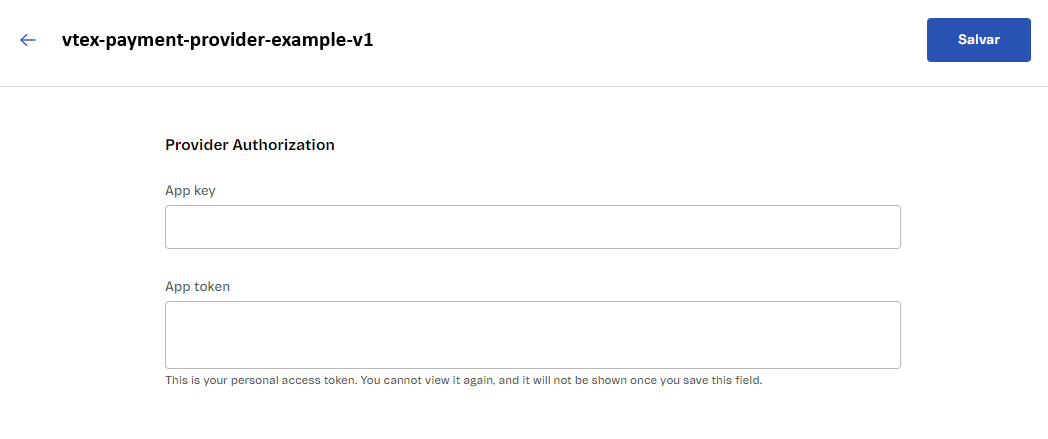
https://{account}myvtex.com/admin/affiliations/connector/Vtex.PaymentGateway.Connectors.PaymentProvider.PaymentProviderConnector_{connector-name}/. Replace{account}for the name of the account you want to test on and{connector-name}for the name of your connector. The format of the name is:${vendor}-${appName}-${appMajor}(e.g.:vtex-payment-provider-example-v1). -

In Payment Control, activate the test environment by clicking Enable test mode. A new field called Workspace will appear.
-
Set the Workspace as you wish. You can leave it as
masterif it is the workspace you want to test on.

Updated 3 months ago