Apple Pay SDK Integration (One-Time Payments)
This guide provides a step-by-step process to integrate the Yuno SDK with Apple Pay for one-time payments. One-time Apple Pay payments using the Yuno SDK provide a streamlined integration experience.
Setup RequiredBefore following this guide, ensure you have completed the dashboard setup and configuration process.
Recurring PaymentsIf you need to process recurring payments with Apple Pay using the SDK, refer to the Recurring SDK integration guide.
Start using your Yuno integration
With your Yuno integration set up, you're ready to start processing payments. Using our SDK integrations, you can seamlessly offer payments through Apple Pay Wallet, providing your users with a smooth and secure payment experience.
Step 1: Create customer (optional)
Use the create customer endpoint to register the customer's information. While this step is optional for one-time payments, it's recommended for better transaction tracking and customer management.
Step 2: Set up checkout session
Create a checkout session with the customer information. Use the create checkout session endpoint, providing the payment amount and location details.
Step 3: Generate one-time token (OTT)
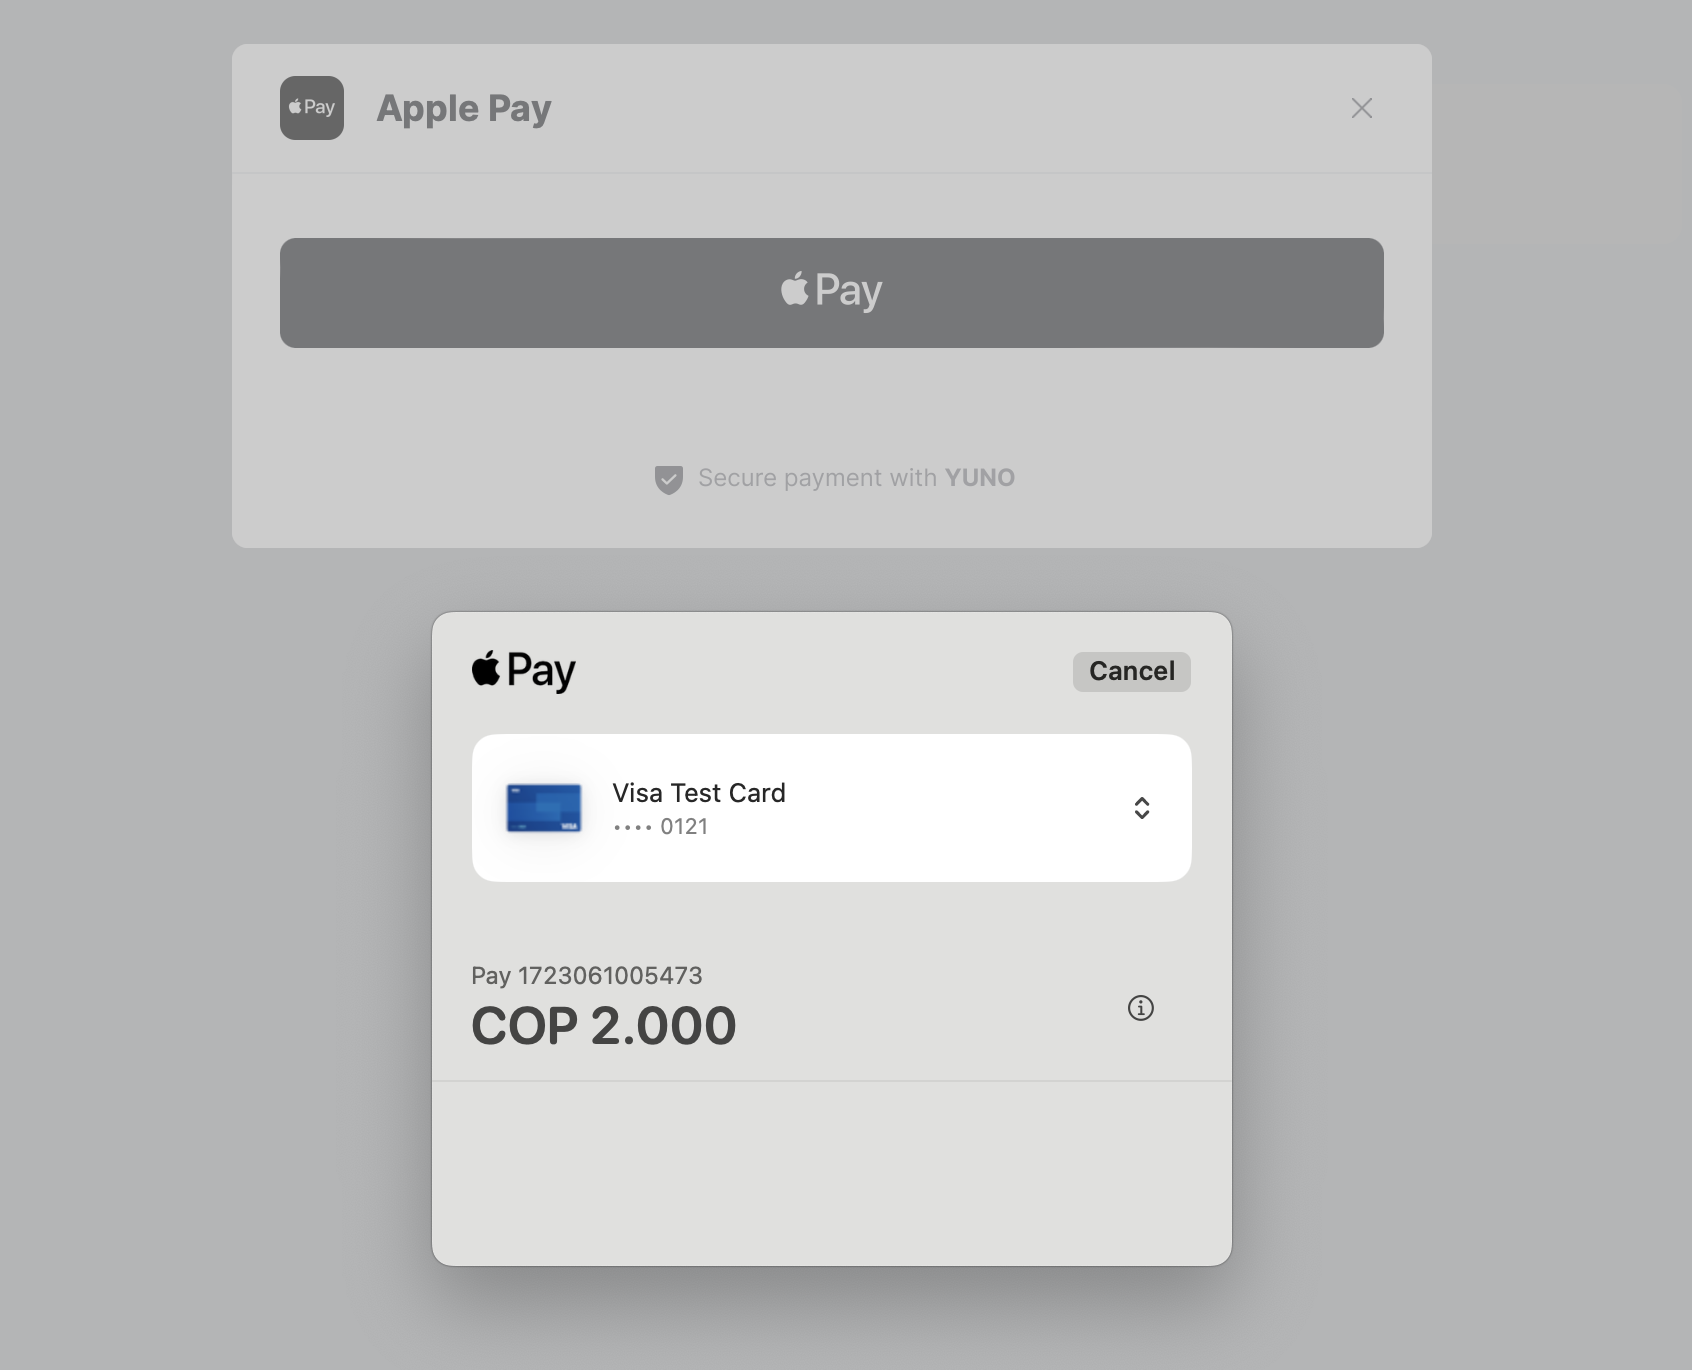
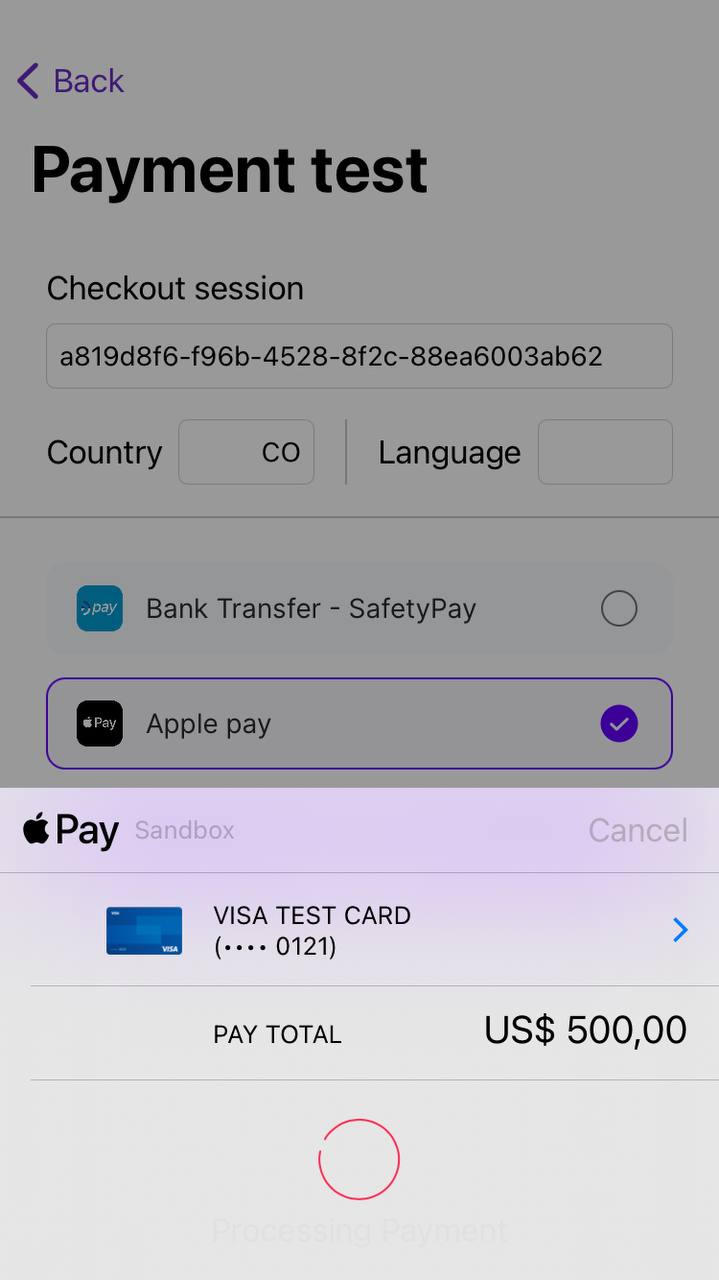
An OTT is a unique identifier Yuno generates to protect your customer's privacy and security. You will obtain the OTT from the Yuno SDK, which handles various payment method scenarios. Use payment_method_type = APPLE_PAY. For a list of all available options, see the Payment types page.
Step 4: Create the payment
Use the create payment endpoint to create a payment using the data received in the previous steps.
Step 5: Retrieve payment details
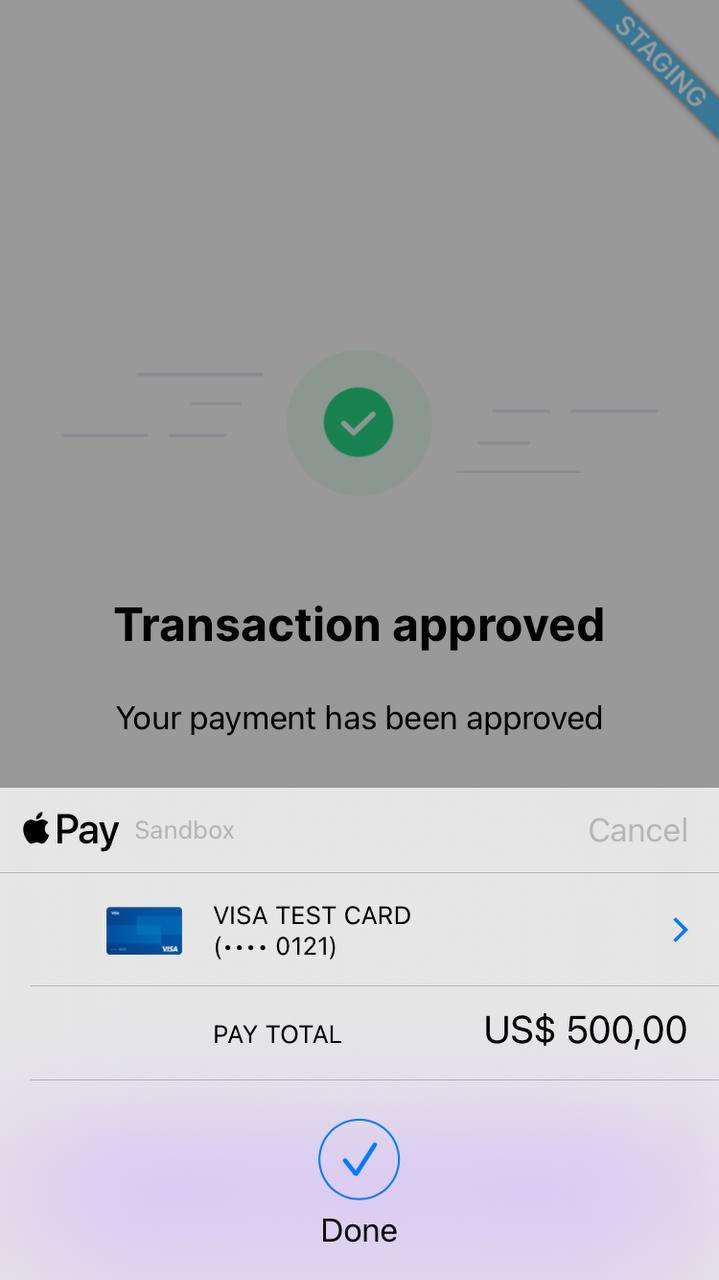
To check the payment status, you can analyze the status and sub_status in the response from the create payment endpoint, or use webhooks. Refer to the payment Status page to see all possible statuses.
Configure Apple Pay in your iOS app
To enable Apple Pay in your app, you need to configure the Apple Pay capability in Xcode:
- Add Apple Pay capability: In Xcode, add the Apple Pay capability to your project.
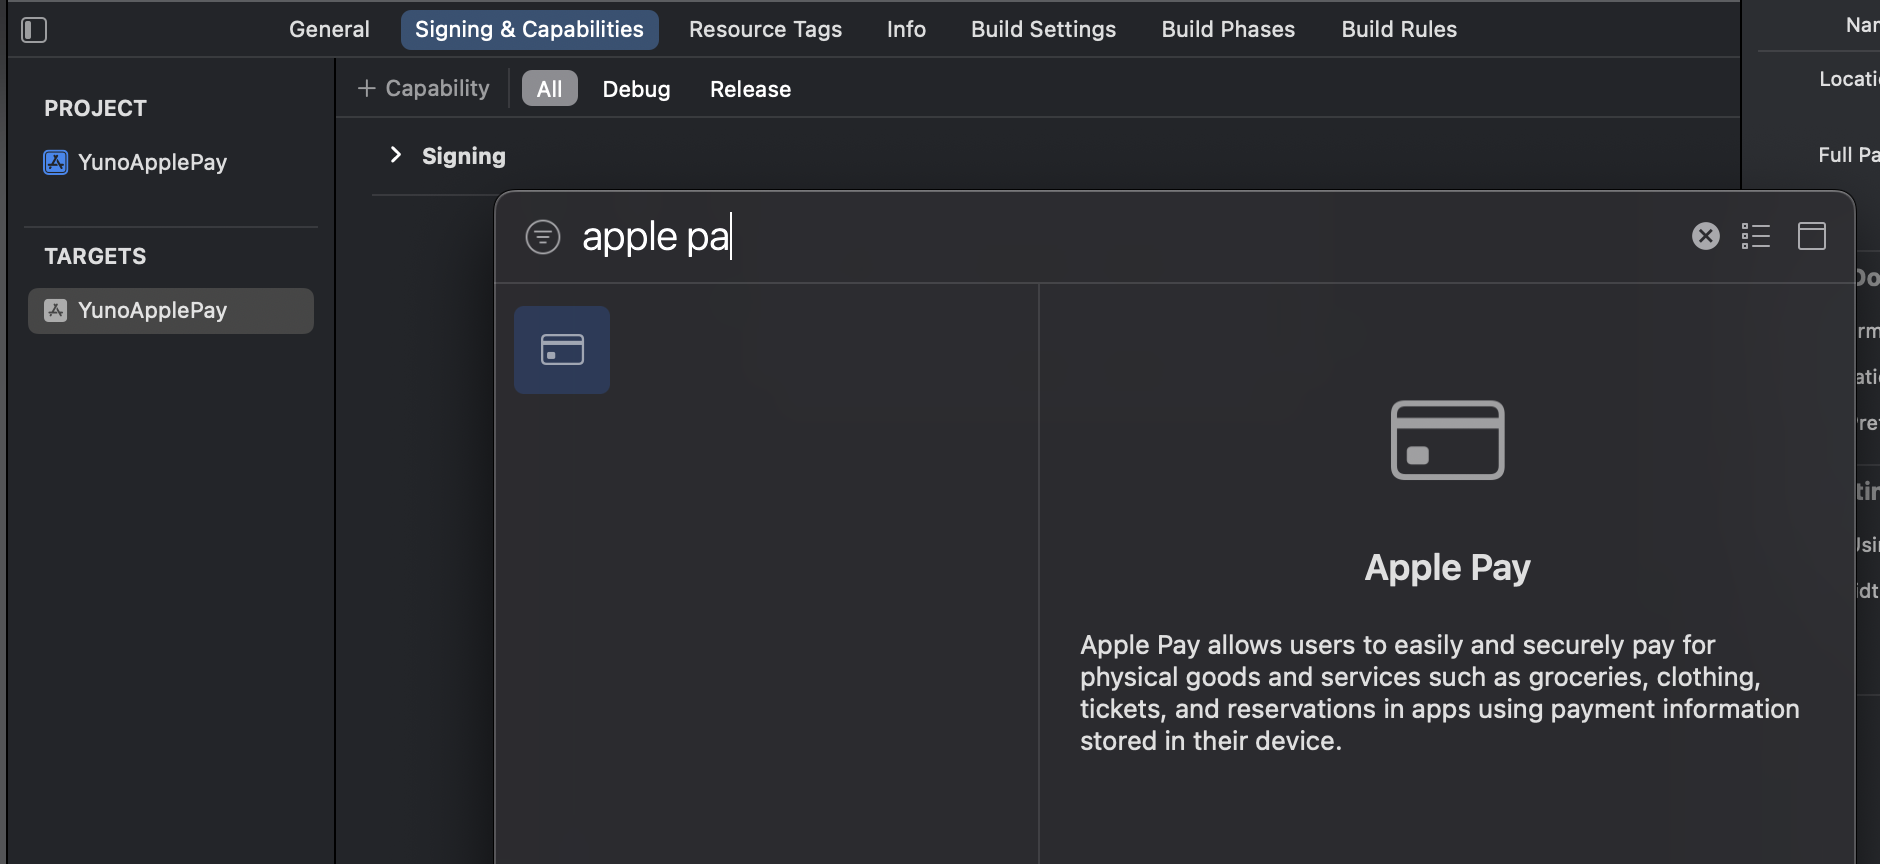
- Select merchant ID: Select the merchant ID you created during the prerequisites process. It will appear if you are logged into your developer account.
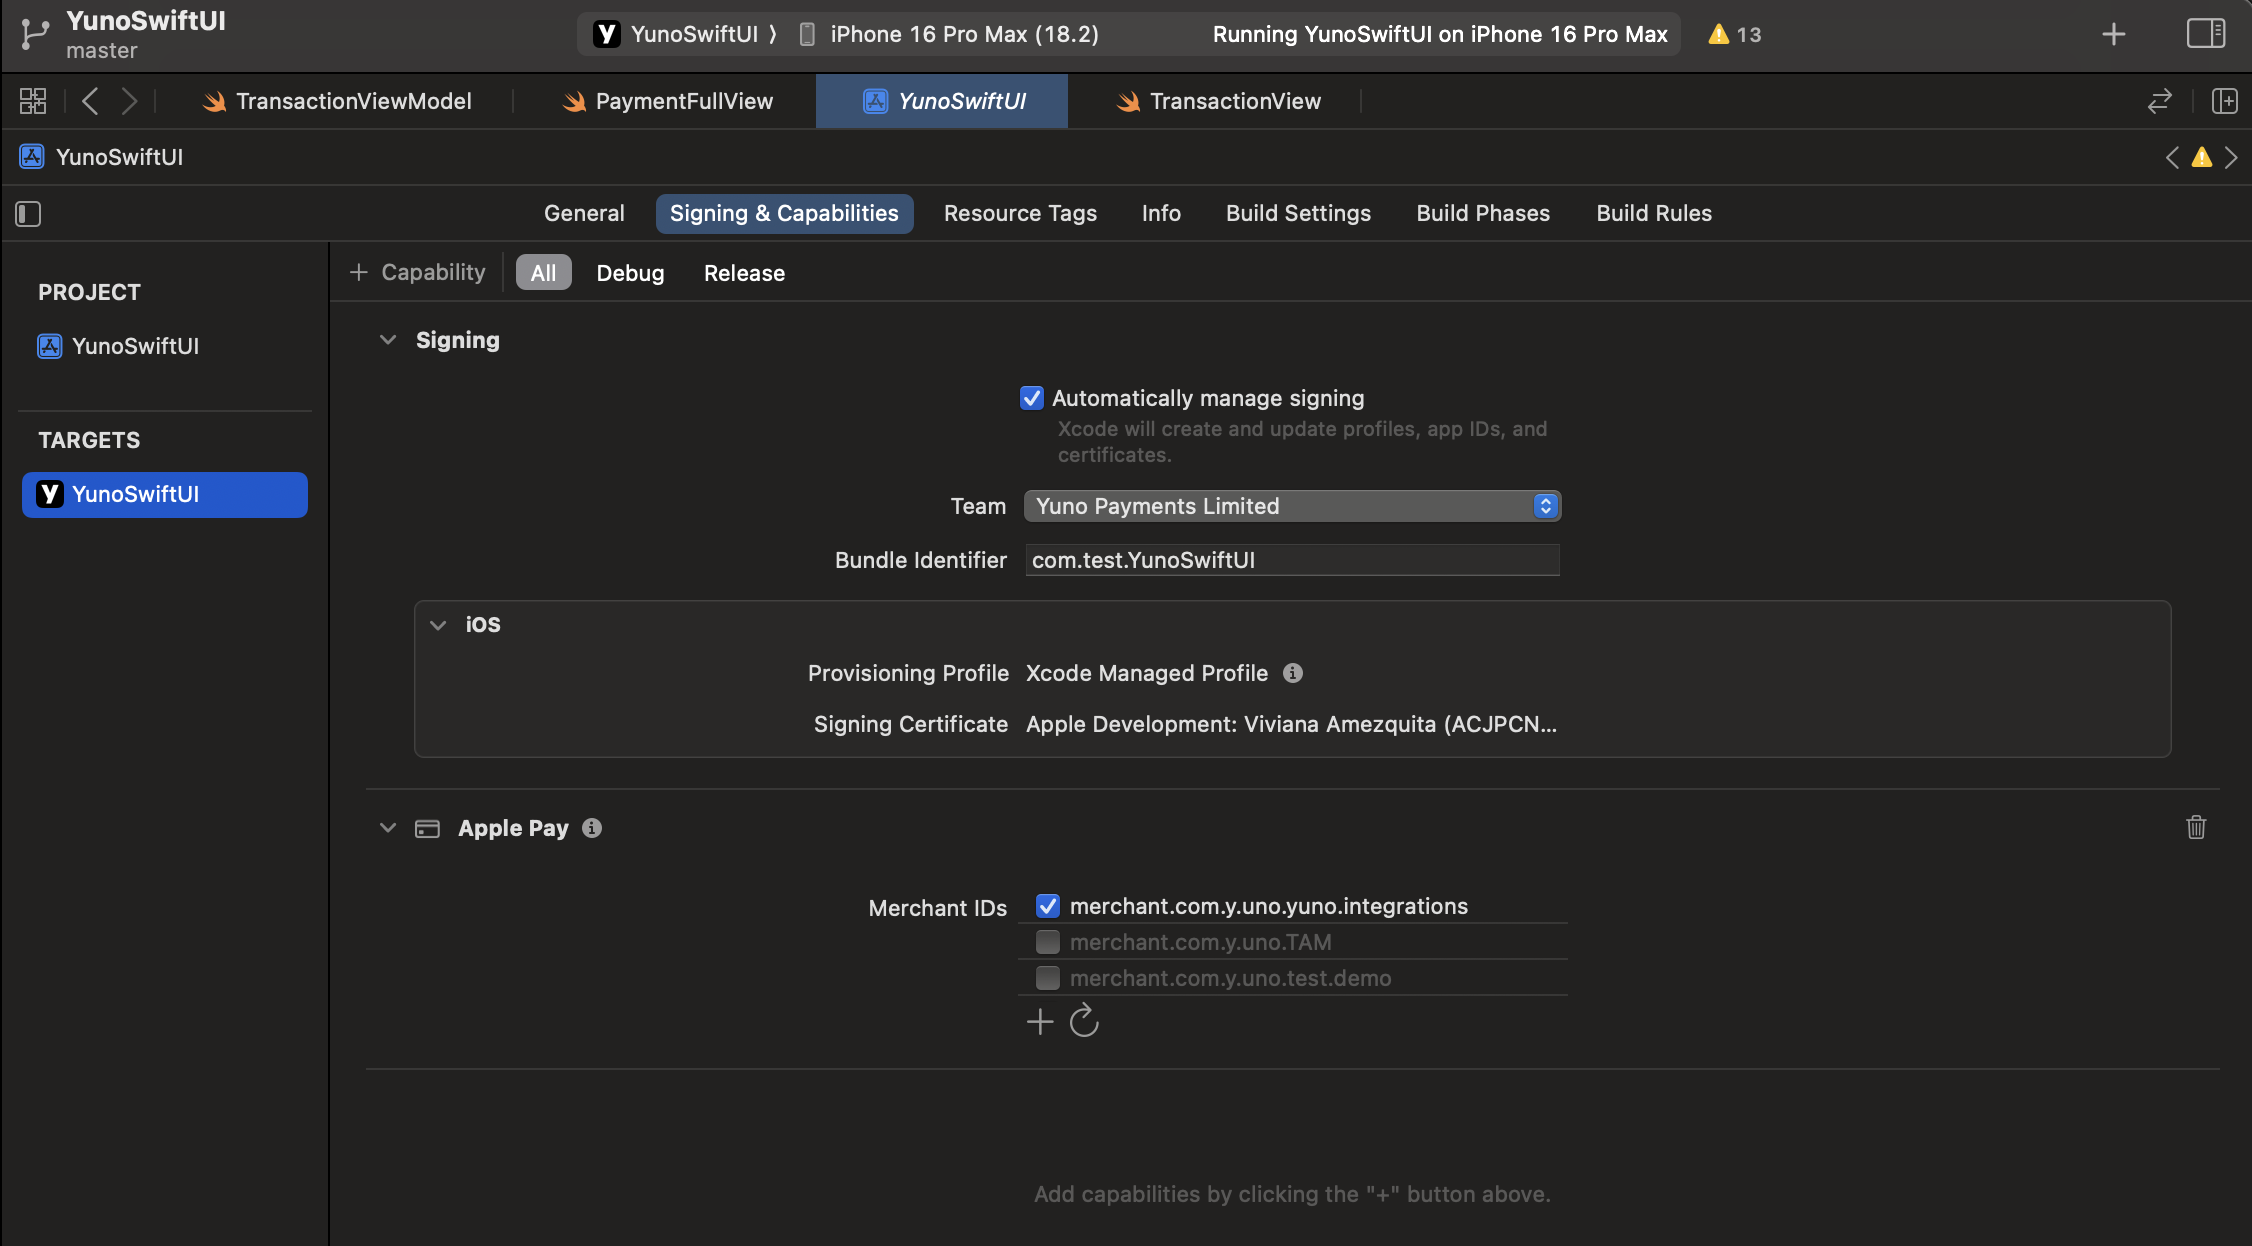
Make sure the Merchant ID is correctly linked to the Apple Pay capability in your app's App Identifier in the Apple Developer portal. This is configured under: Certificates, Identifiers & Profiles → Identifiers → select your app → Capabilities tab.
Prepare for testing with Apple Pay
Before you start making test payments with Apple Pay, follow these steps to ensure your setup is correctly configured:
Browser testing
- Follow the official Apple Pay test guidelines to create a test account and set up test cards.
- Test in Safari to ensure compatibility and functionality.
- Set up the testing domain URL in the Apple Pay connection within your Yuno dashboard to ensure that payments are routed correctly during testing.
Testing in the app
-
Provide test email: Provide an email address to any of the iOS team members that does not have an Apple ID associated with it (as specified in the Apple documentation).
-
Set up iCloud: Log in to iCloud using the email provided in the previous step.
-
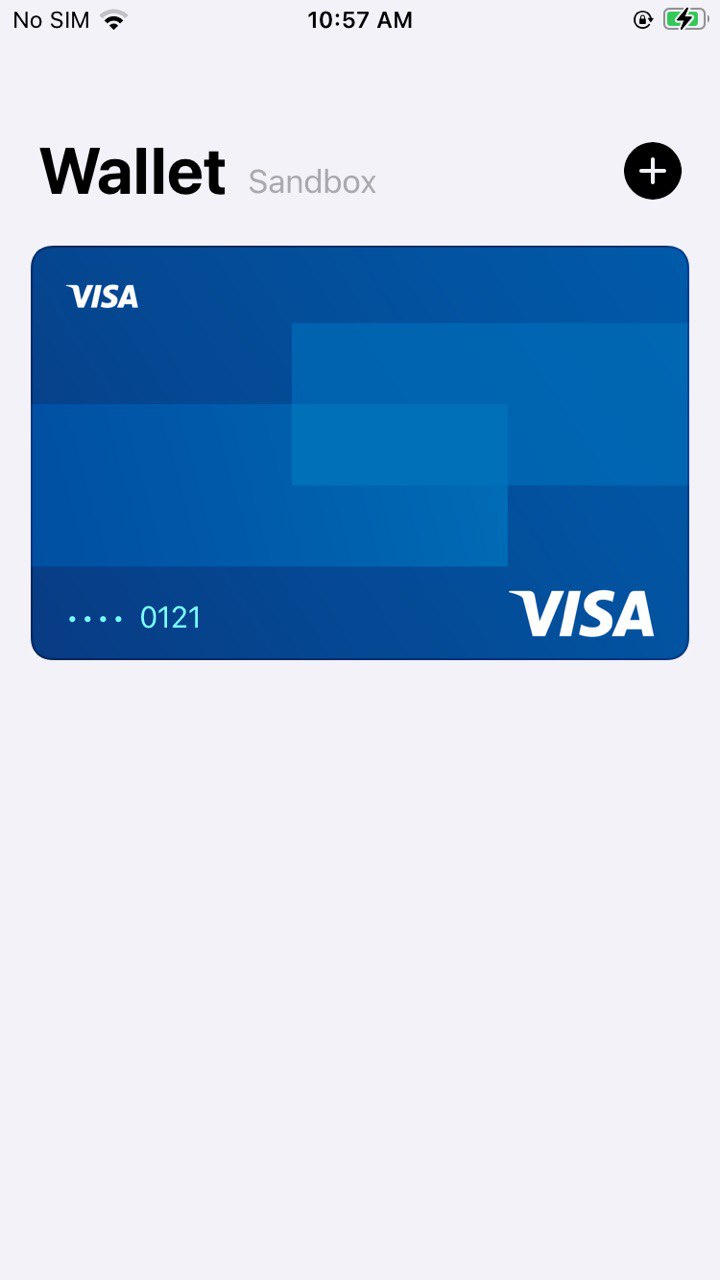
Add test cards: In the Wallet app, add one of the cards available on the sandbox testing cards page within the Apple Developer website.
- Follow payment flow: Follow the flow you use for any other payment method.
Related documentation
- Prerequisites for Apple Pay - Initial requirements before integration
- Dashboard setup and configuration - Required setup steps
- Recurring SDK integration - SDK-based recurring implementation
- Direct integration for one-time payments - Non-SDK direct integration
Updated 25 days ago