Apple Pay Setup and Configuration
This guide covers the common setup and configuration steps required for all Apple Pay integrations with Yuno.
Prerequisites
Before starting the dashboard configuration, ensure you have completed the Prerequisites process to obtain the necessary Apple Pay certificates and merchant credentials.
Step 1: Add the Apple Pay connection
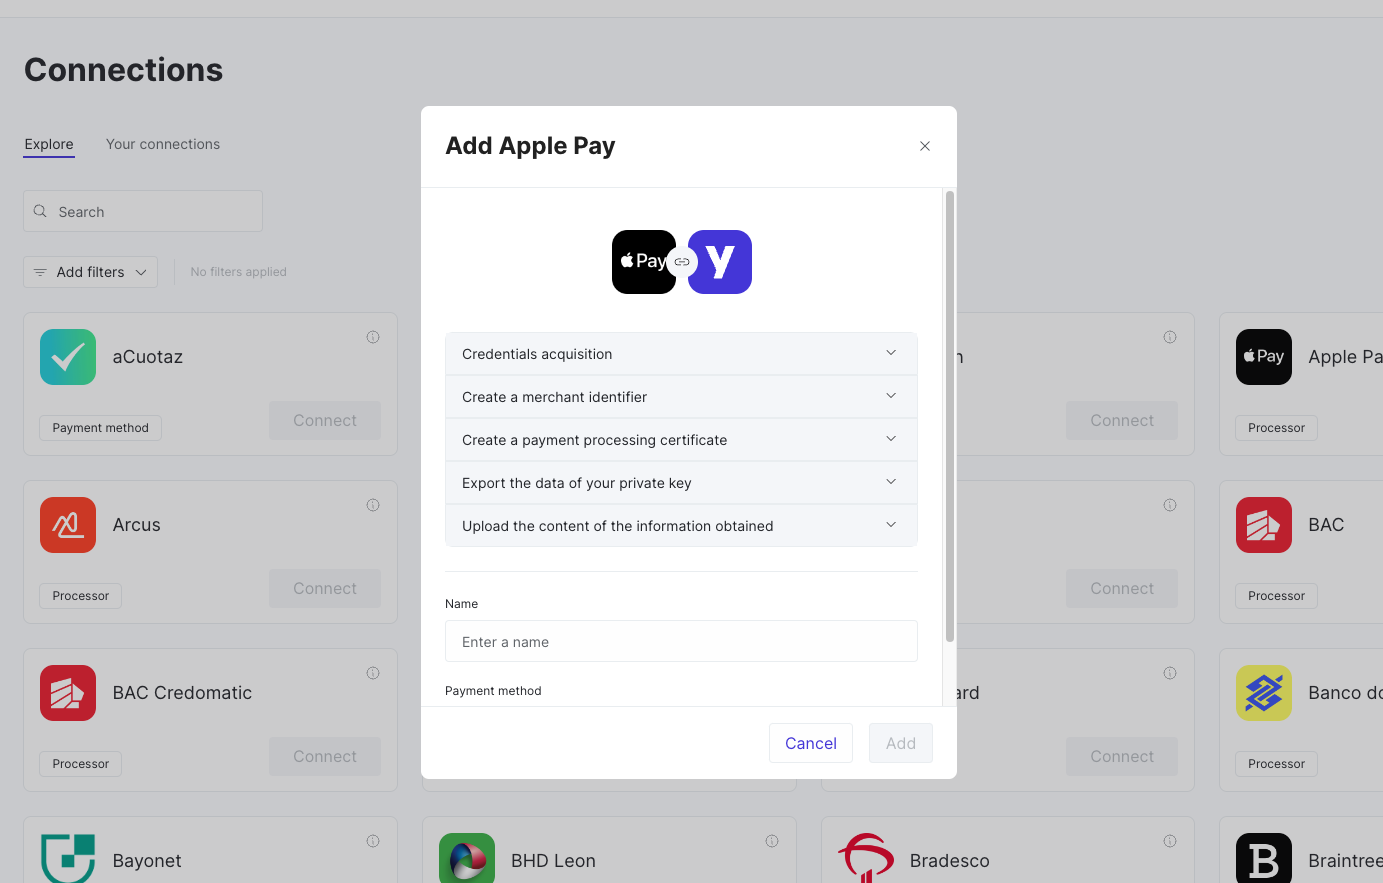
To add the Apple Pay connection to the Yuno Dashboard, follow these steps:
- Log in to your Yuno Dashboard.
- Navigate to the Connections section.
- Locate and select the Apple Pay option and click Connect.
- Provide a Name for the connection, select Apple Pay as Payment method, and provide the information you acquired when following the Prerequisites process, click Next.
- Configure set up costs (optional) and accounts in the following two steps.
- Click Save. Apple Pay will be added to your connections.
Step 2: Configure routing
Set up a new route to control how payments are processed through Apple Pay. Follow the steps below:
Understanding RoutingVisit the Routing page for additional information on this step.
- In the Yuno Dashboard, navigate to the Routing section.
- Find the Apple Pay connection. If you have not created a route for Apple Pay yet, it will be on the Not published tab.
- Set up a new route by pressing Setup on your Apple Pay module (or View if the route is published) and then clicking on Create new route. Give the connection a name and click Save.
- Add conditions to specify how payments should be routed through Apple Pay.
- Add Apple Pay as the payment processor for this route to ensure that payments meeting the defined conditions are processed through Apple Pay.
- Publish the route once all configurations are defined.
Here's a simple route processing all payments through Apple Pay.

- Finally, set the route for the Card payment method indicating which provider you want to process payments with.
Step 3: Enable Apple Pay in Checkout Builder
Learn More About Checkout BuilderVisit the Routing page for additional information on this step.
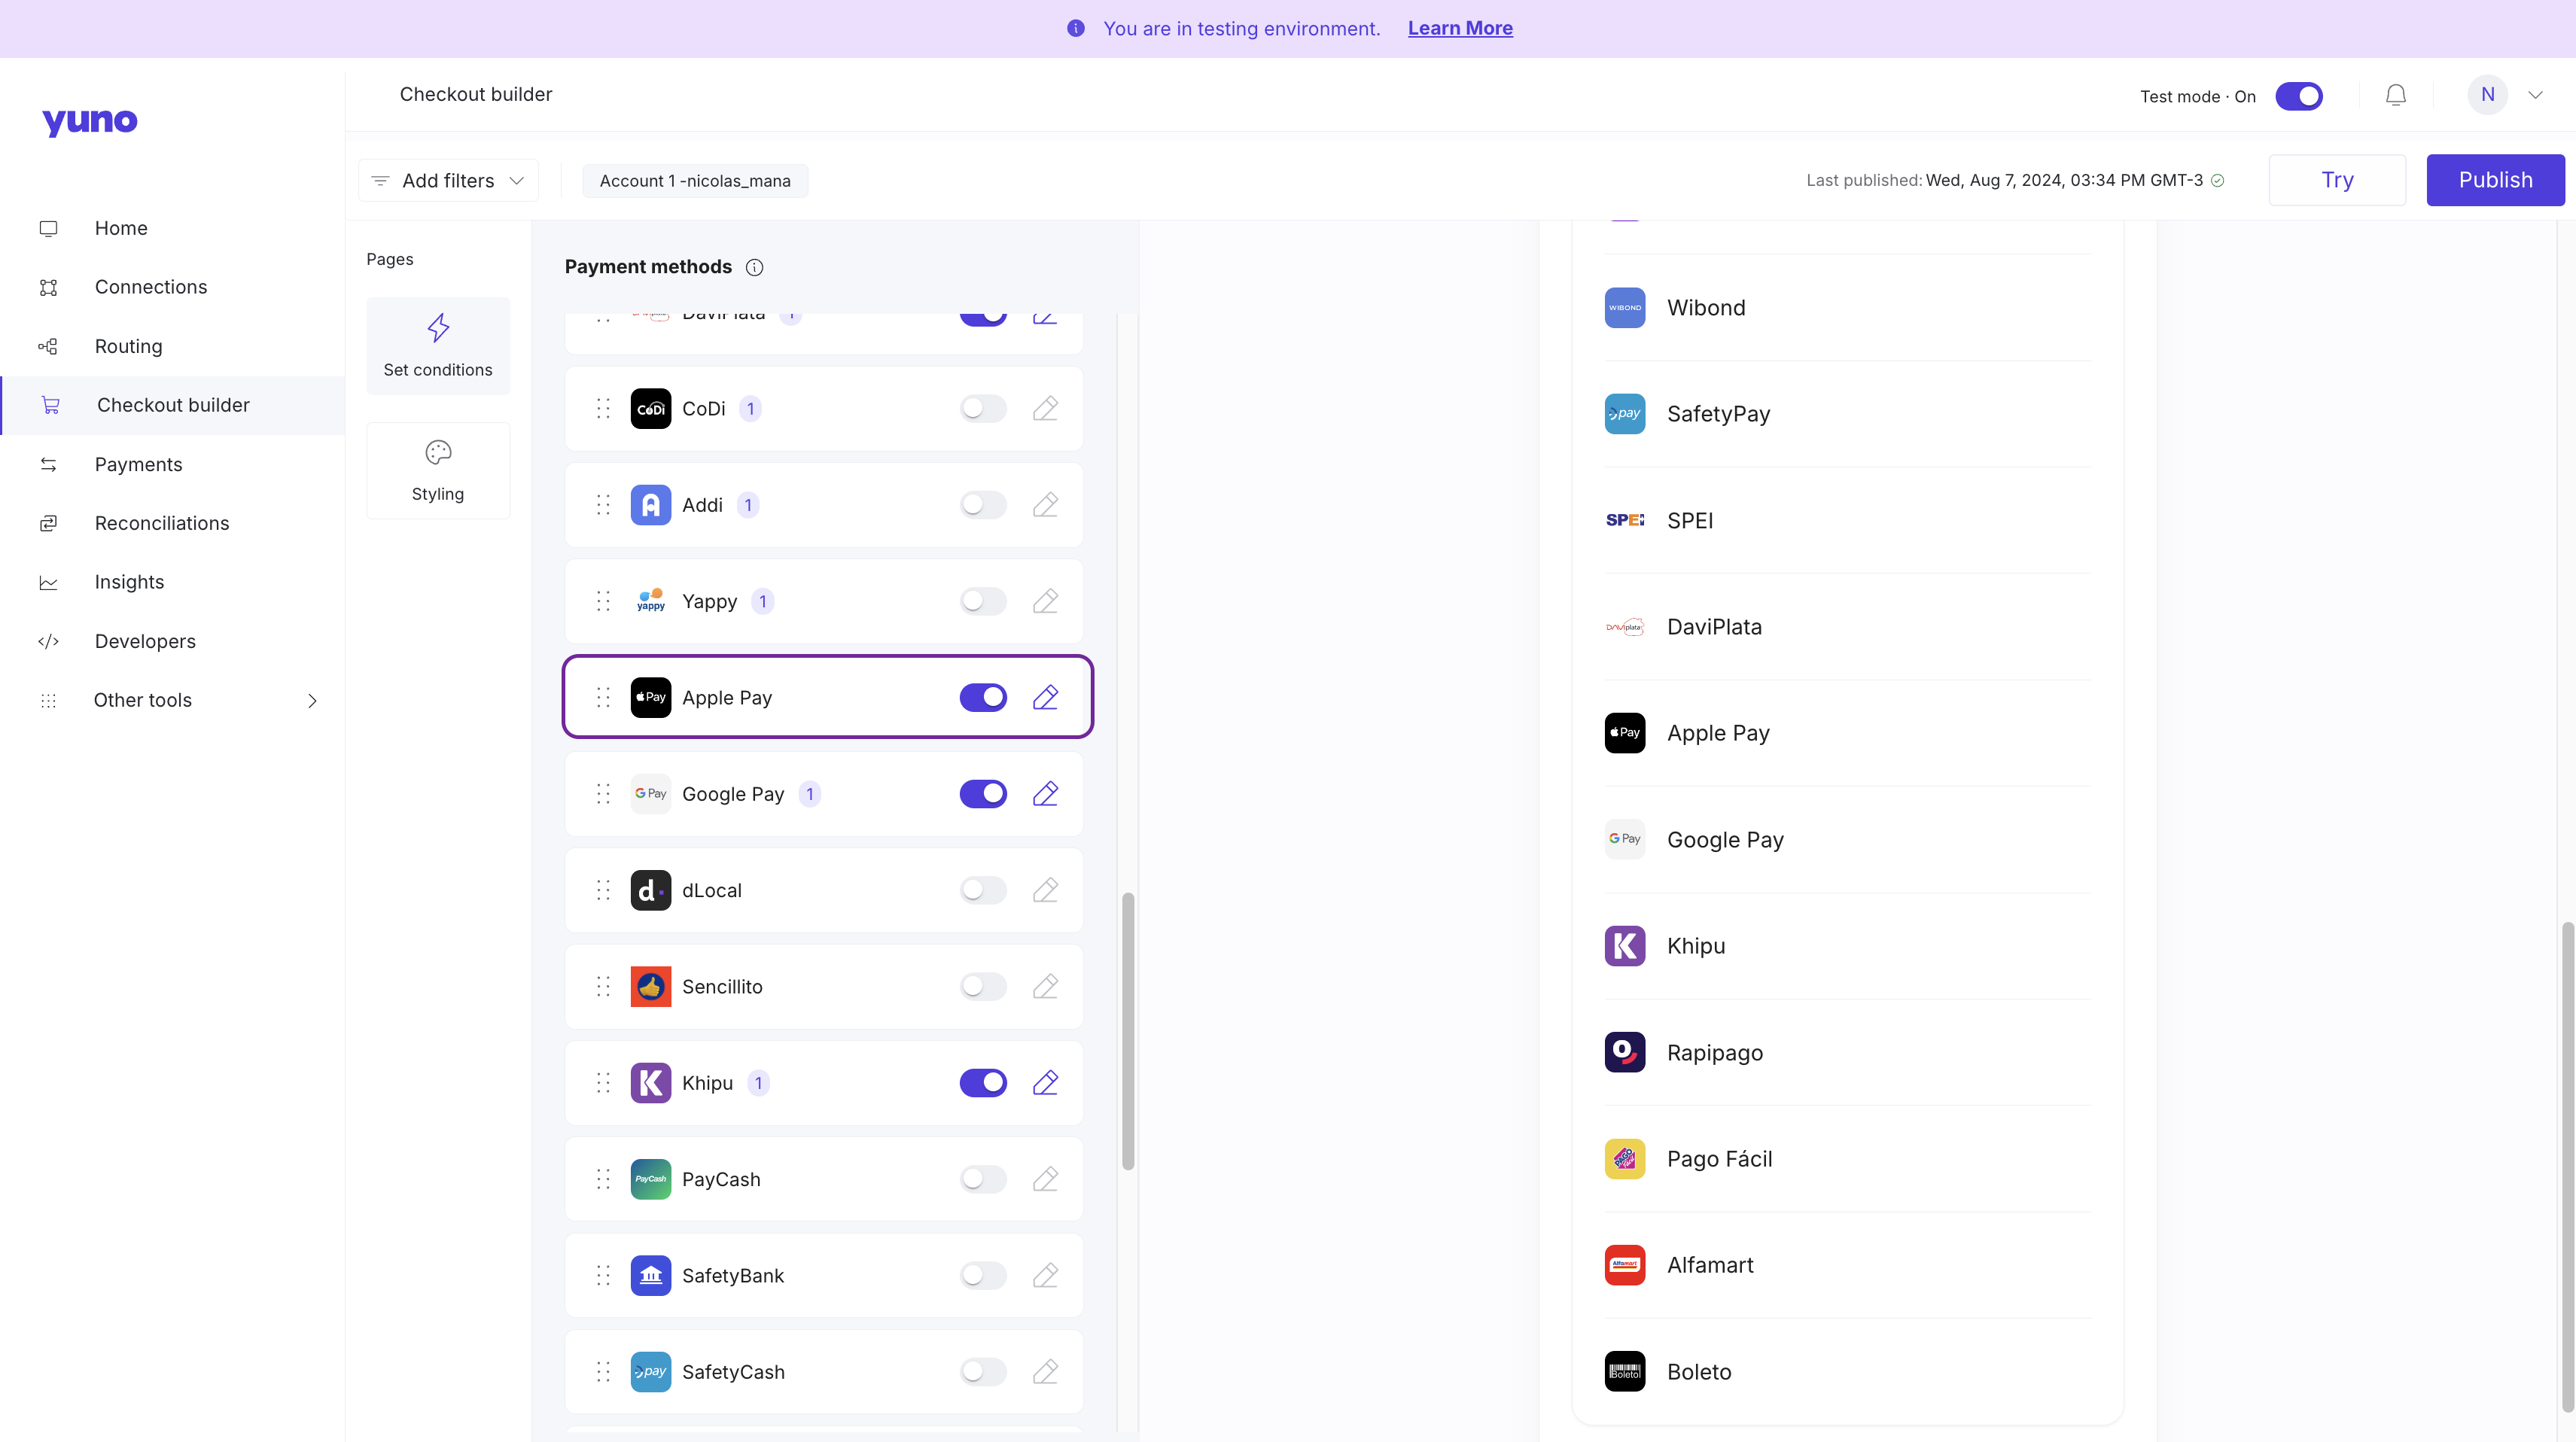
To make Apple Pay available to your end users, you have to enable it on the Checkout Builder:
- In the Yuno Dashboard, navigate to the Checkout Builder section.
- Locate the available Payment methods and enable Apple Pay. Click the three dots next to each method for additional options.
- Click Publish settings to make Apple Pay available as a payment option for all transactions that meet the defined routing criteria.
Next steps
After completing the dashboard setup, you can proceed with your preferred integration method:
One-time payments
- Direct integration - Integrate directly with Yuno's API
- SDK integration - Use Yuno's SDK for easier implementation
Recurring payments
- Recurring direct integration - Handle recurring payments with direct API calls
- Recurring SDK integration - Implement recurring payments using Yuno's SDK
Additional Configuration for Recurring PaymentsIf you plan to implement recurring payments, you will need to configure an additional URL in your Apple Pay connection where customers can manage their subscriptions (cancel, modify, etc.). This URL must be created and hosted by your merchant platform.
Updated about 1 month ago