Checkout builder (old)
Yuno provides an intuitive graphical interface so that you can easily define the available payments for your customers without going deep into the code.
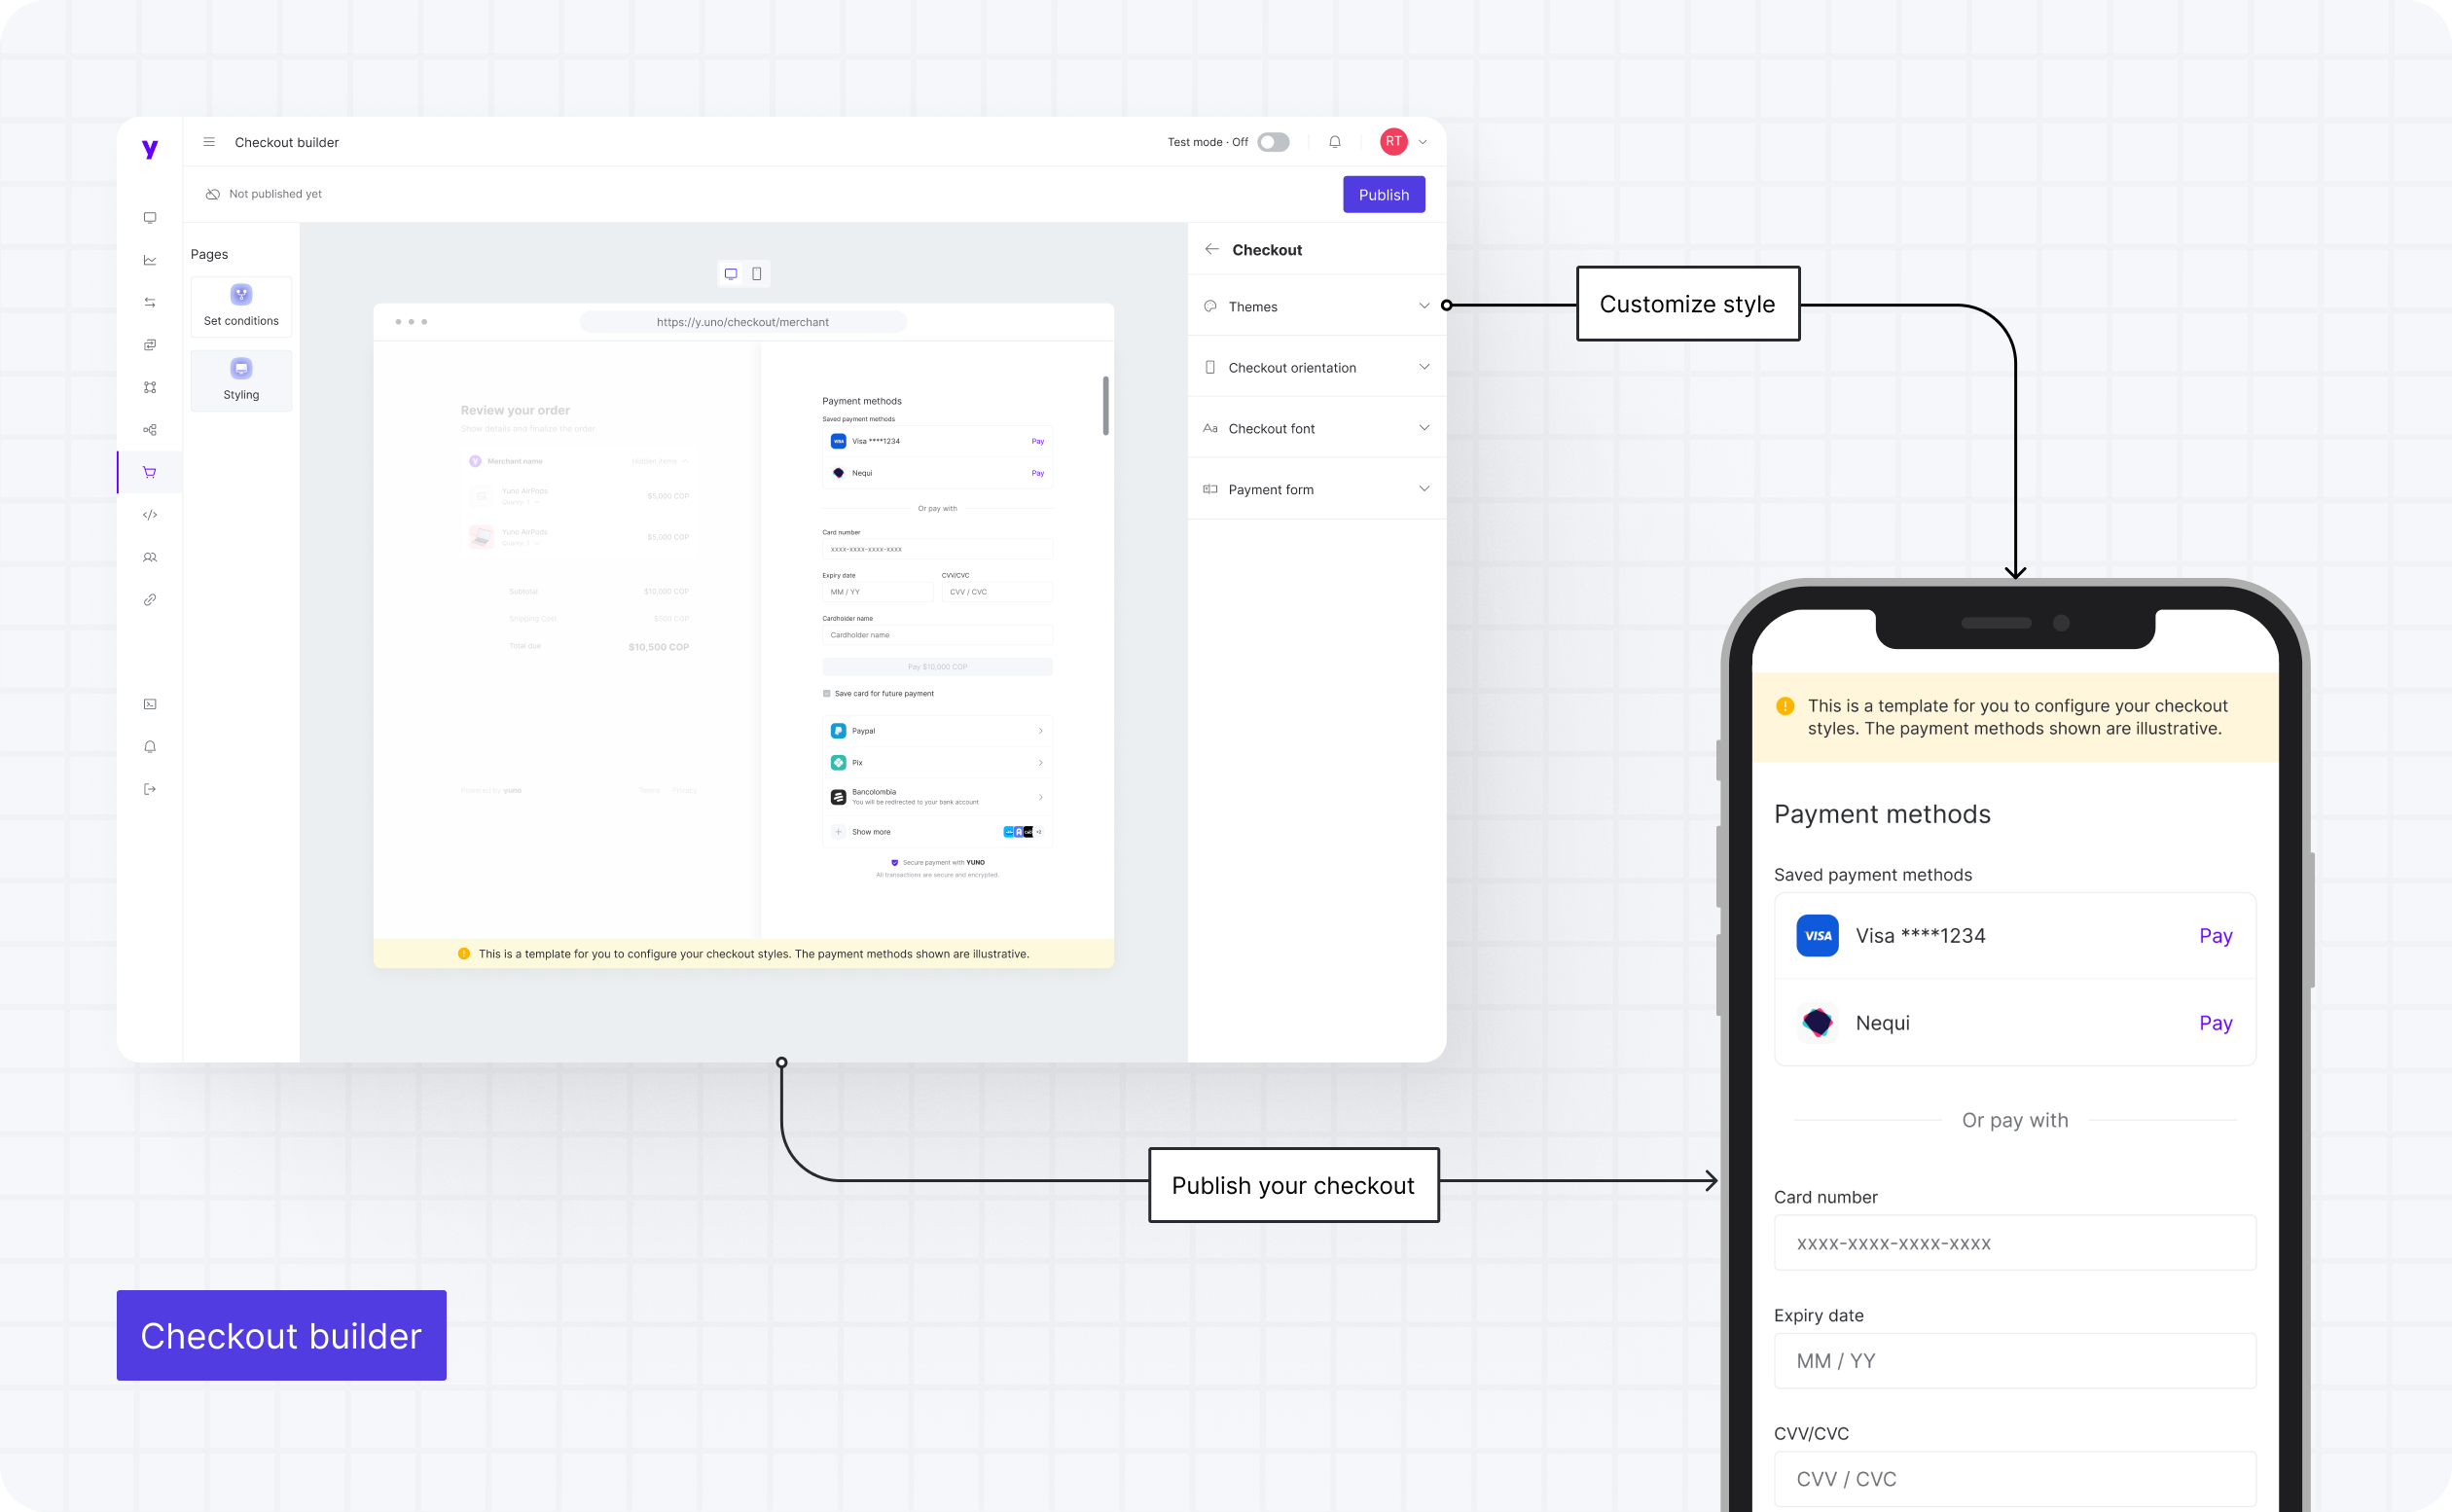
After configuring your connections with payment methods and payment processors, you can decide which one you will make available to your customers. The connected methods and processors will be available on Yuno Merchant Dashboard. You can toggle a switch to make them available for users instead of going deep into the code. Thus, you can easily add or remove payment methods that make sense to your company.
In the following step-by-step, you find a guide on how to make checkout methods available using the Yuno Merchant Dashboard.
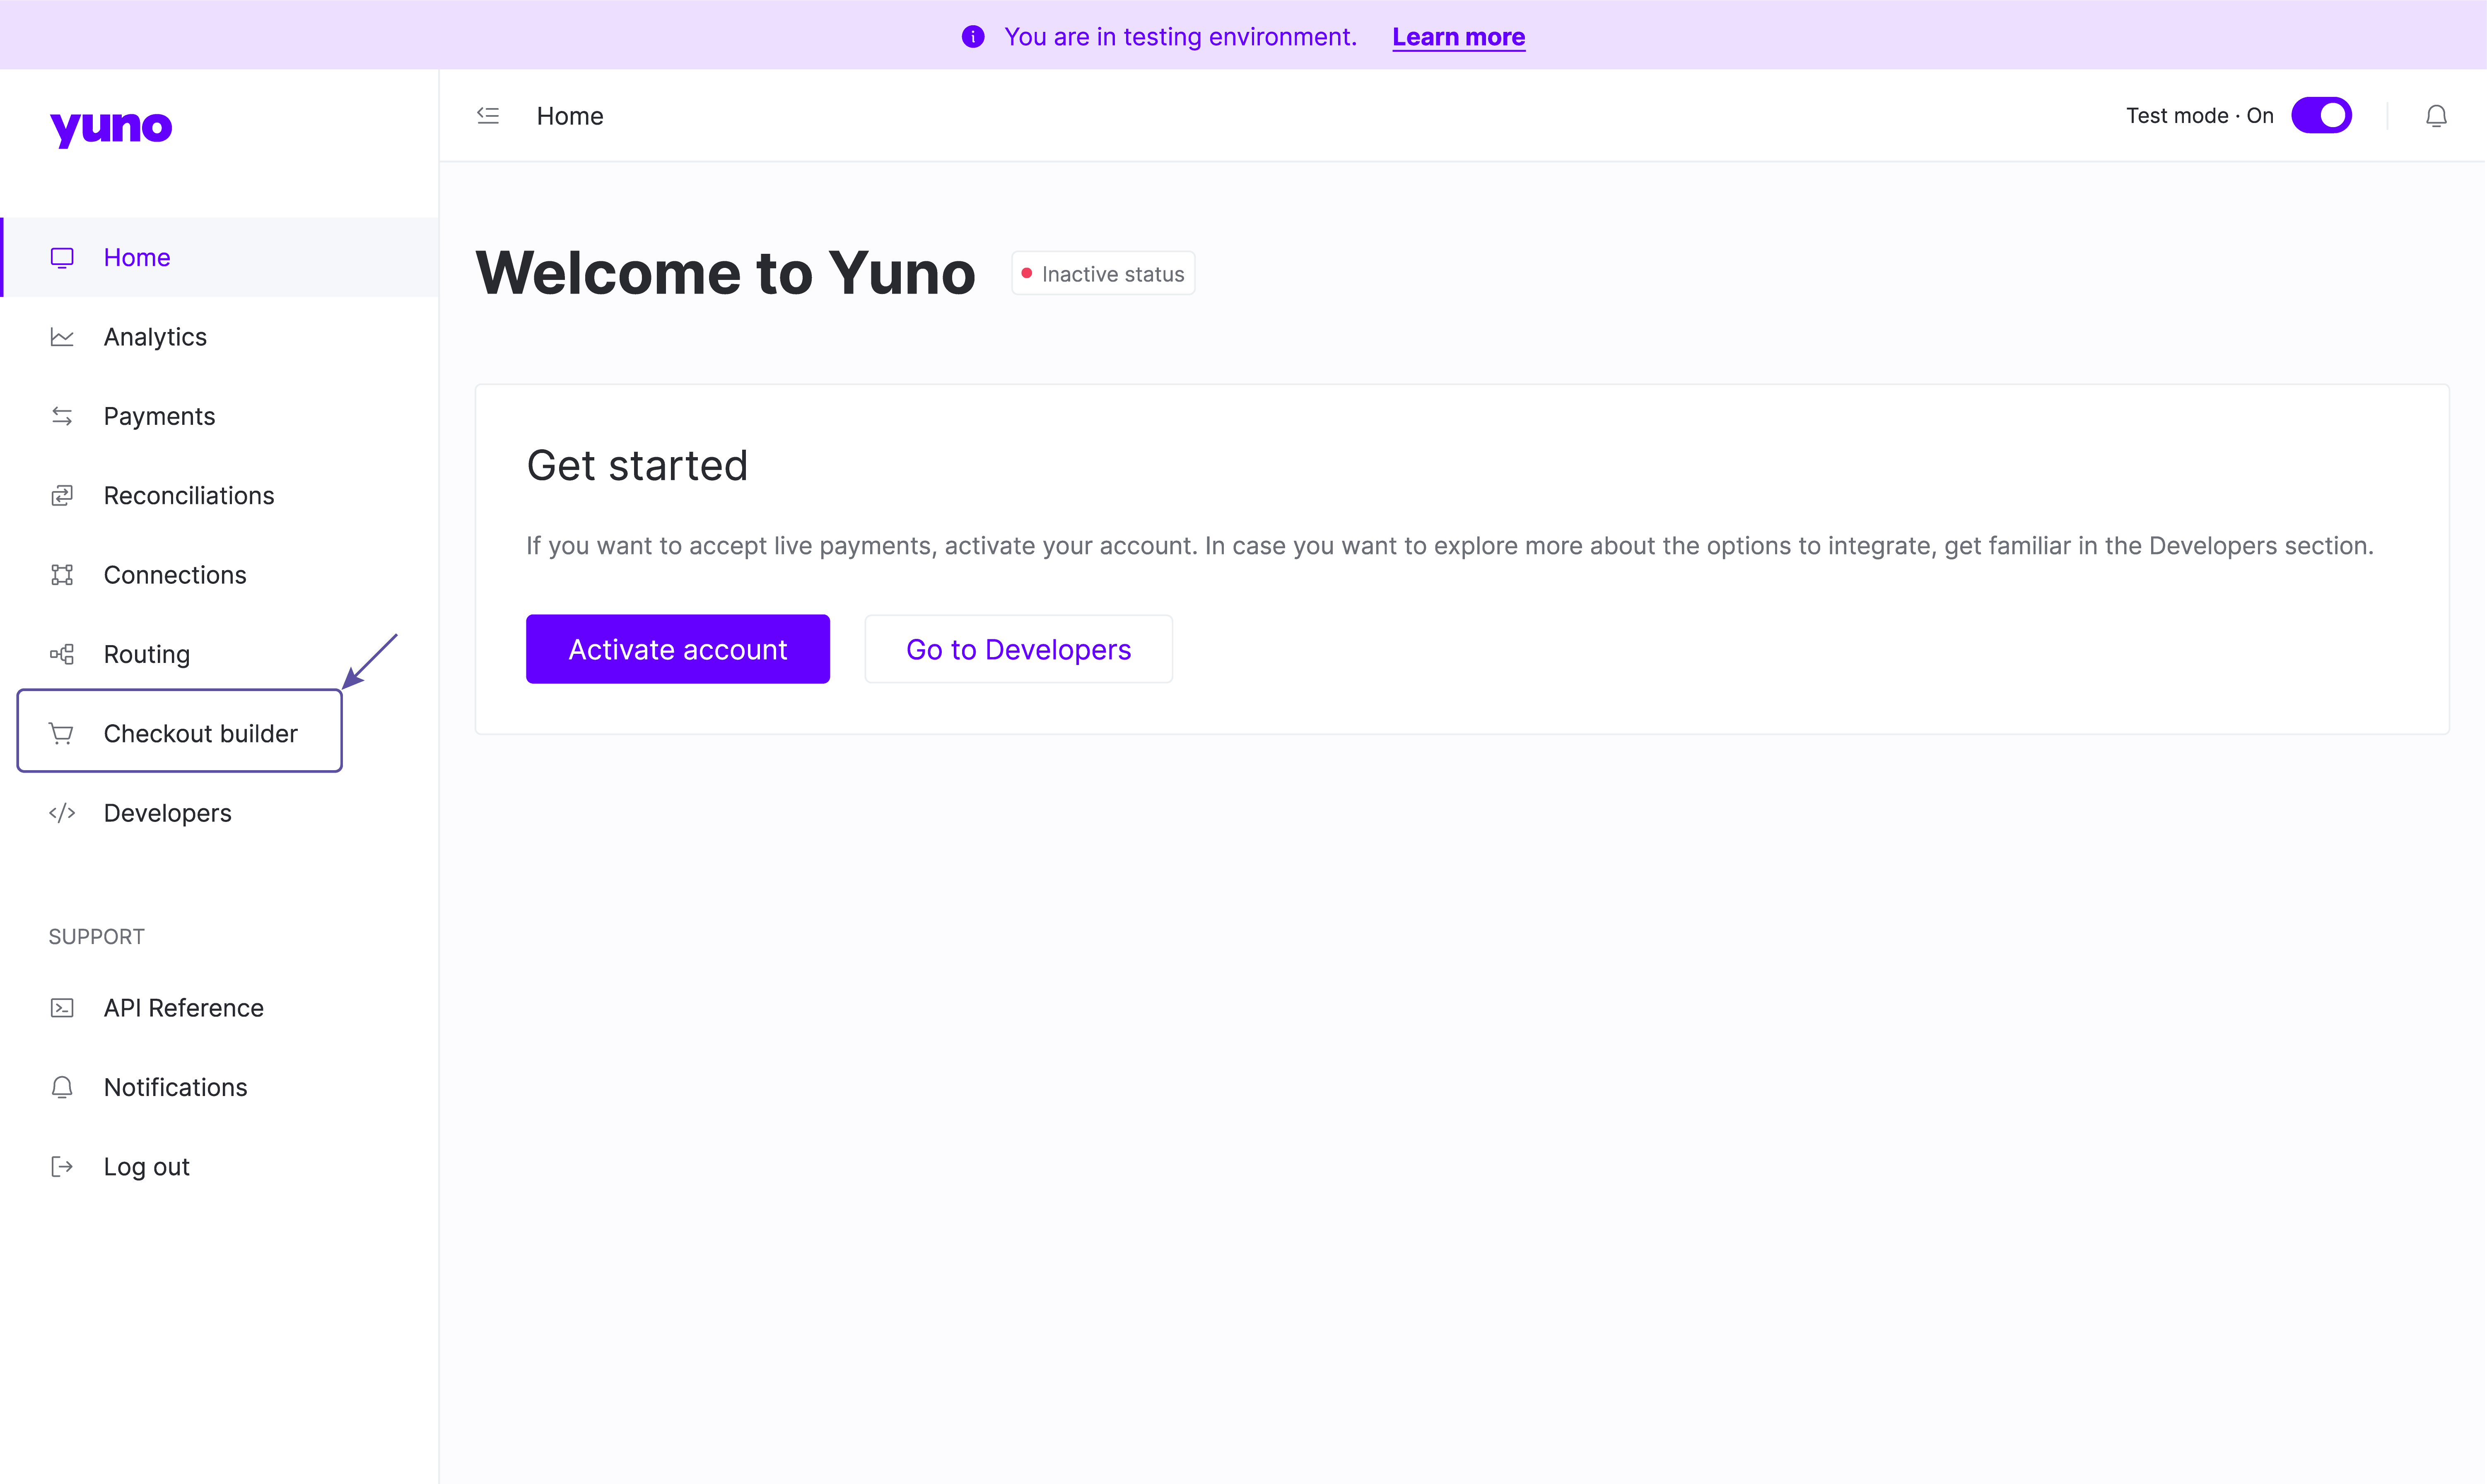
- First, access your Yuno Merchant Dashboard account and then select the option 'Checkout builder'.
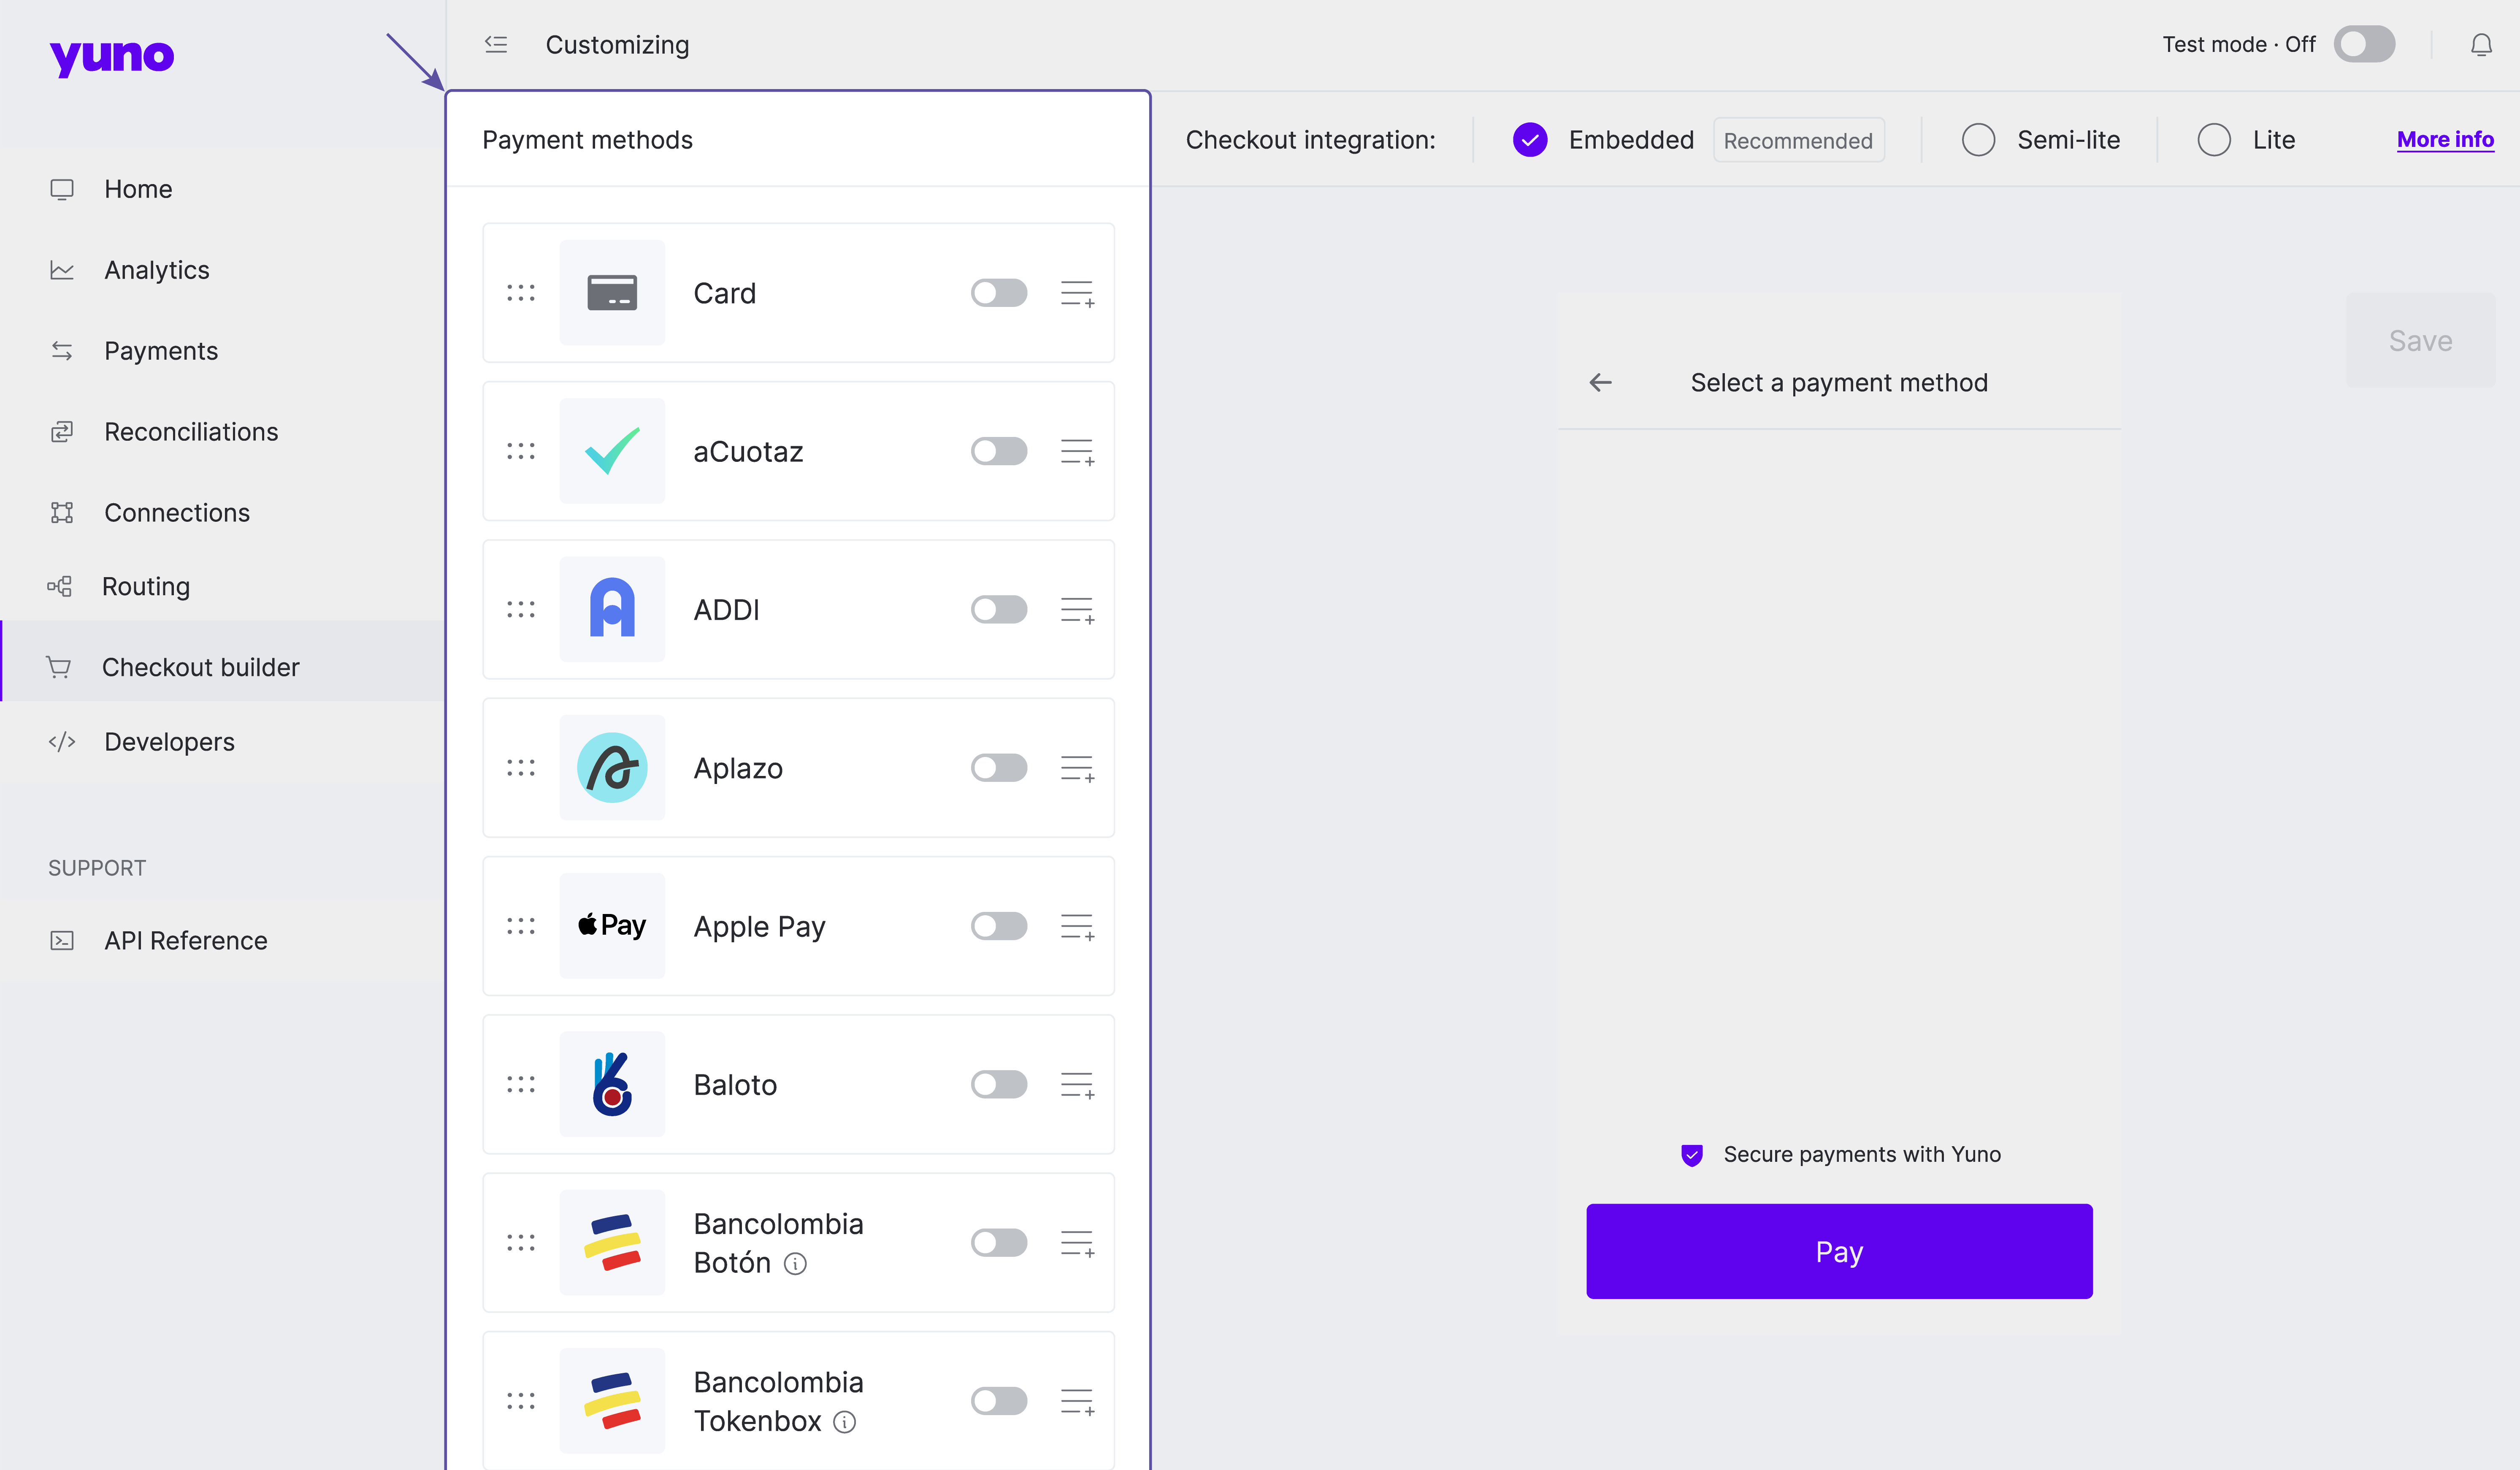
- When you access the 'Checkout builder' page, you find all payment methods already connected and created routes. Thus, if you do not see the desired payment method, please ensure you have successfully connected and published a route for it by accessing the Connections and Routes pages.
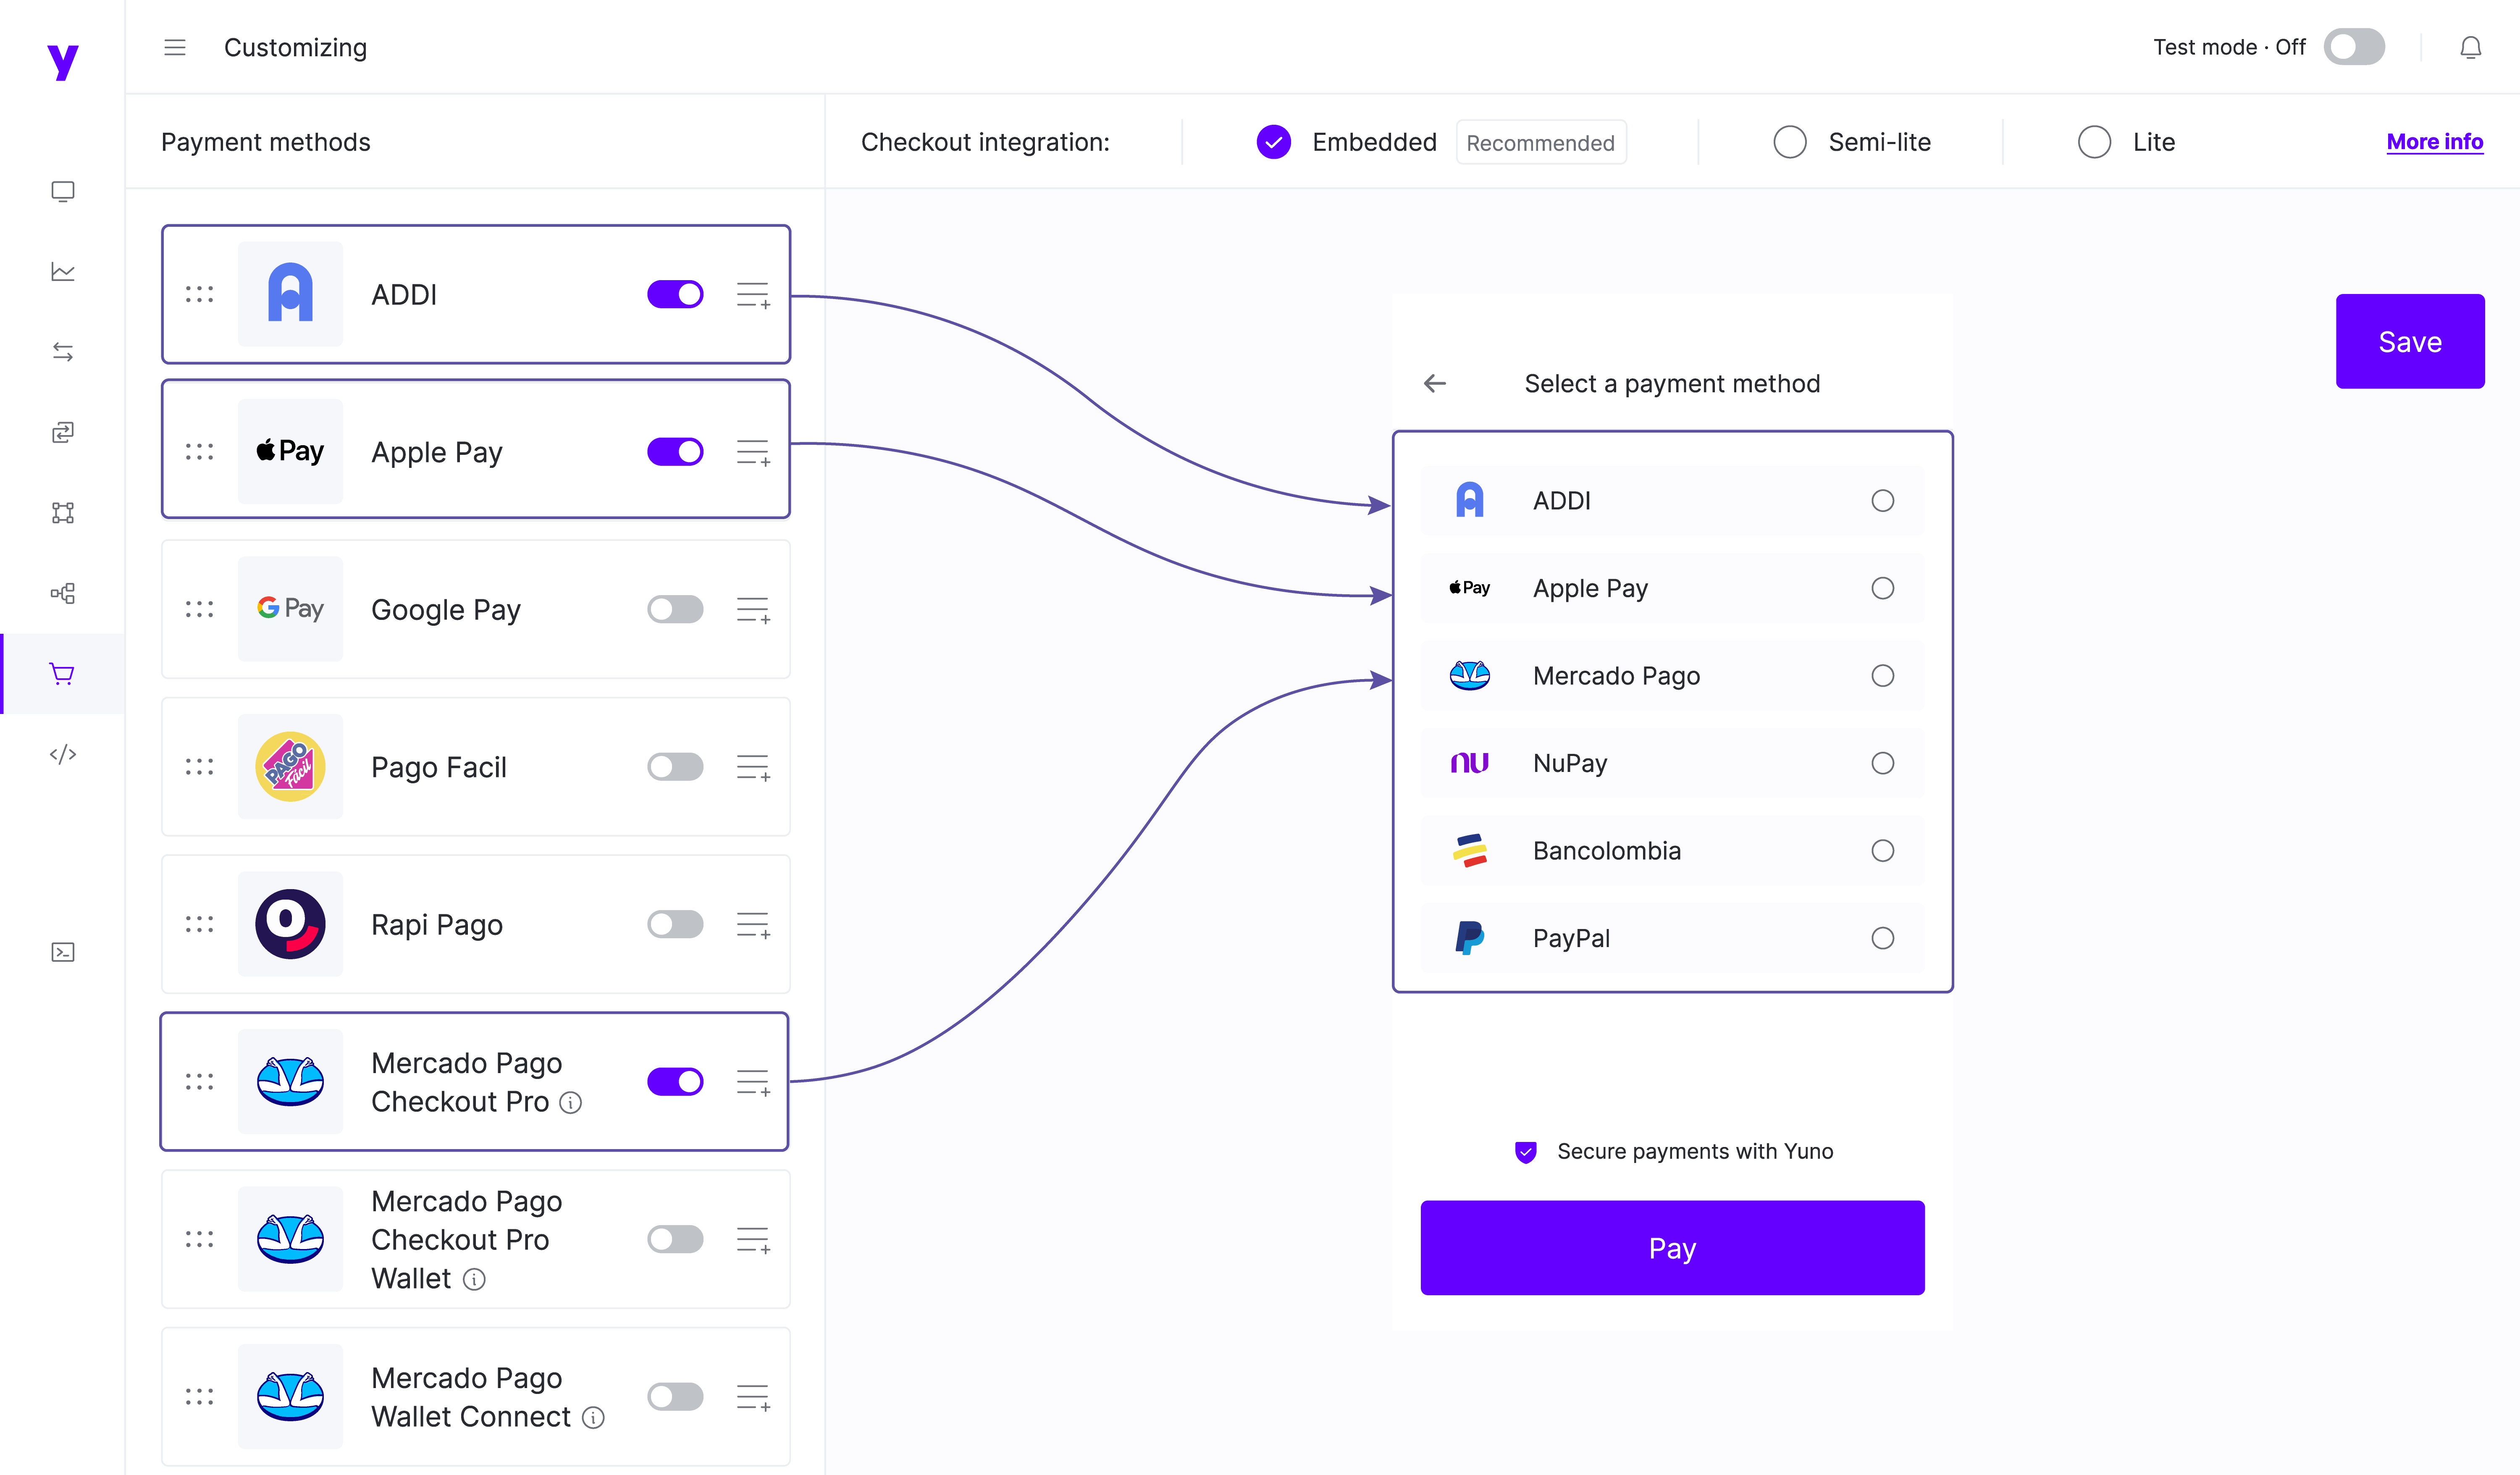
- Select the integration type desired by choosing between 'Embedded', 'Semi-lite', and 'Lite'. These options enable you to customize and control the checkout experience, selecting the one that best suits your demands:
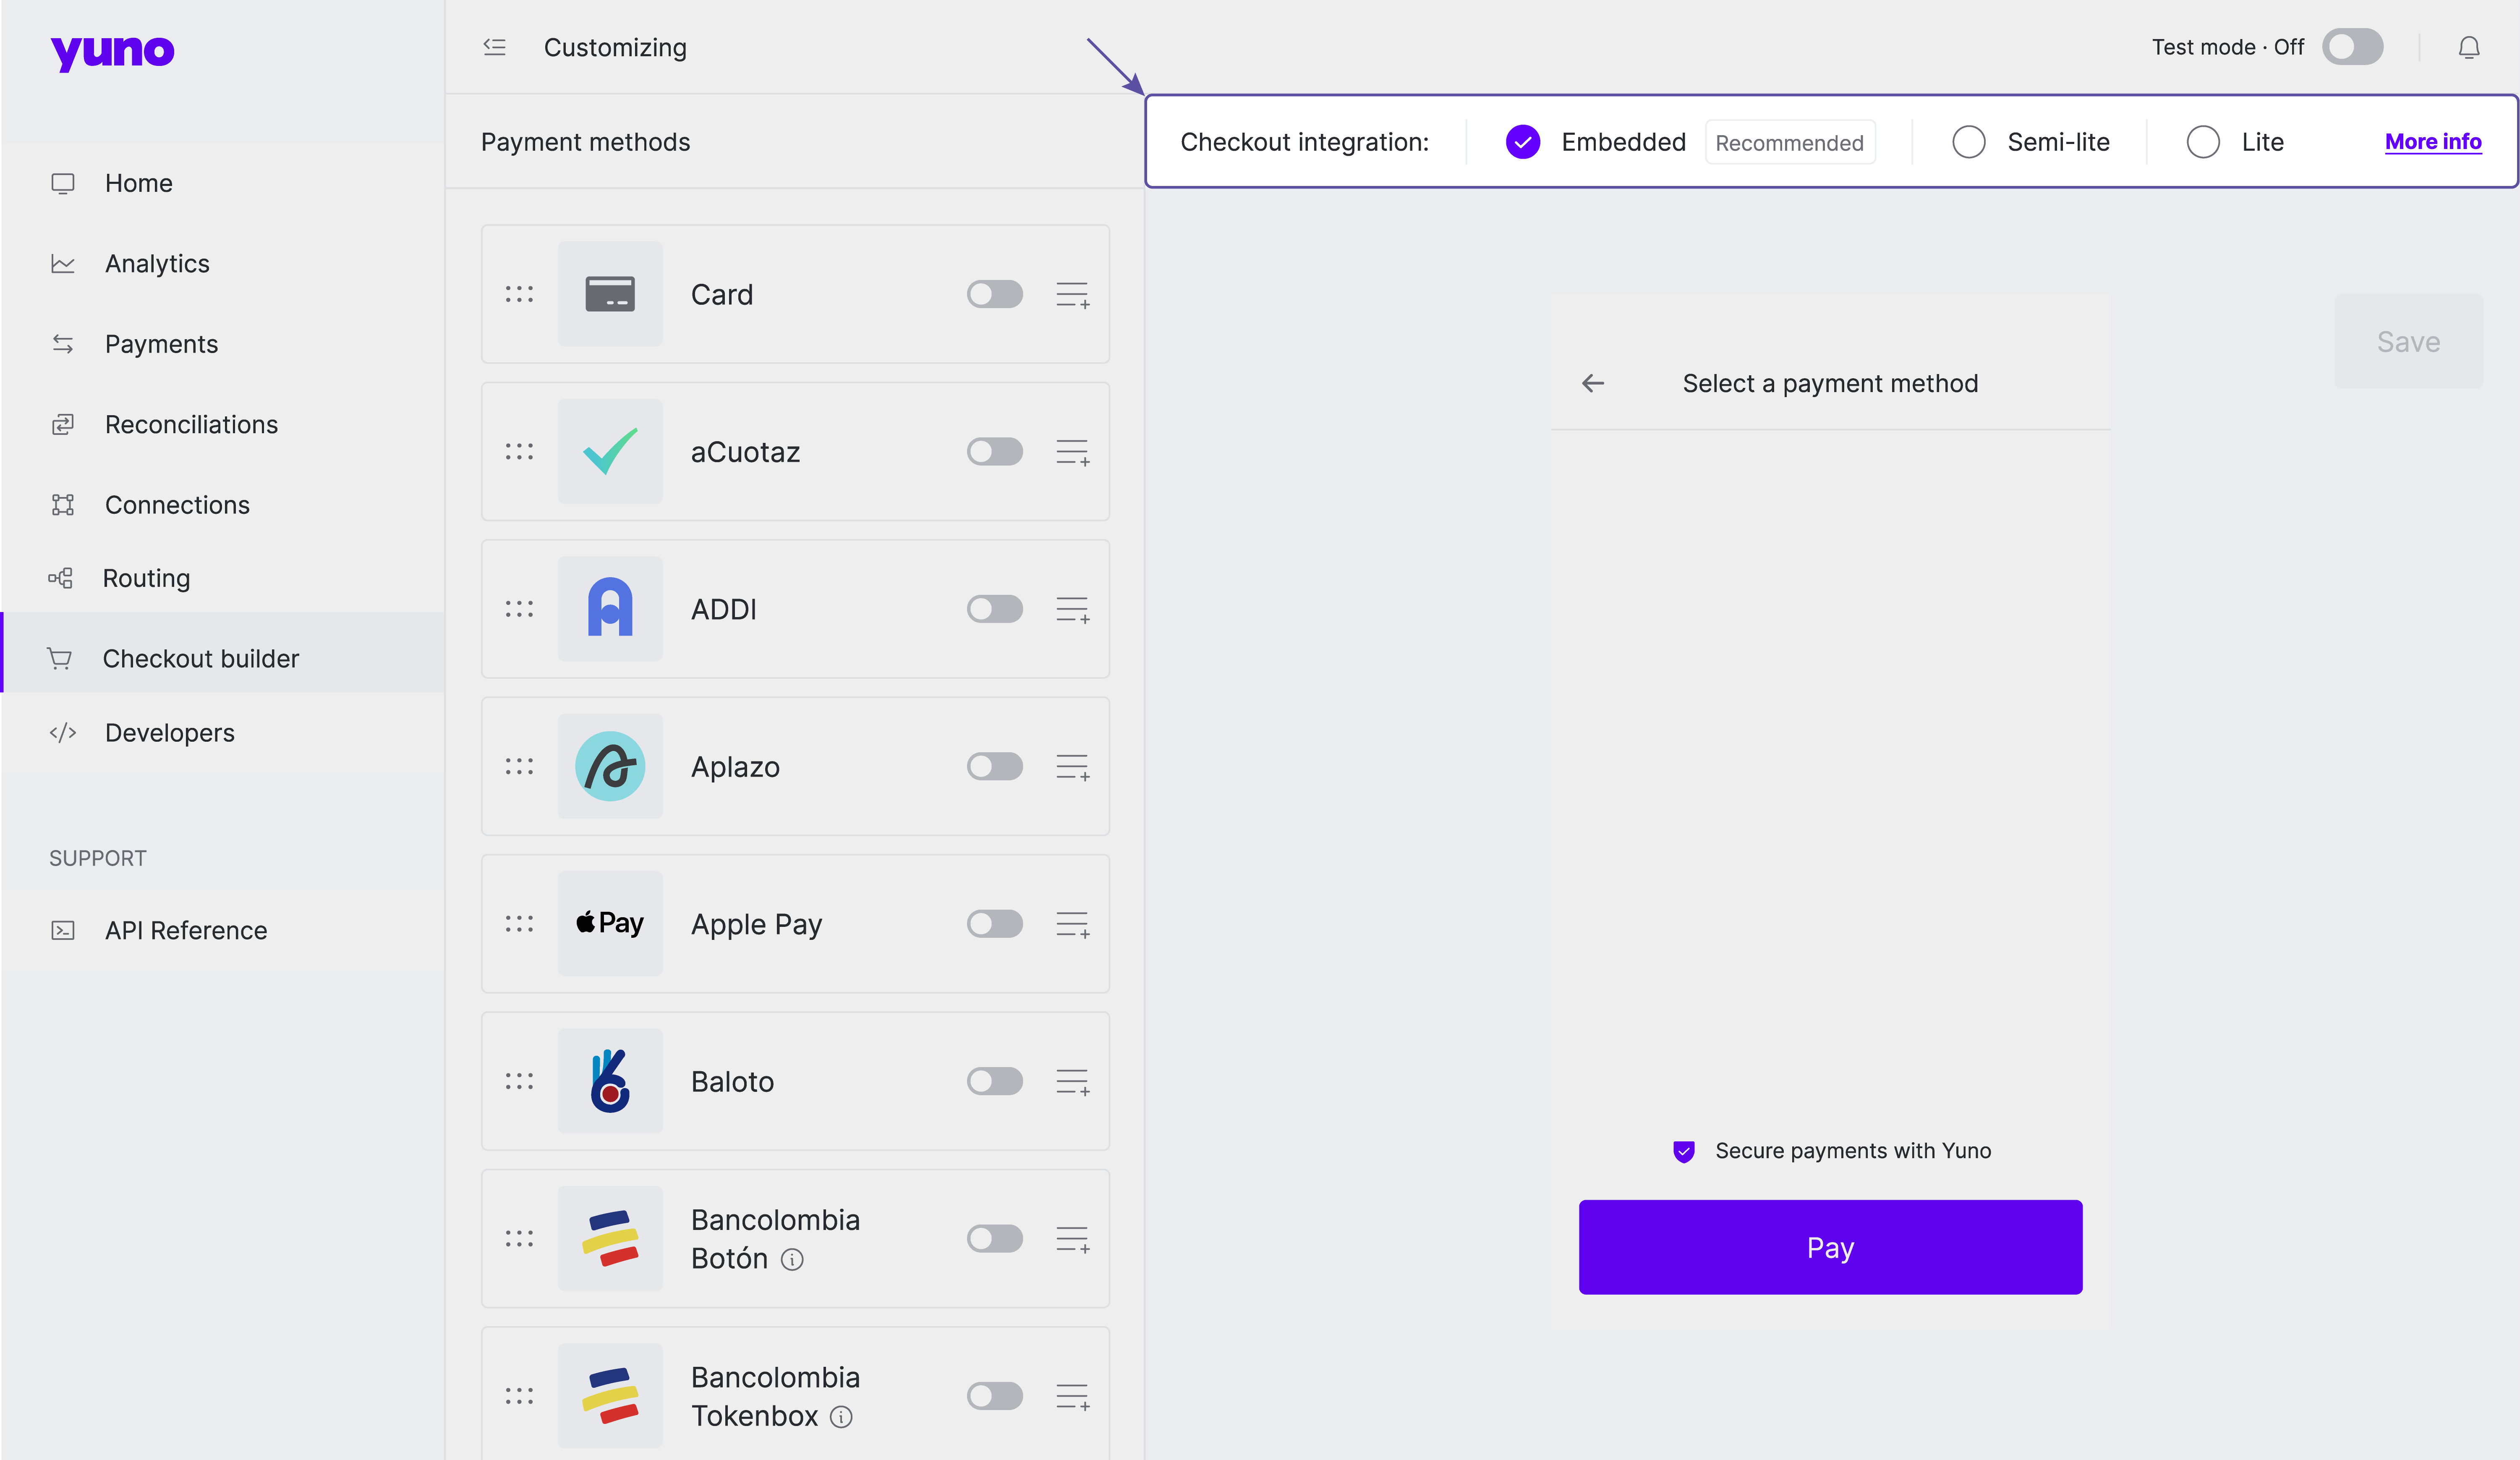
- Embedded: This is the easiest way to build your checkout. — Low-code integration that you won't have to touch when adding new payment methods.
- Semi-lite: If you need more customization, this is another type of integration available for your checkout. With this version, you will use your own user interface but manage the conditions of when to display a payment method through the dashboard.
- Lite: For more flexibility, Yuno offers a lighter version that will allow you to use your own user interface and set conditions of when to display a payment method while still having our checkout support.
- After checking the available payment methods and selecting the integration methods, it's time to define which payment methods will be available for users. By simply clicking on the toggle switch, the respective method shows up on the right panel and becomes available for users. IMPORTANT: the right panel provides a pre-visualization of your checkout payment methods. It does not affect your checkout.
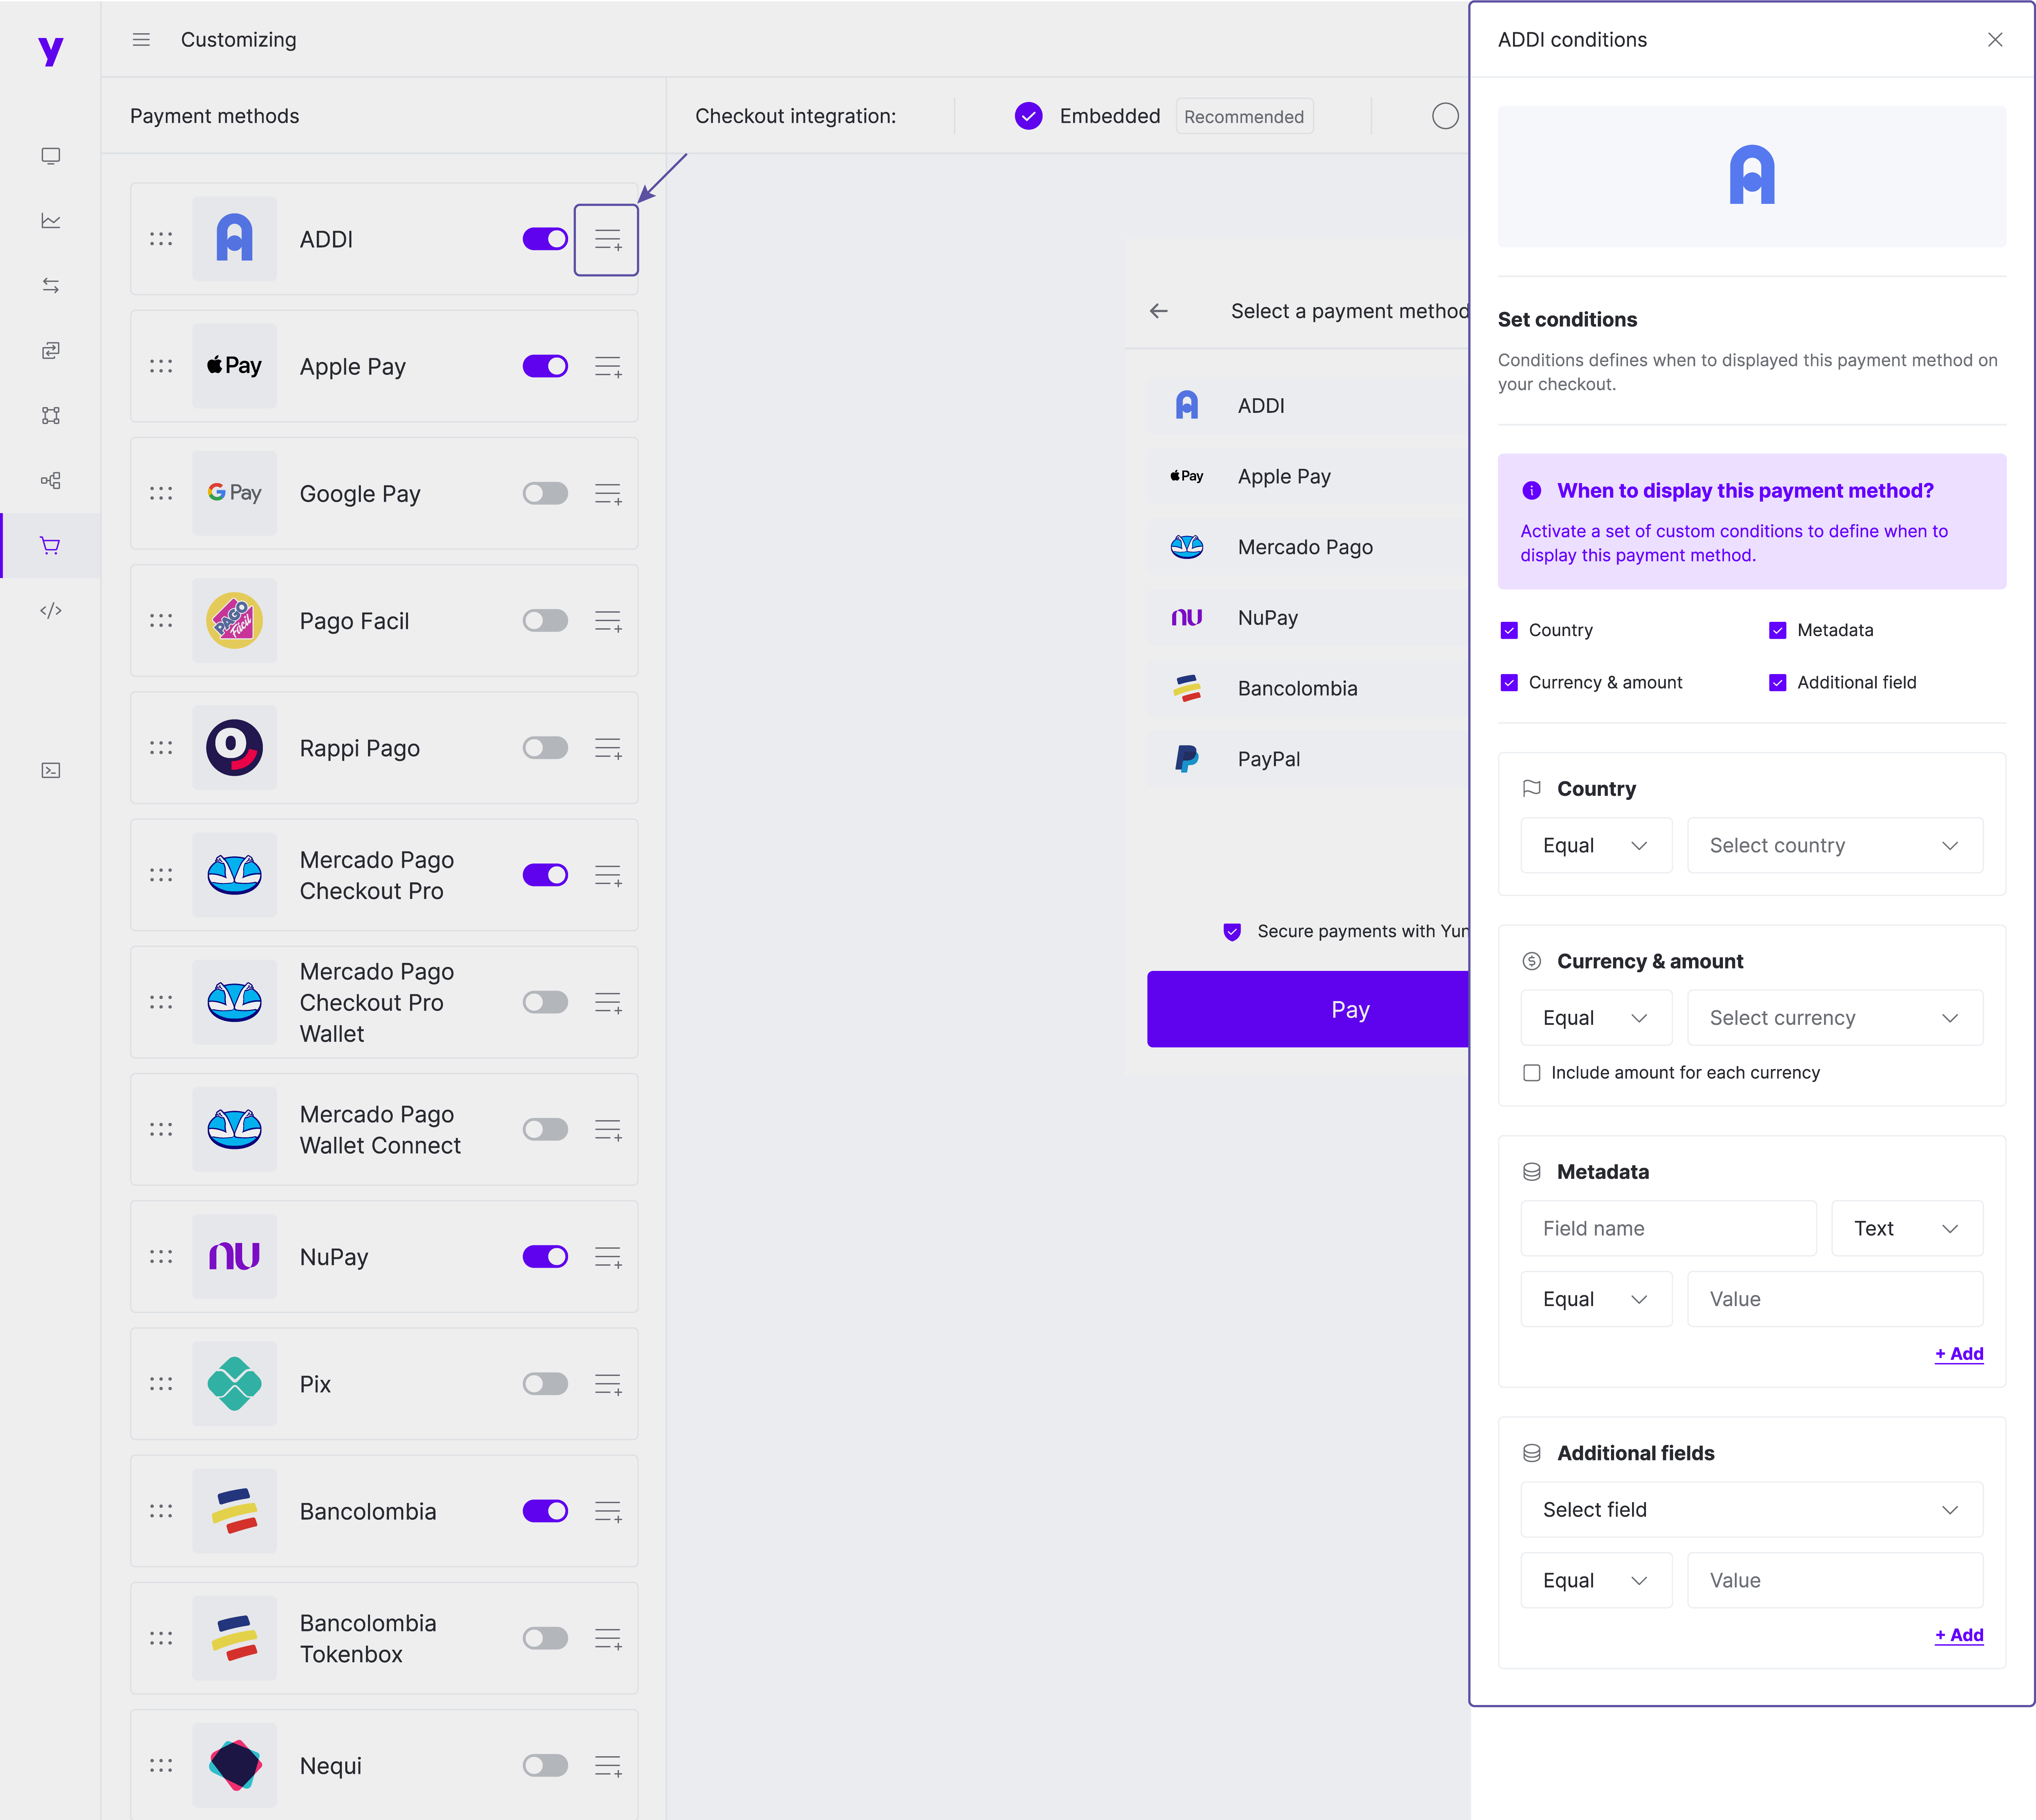
- The next step is to define the conditions for each selected payment. A panel will show up by clicking on the menu icon on the right of the toggle switch. In the panel, you can define the countries where the payment method will be available, the accepted currencies, configure the metadata and add additional fields.
Important
Please, note that only the configured payment methods will be published in your checkout.
Important
Make sure that the payment methods have a route created and published. Payment methods that do not have a routing will decline payments. Access Configure dynamic routes to learn how to set up payment methods rounting.
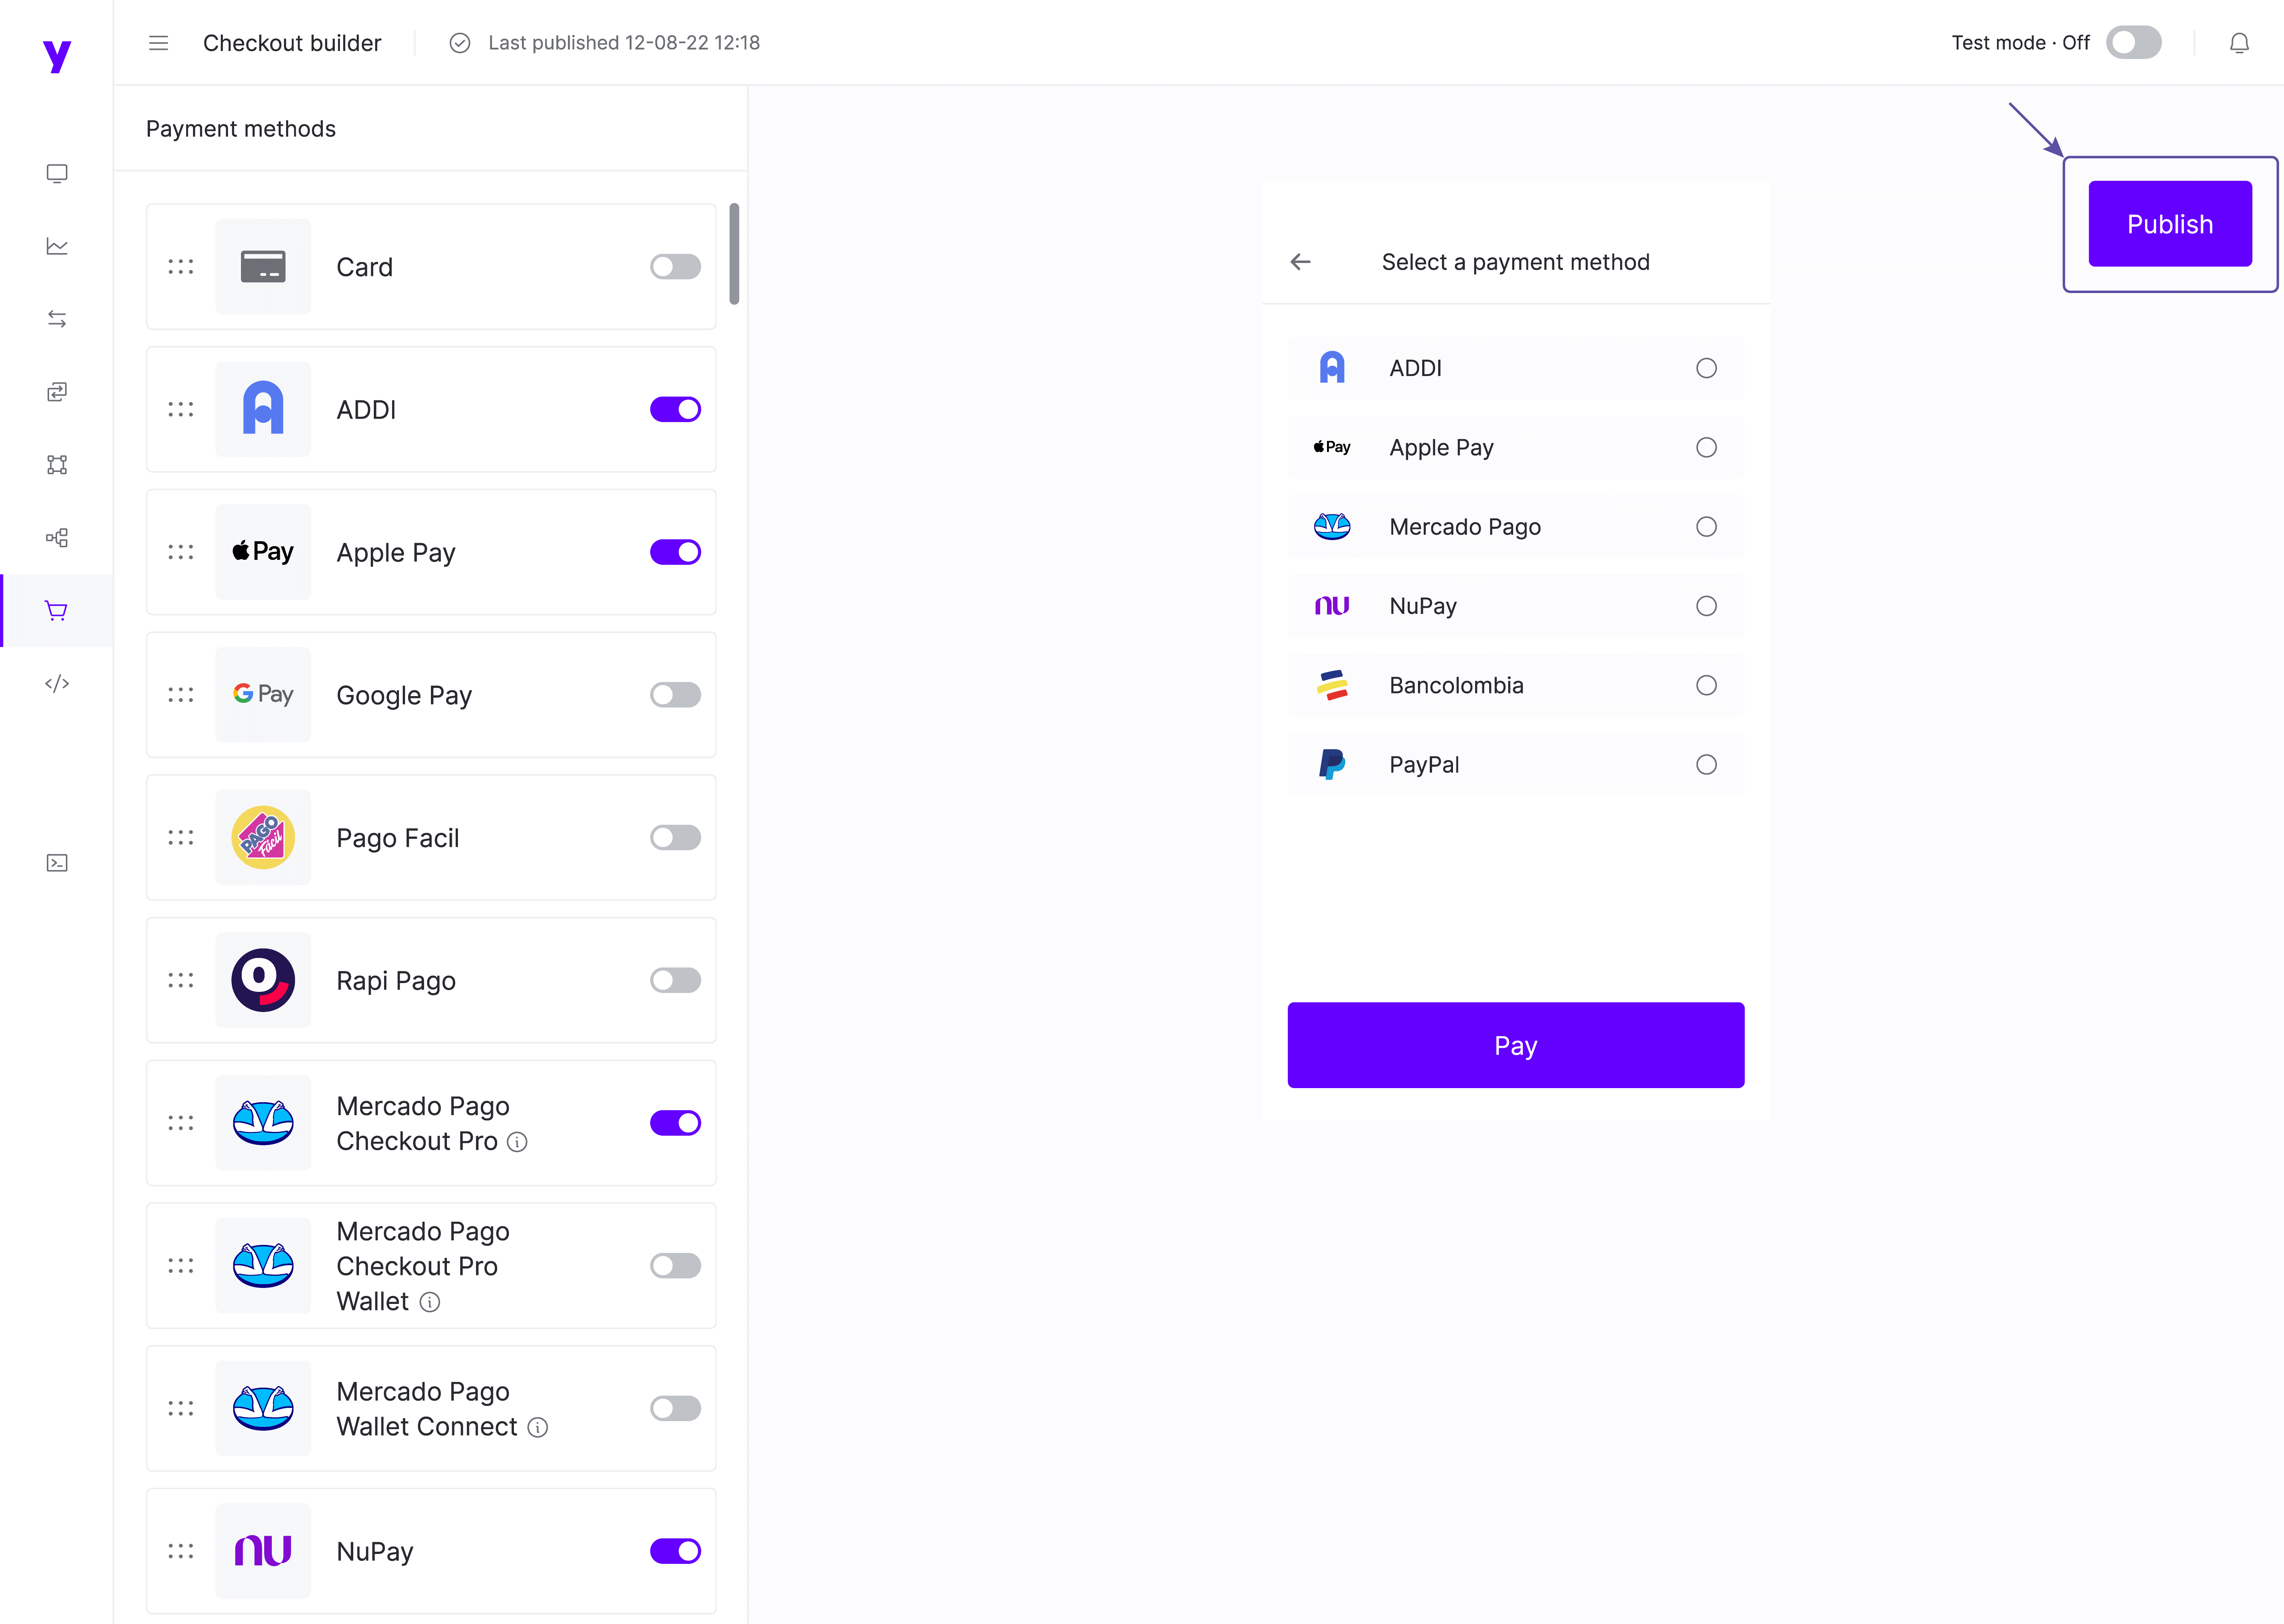
- After selecting the payment methods and defining the conditions for each one, you should click on 'Publish' to complete the Checkout Builder configuration.
Updated about 14 hours ago