Routing (old)
Dynamic routing is a payment orchestration technique that enhances the payment experience for users while automating the process of increasing approval rates. It involves directing payment transactions to the most suitable payment service provider or acquiring bank based on various factors such as card type, transaction amount, currency, and payment origin.
Why use dynamic routing?
Yuno, through its user-friendly Merchant Dashboard, offers a graphical interface for you to configure business rules for payments. Yuno's dynamic routing feature allows you to create personalized payment flows by defining validation and processing services according to your specific requirements. As a result, you can prioritize services that align with your needs, such as those with lower fees or higher approval rates.
By leveraging dynamic routing, you will enjoy several advantages:
- Optimization: You can optimize your payment processing strategy in response to market changes, regulatory demands, or other factors. With the ability to quickly adjust routing rules, you can seamlessly switch between PSPs or services, ensuring you will always use the best options for processing transactions.
- Reduce costs: Dynamic routing allows you to reduce payment processing fees significantly. By routing transactions through the most cost-effective PSP or service, you can take advantage of lower fees or better exchange rates offered by different providers for specific currencies or transaction types.
- Mitigate frauds: You can direct high-risk transactions to specialized fraud prevention providers or PSPs with advanced fraud detection capabilities, minimizing your exposure to fraudulent activities.
- Processing speed: Dynamic routing ensures efficient and speedy transaction processing. Directing transactions to the most suitable PSP or service based on transaction volume, processing capacity, or response times can enhance the overall customer experience while reducing the likelihood of transaction failures or delays.
Configuring the dynamic routing
In the following steps, you will find a guide on how to create routes to process payments using the Yuno Merchant Dashboard.
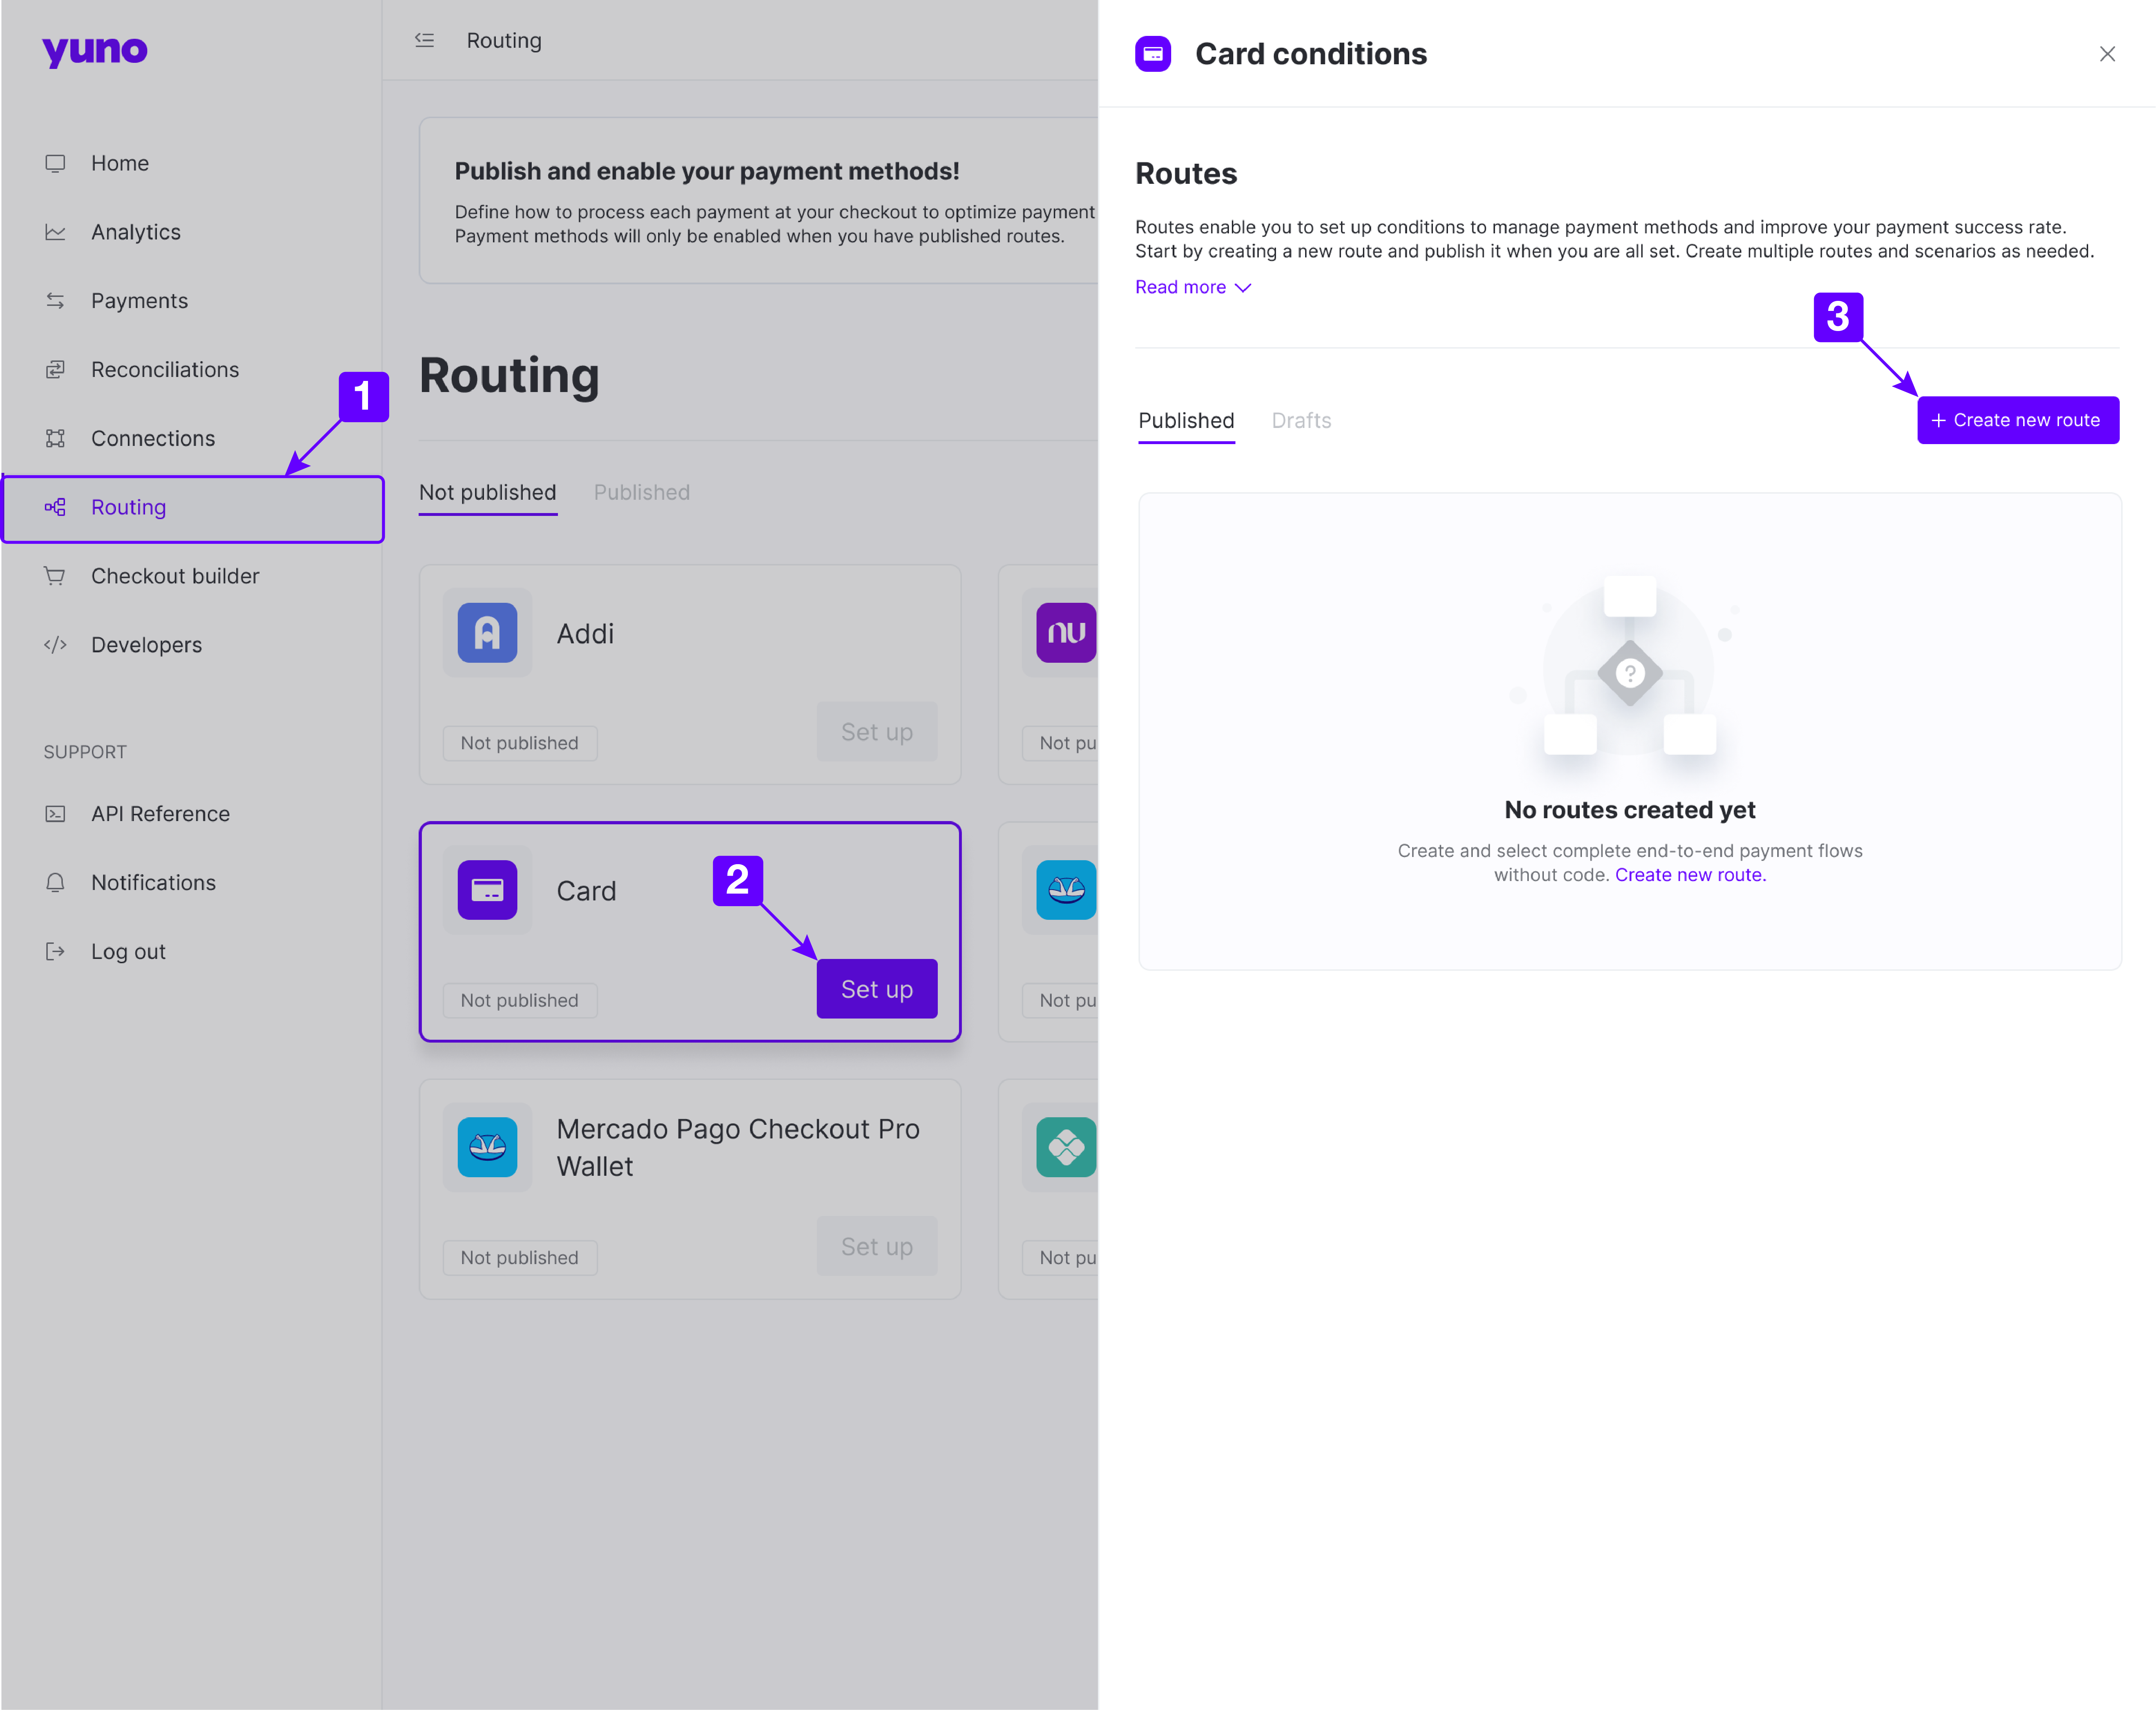
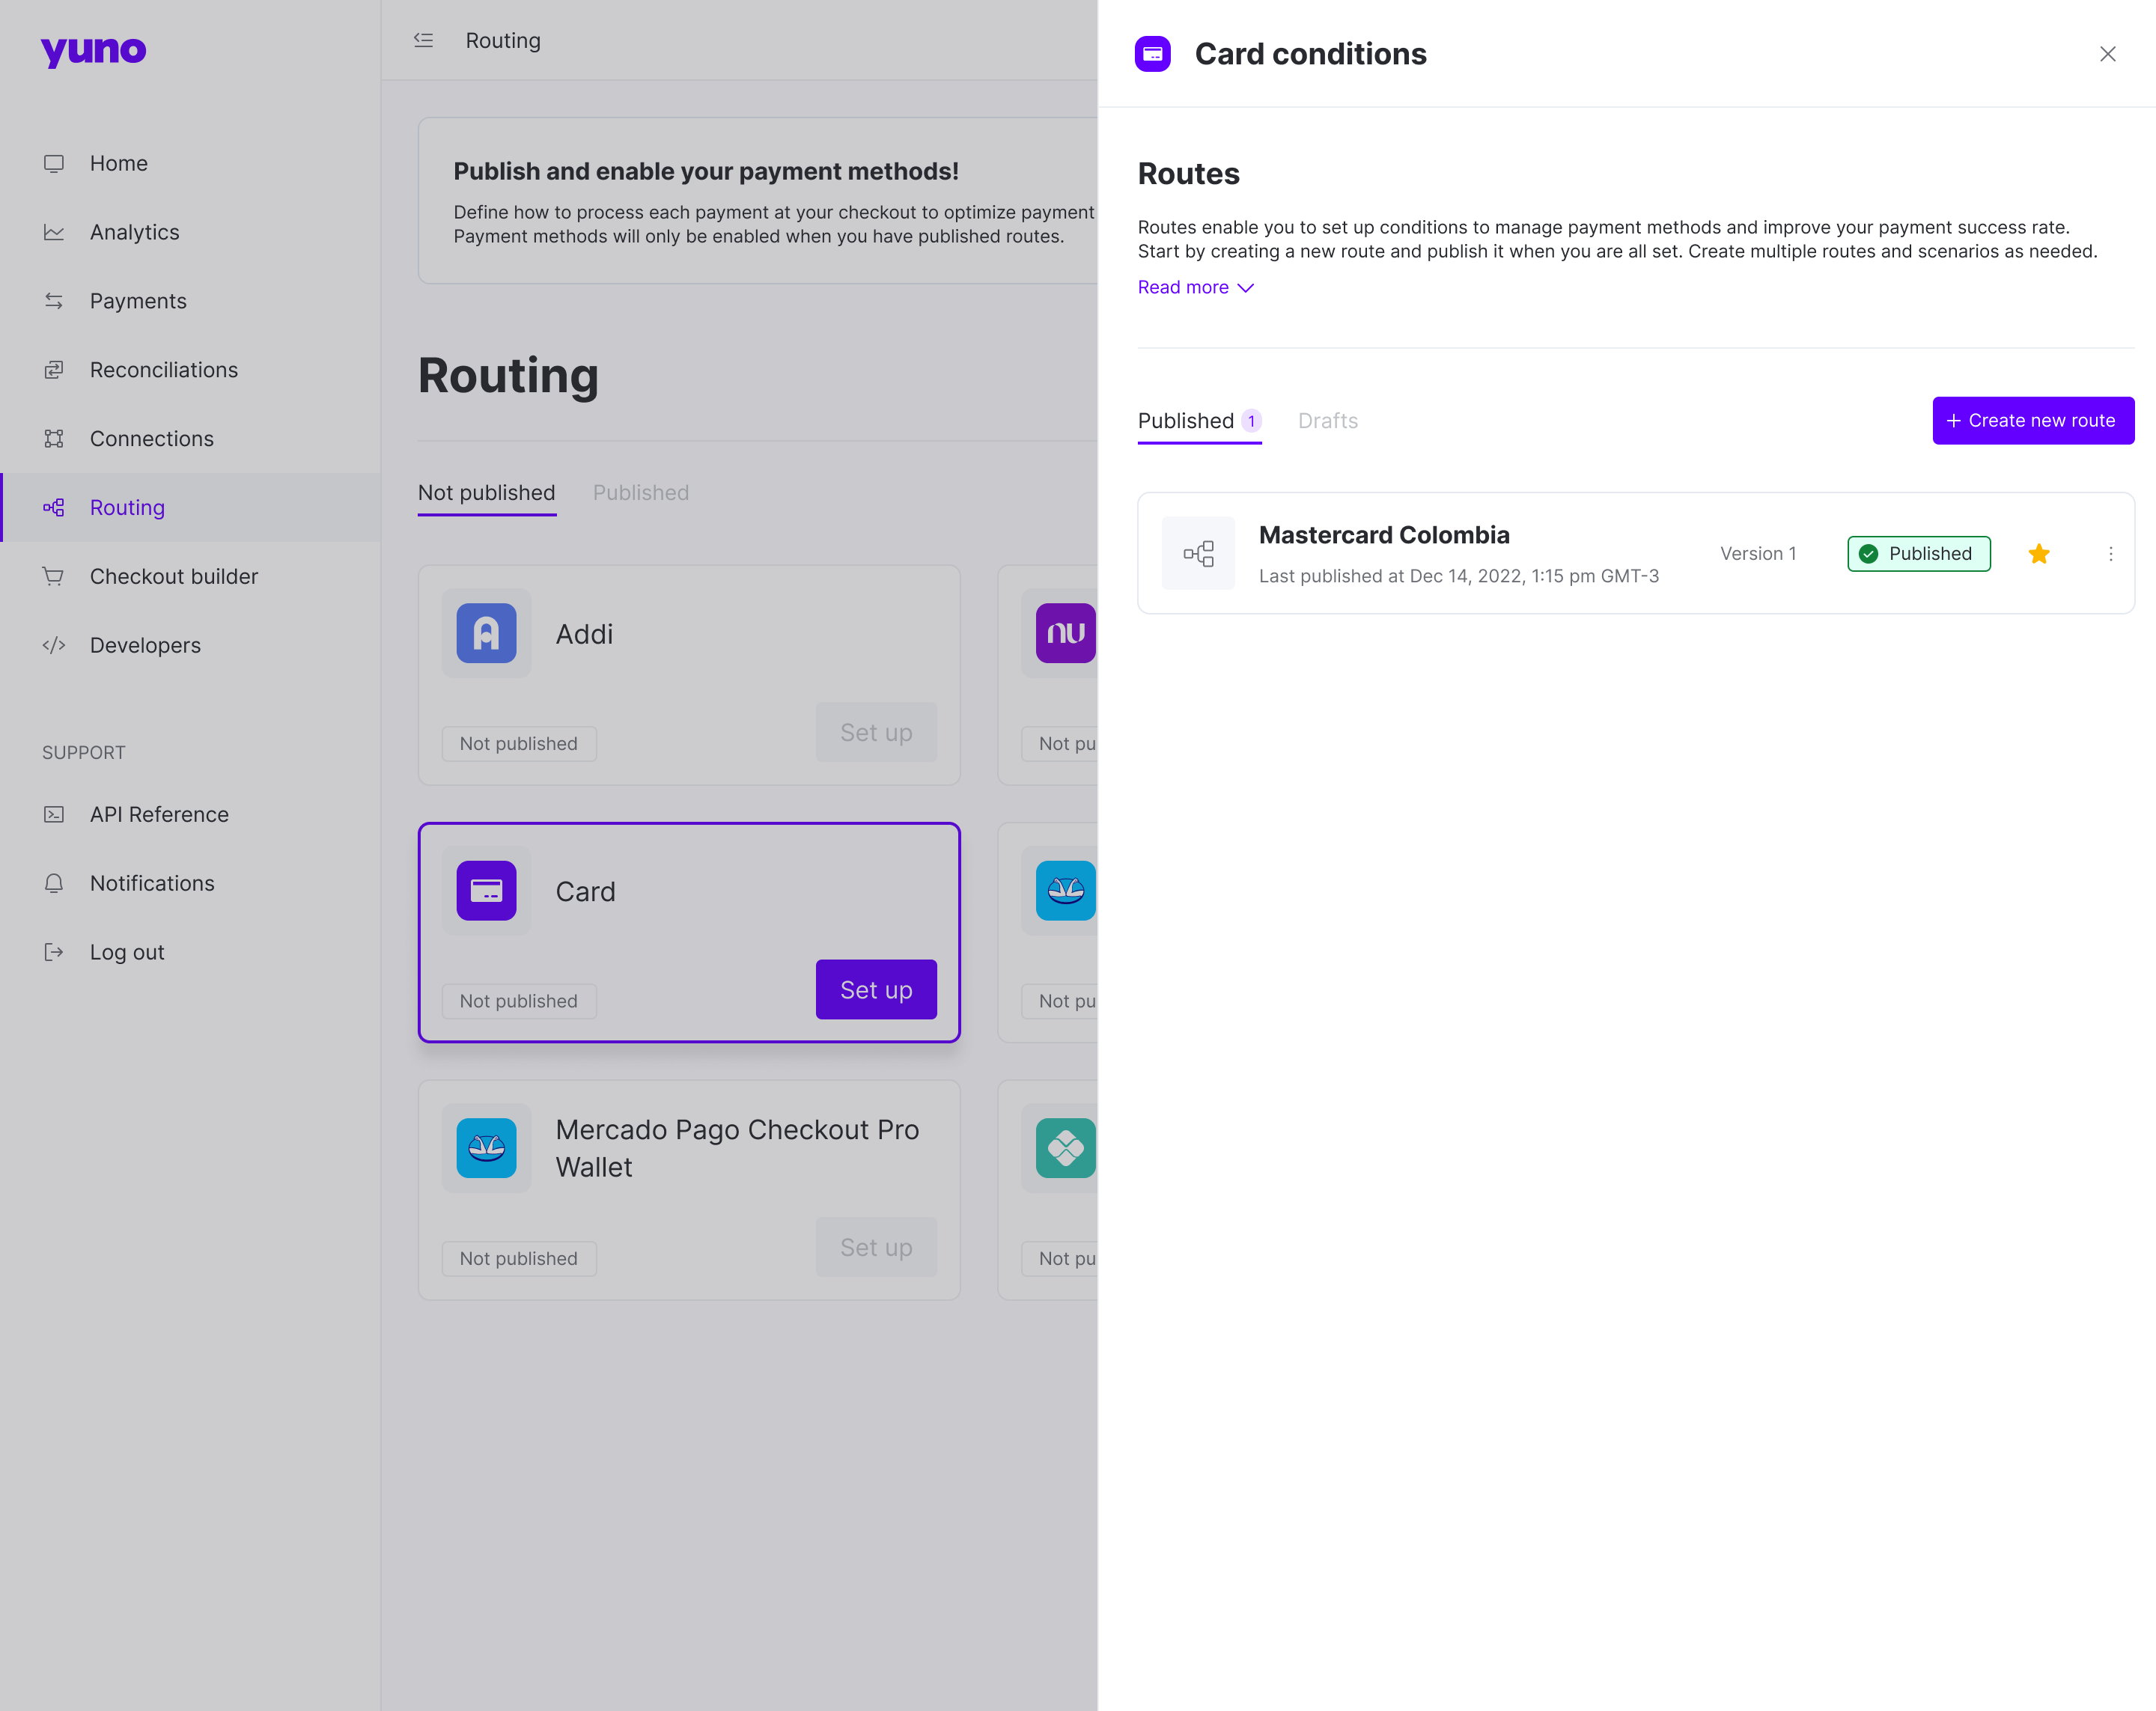
- First, access your Yuno Merchant Dashboard account and select the option Routing. The Routing page separates the payment by Not published and Published. In the Not published tab, you will find the payment methods connected to your account that don’t have a published route.
- After choosing the desired method, click on Set up. Then, the right panel will show up, and you can click on the Create new route to start configuring routes.
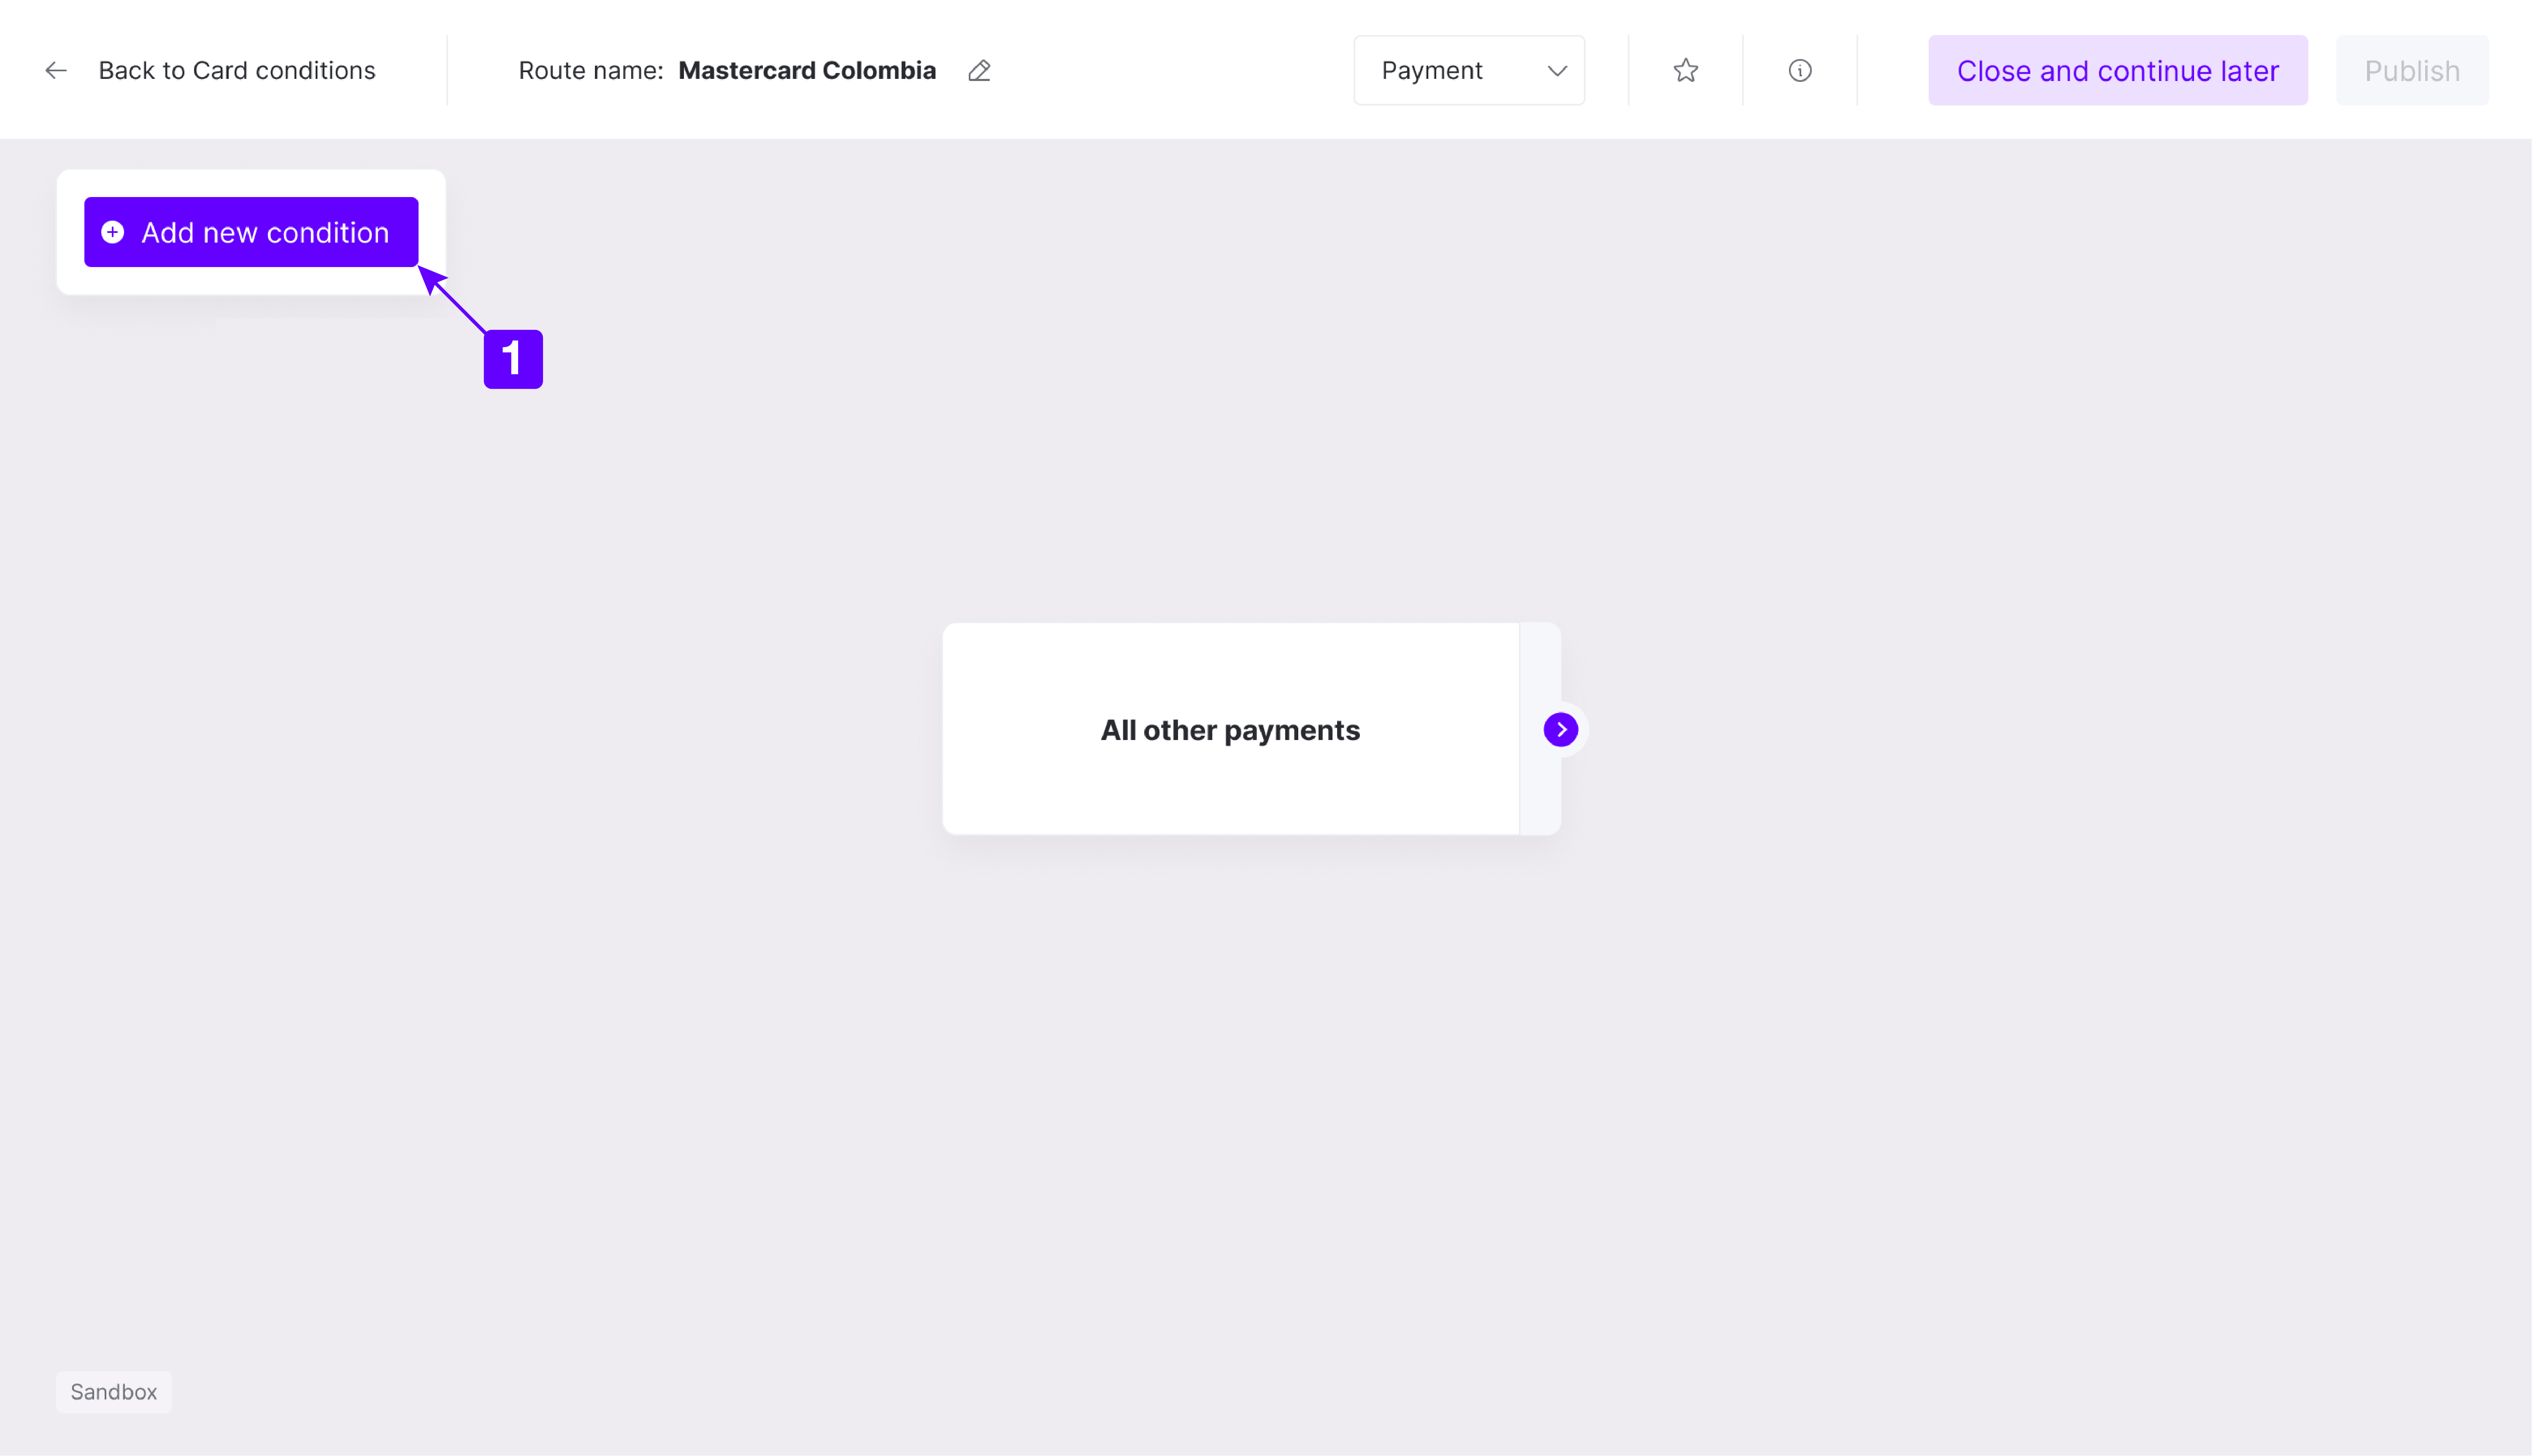
- After clicking on Create new route, you can name the route you will build.
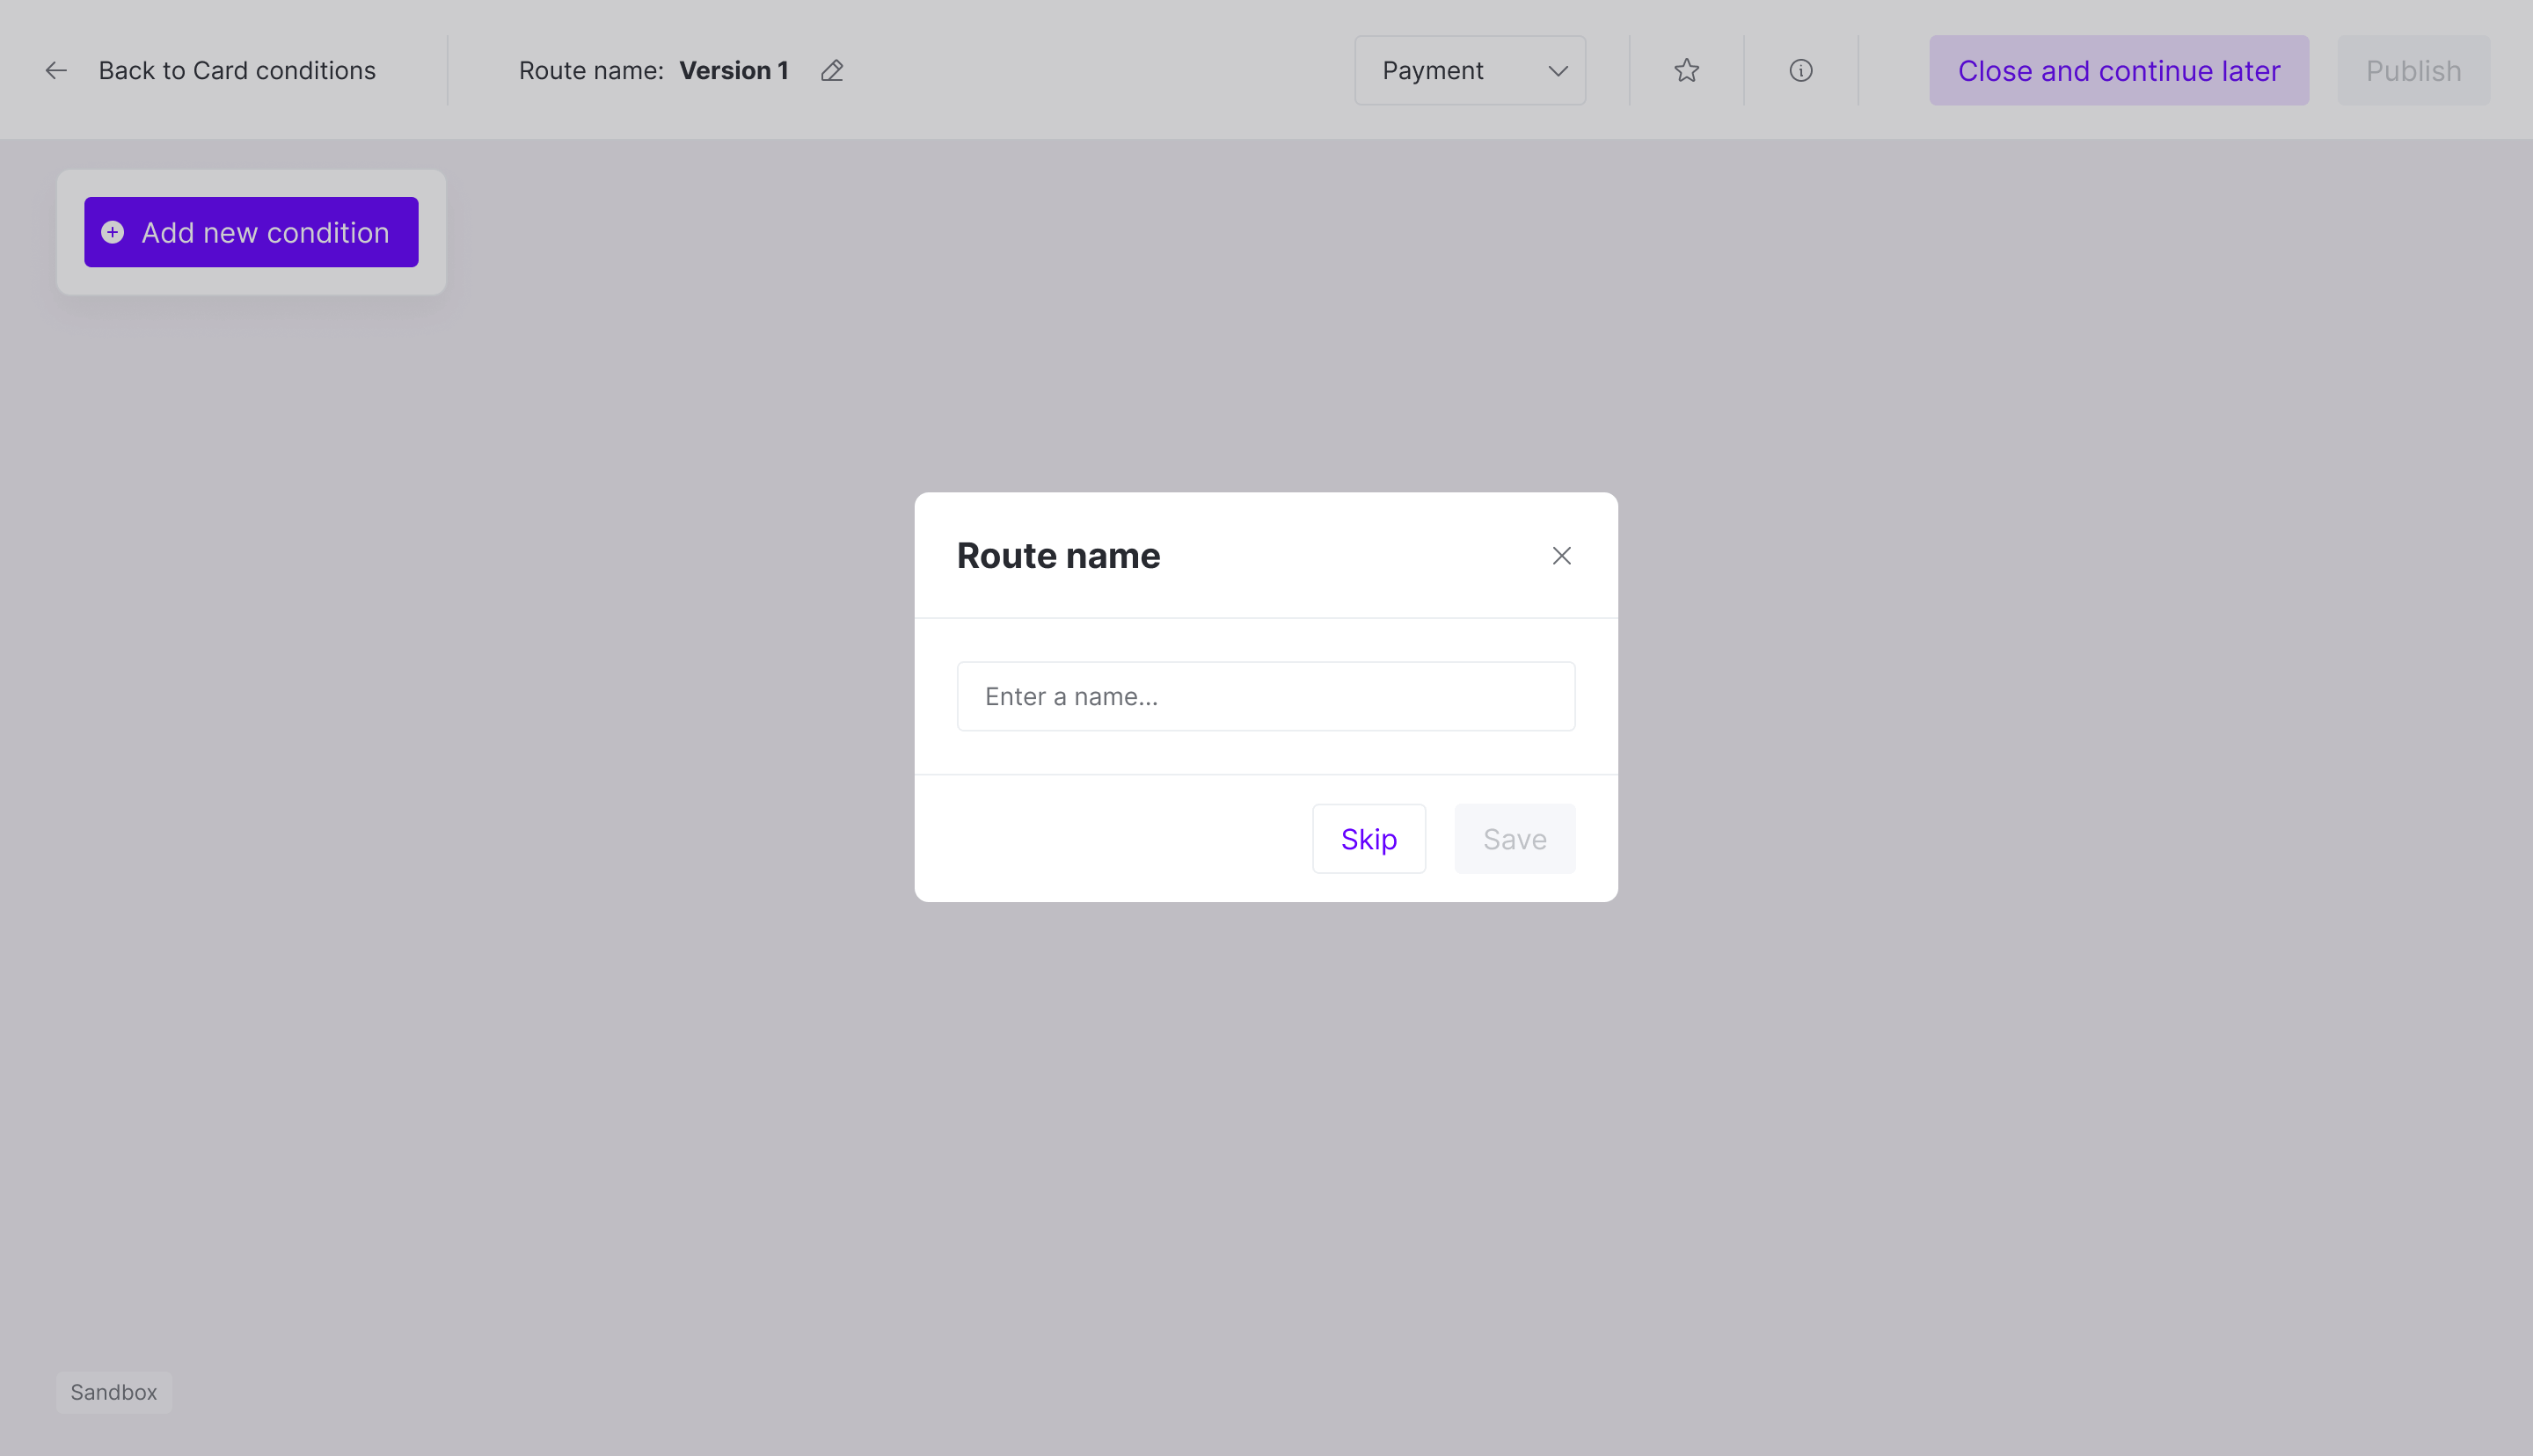
- With the route named, use the Add new condition button to define the condition that will trigger the payment processing route.
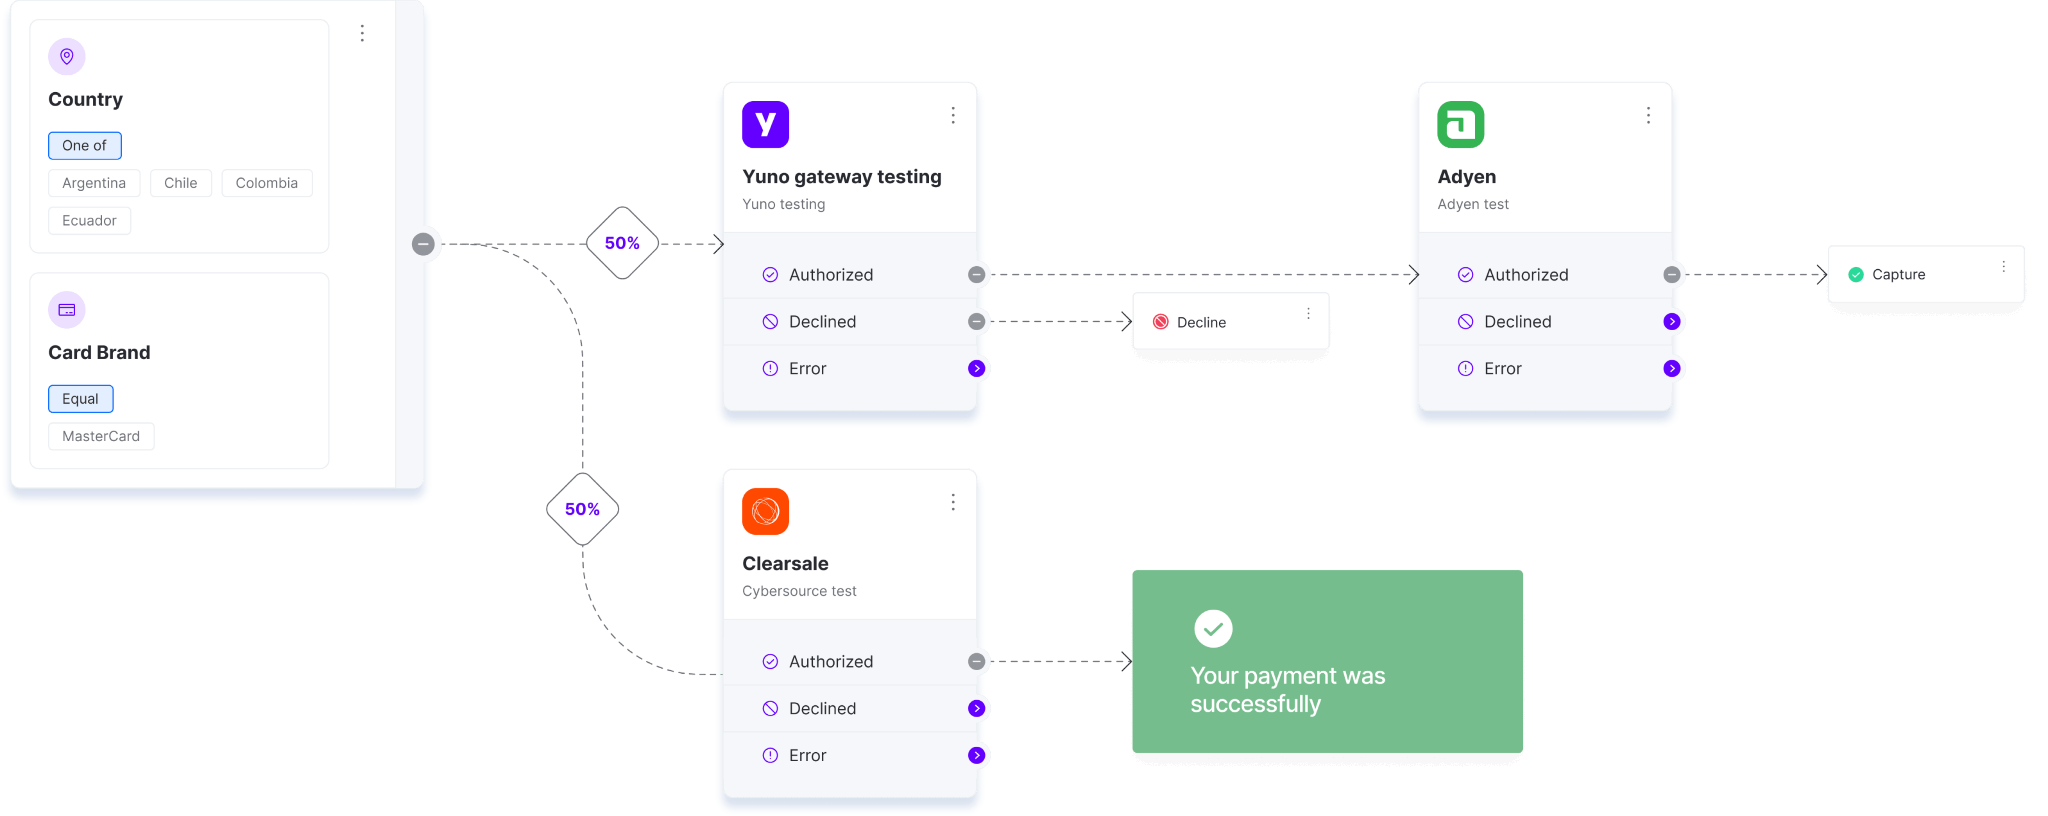
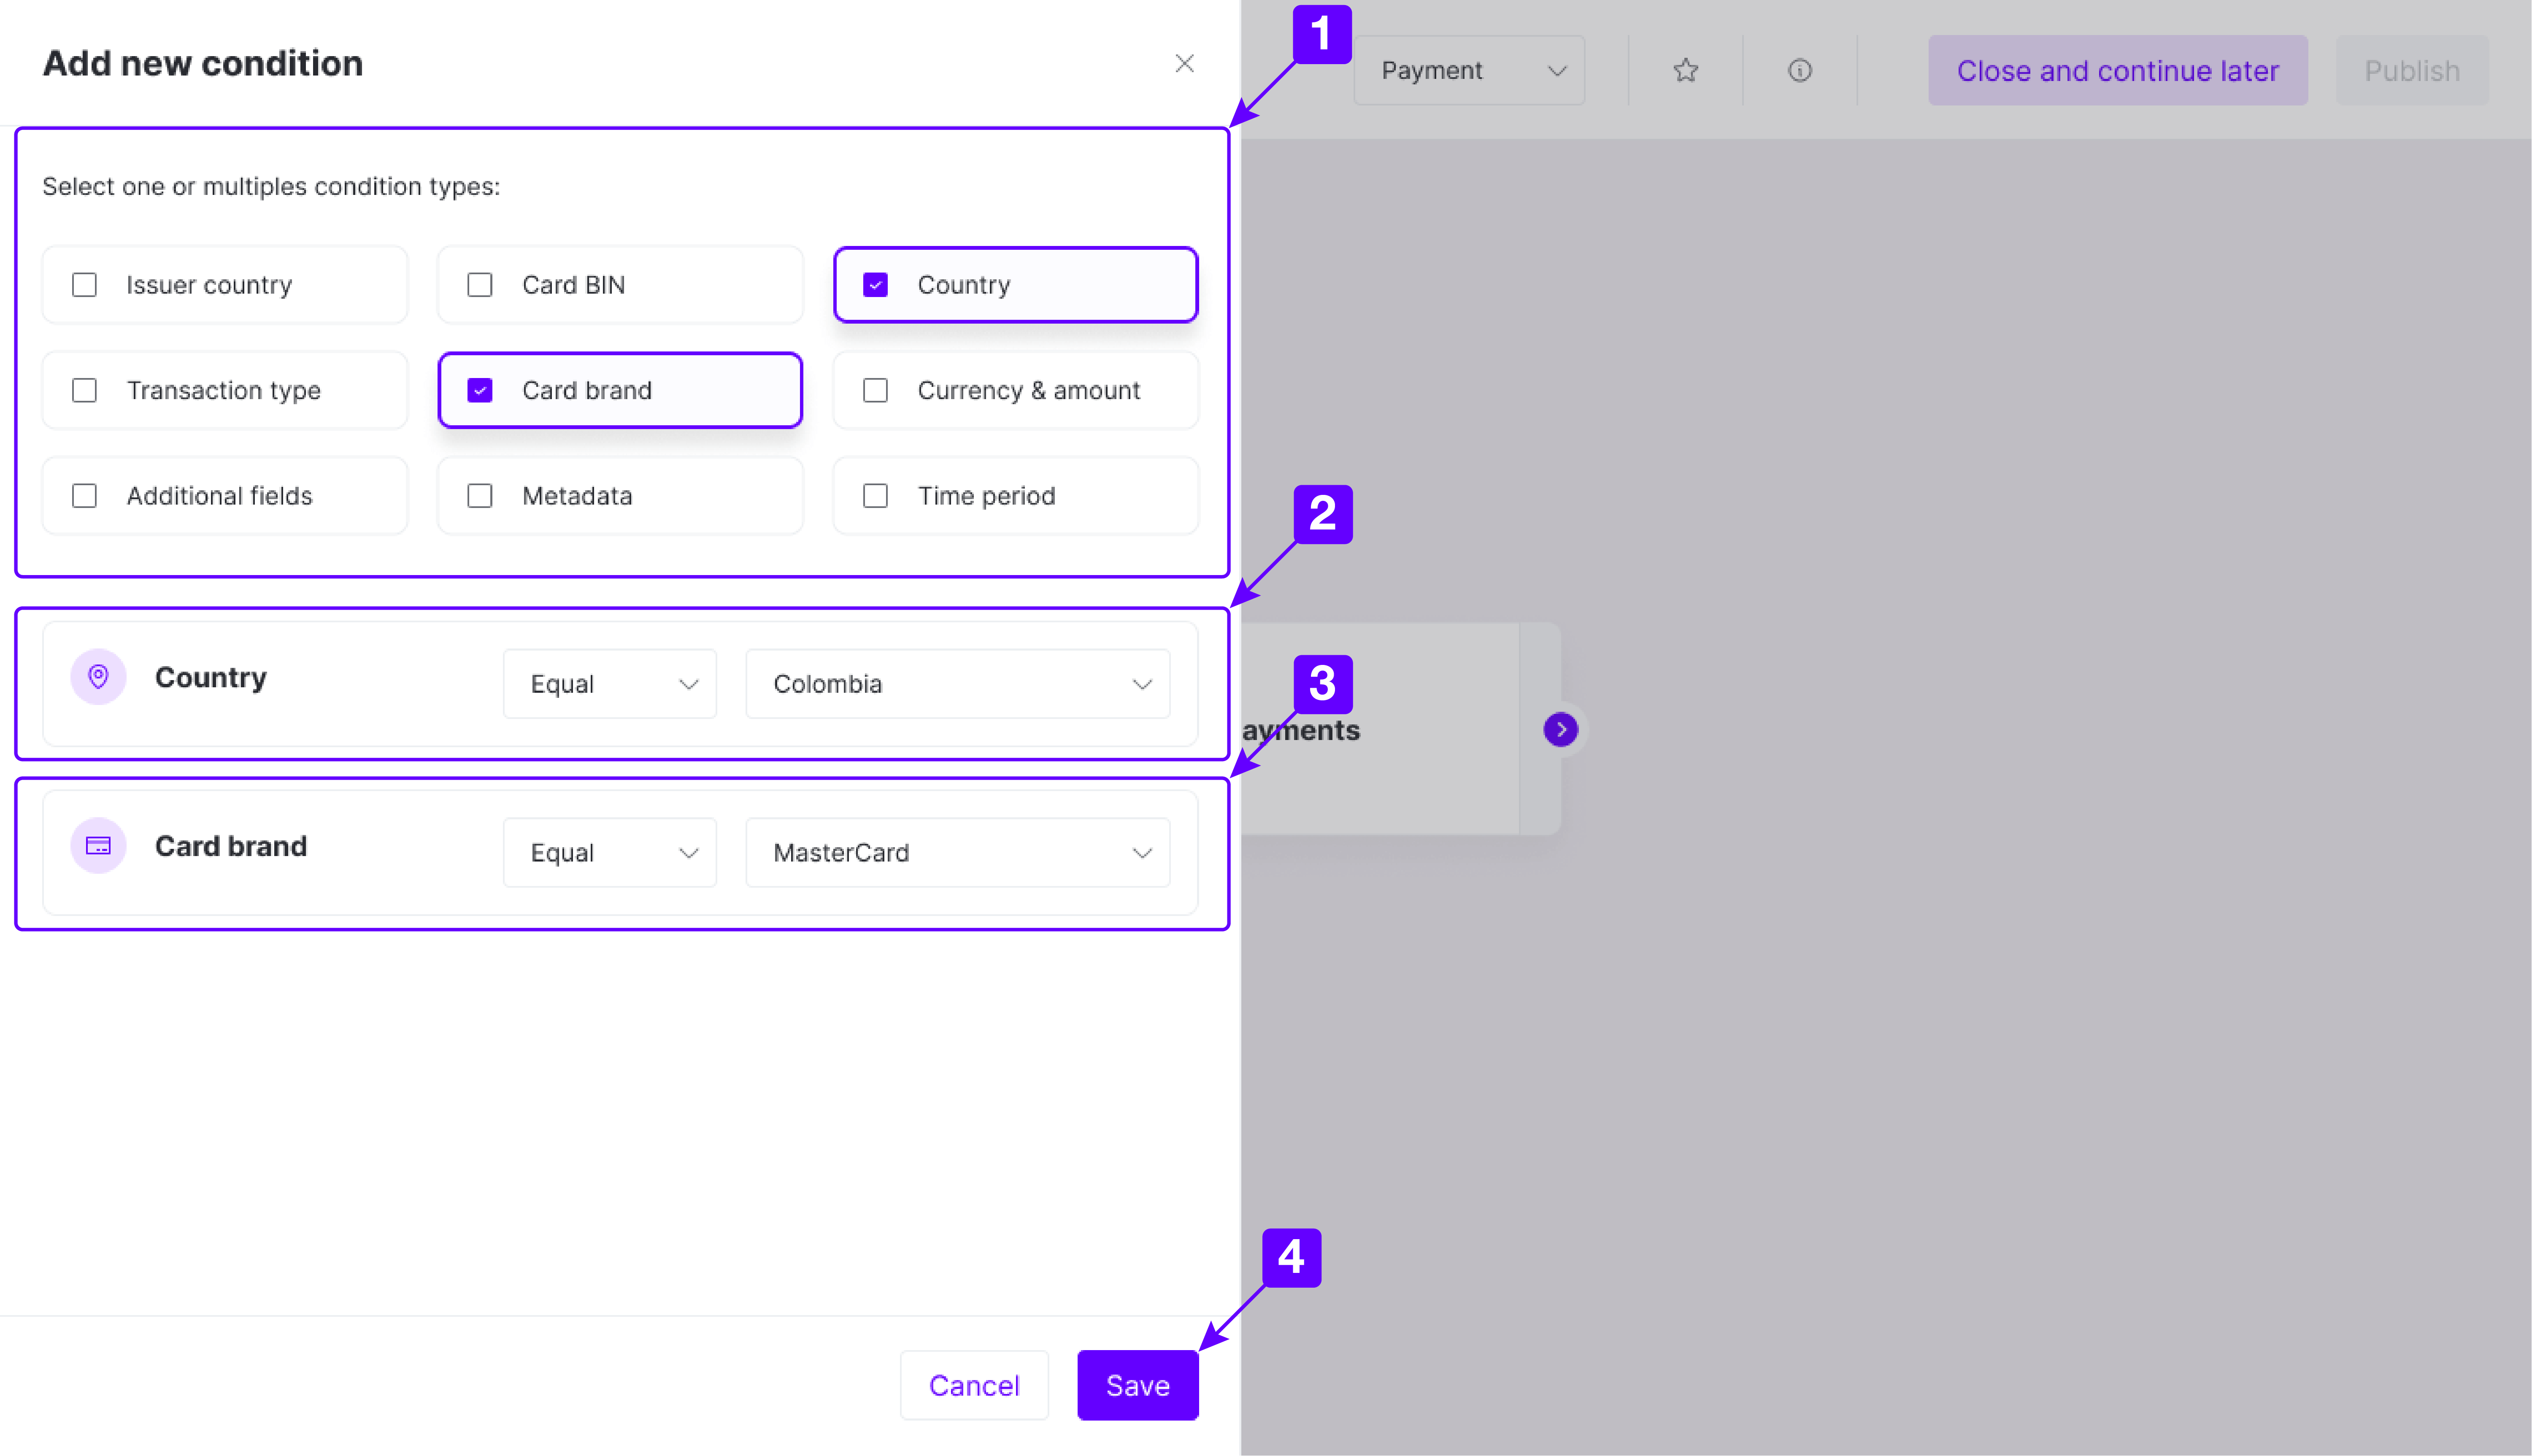
- When adding a new condition, you can select several condition types to narrow route usage. The example below uses Country and Card brand as conditions. For each condition, you need to define the values accepted. In the example below, the route will be triggered when the payment is from Colombia using a card with the MasterCard brand. After defining the conditions, click on the Save button.
- The new condition will appear on the screen. Now you can click on the + button to add further steps to the payment process route. Click on the Add step arrow to show the available connections.

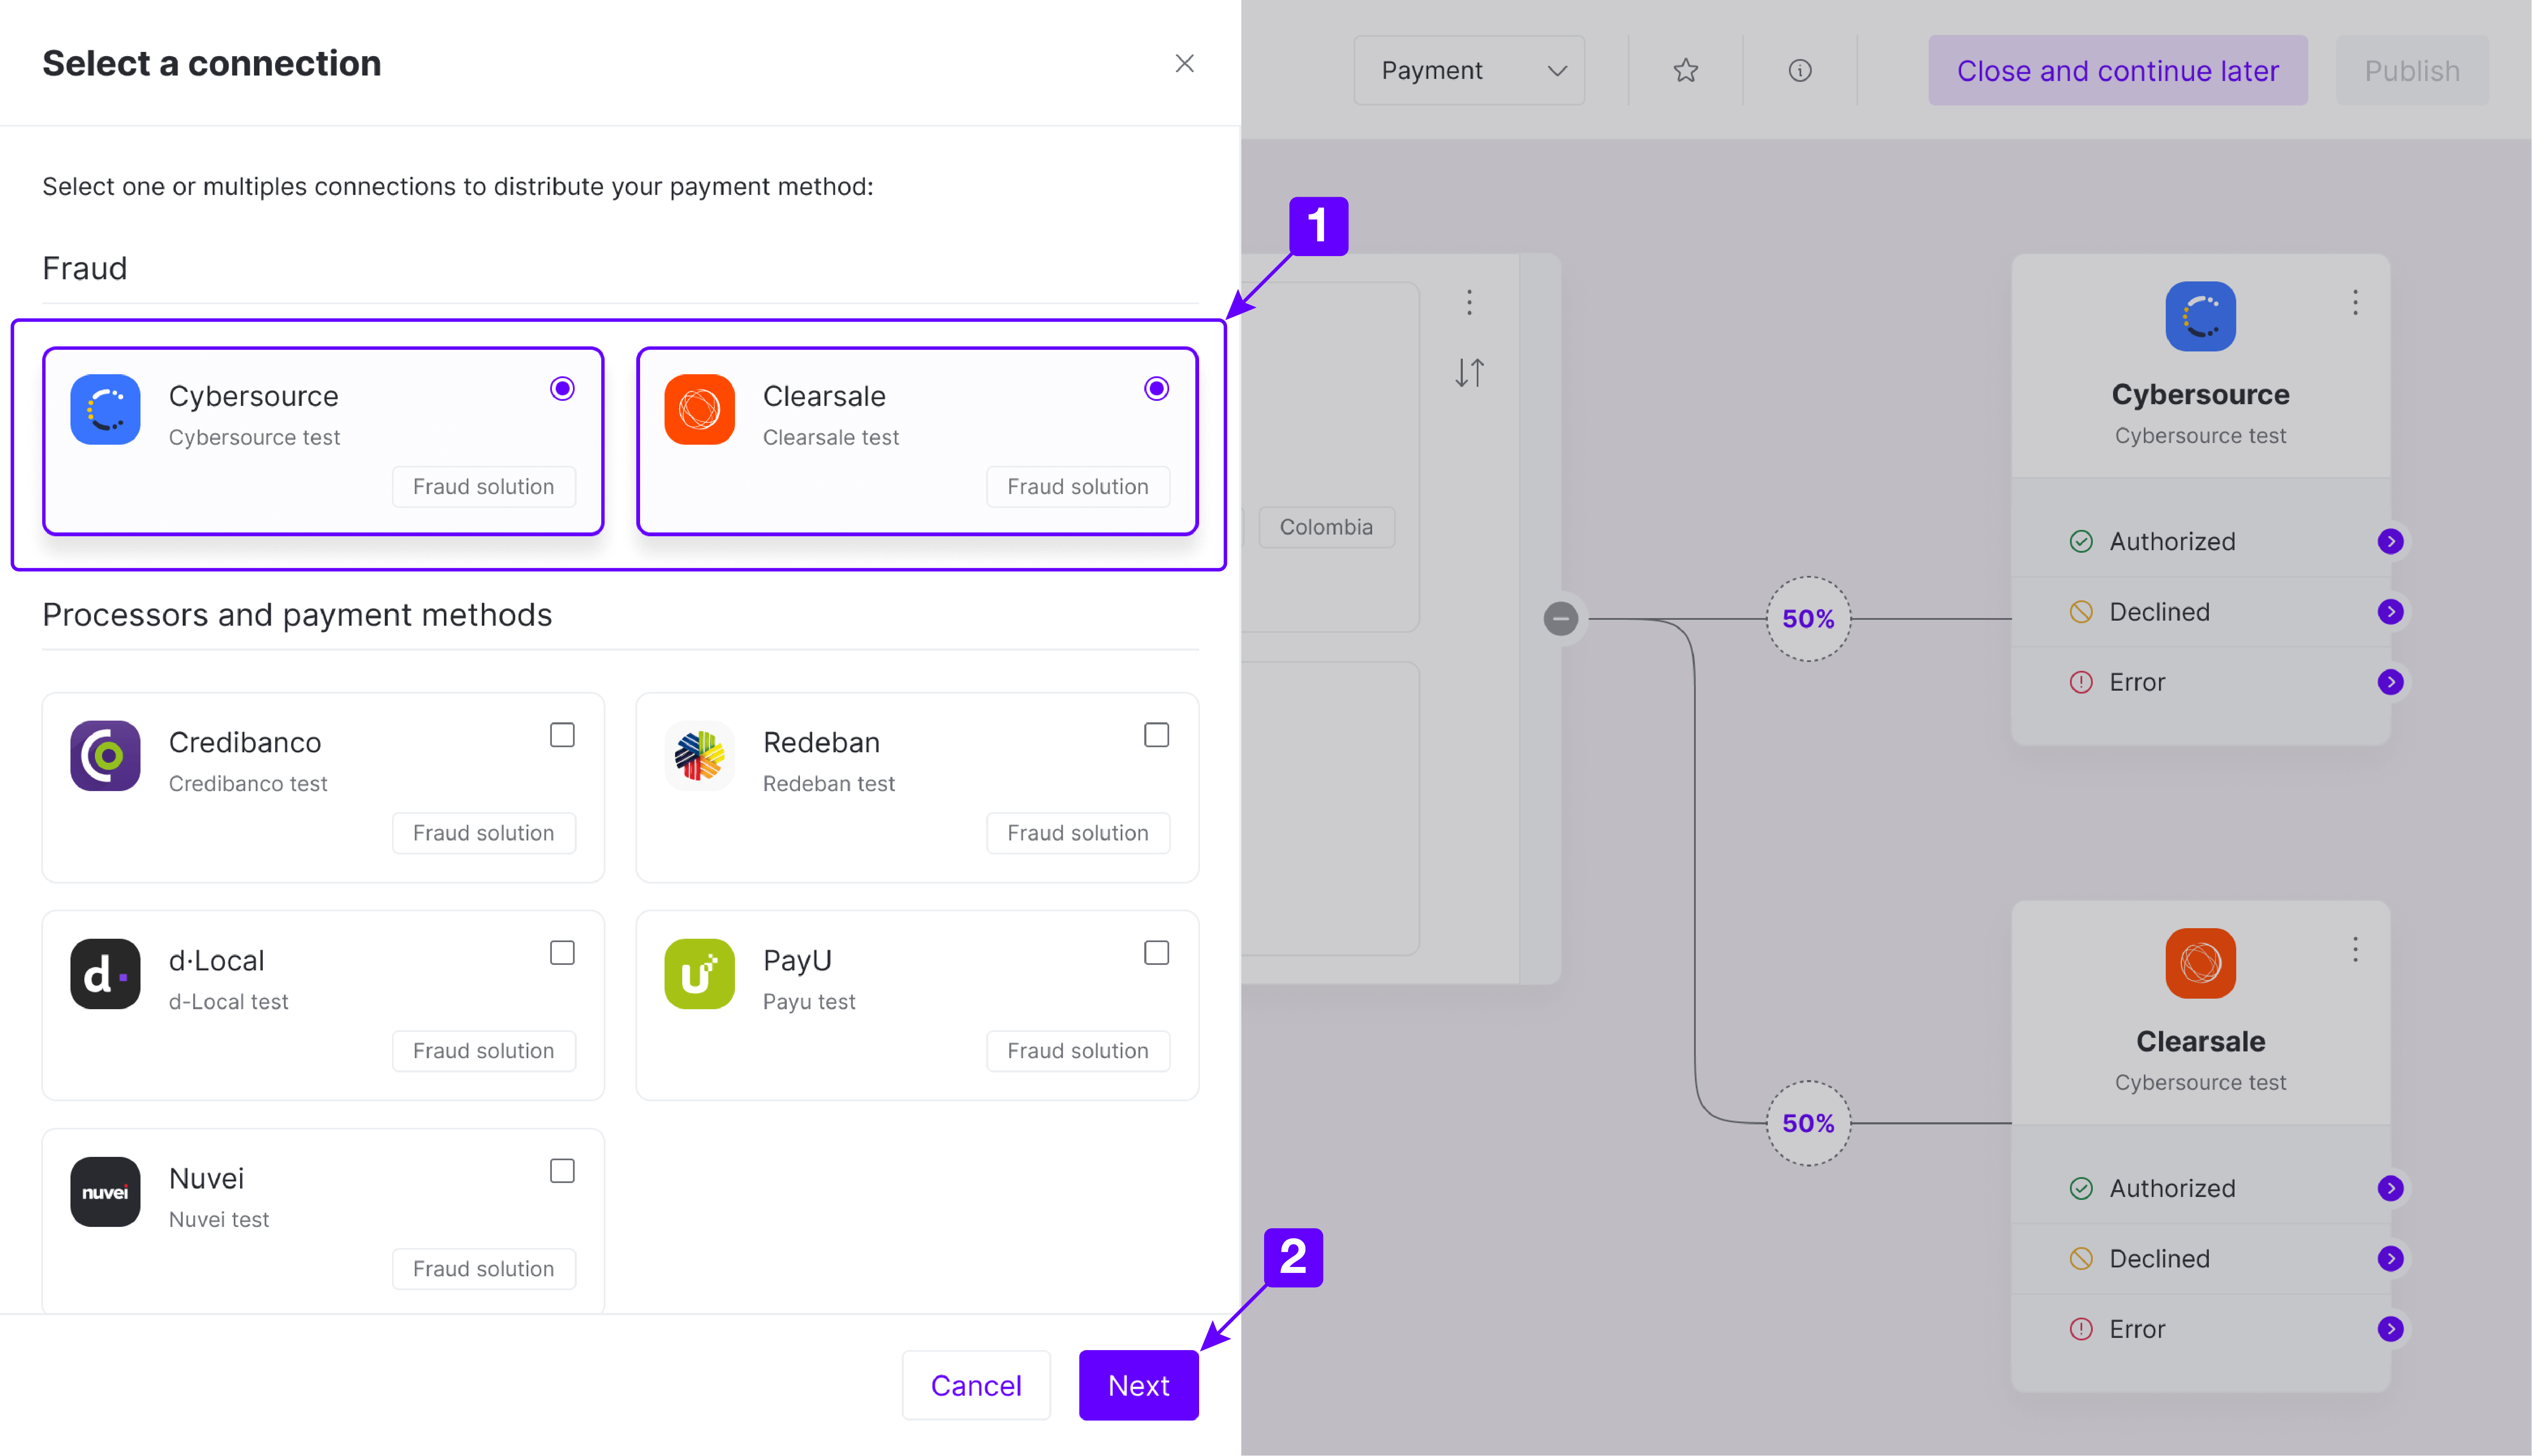
- After clicking on Add step, a panel will show up presenting the available connections. You will find a list of Fraud, Processors, Payment Methods, and Acquirers. Select the necessary connections to distribute your payments and click on Next. In the example, both Fraud solutions were selected.
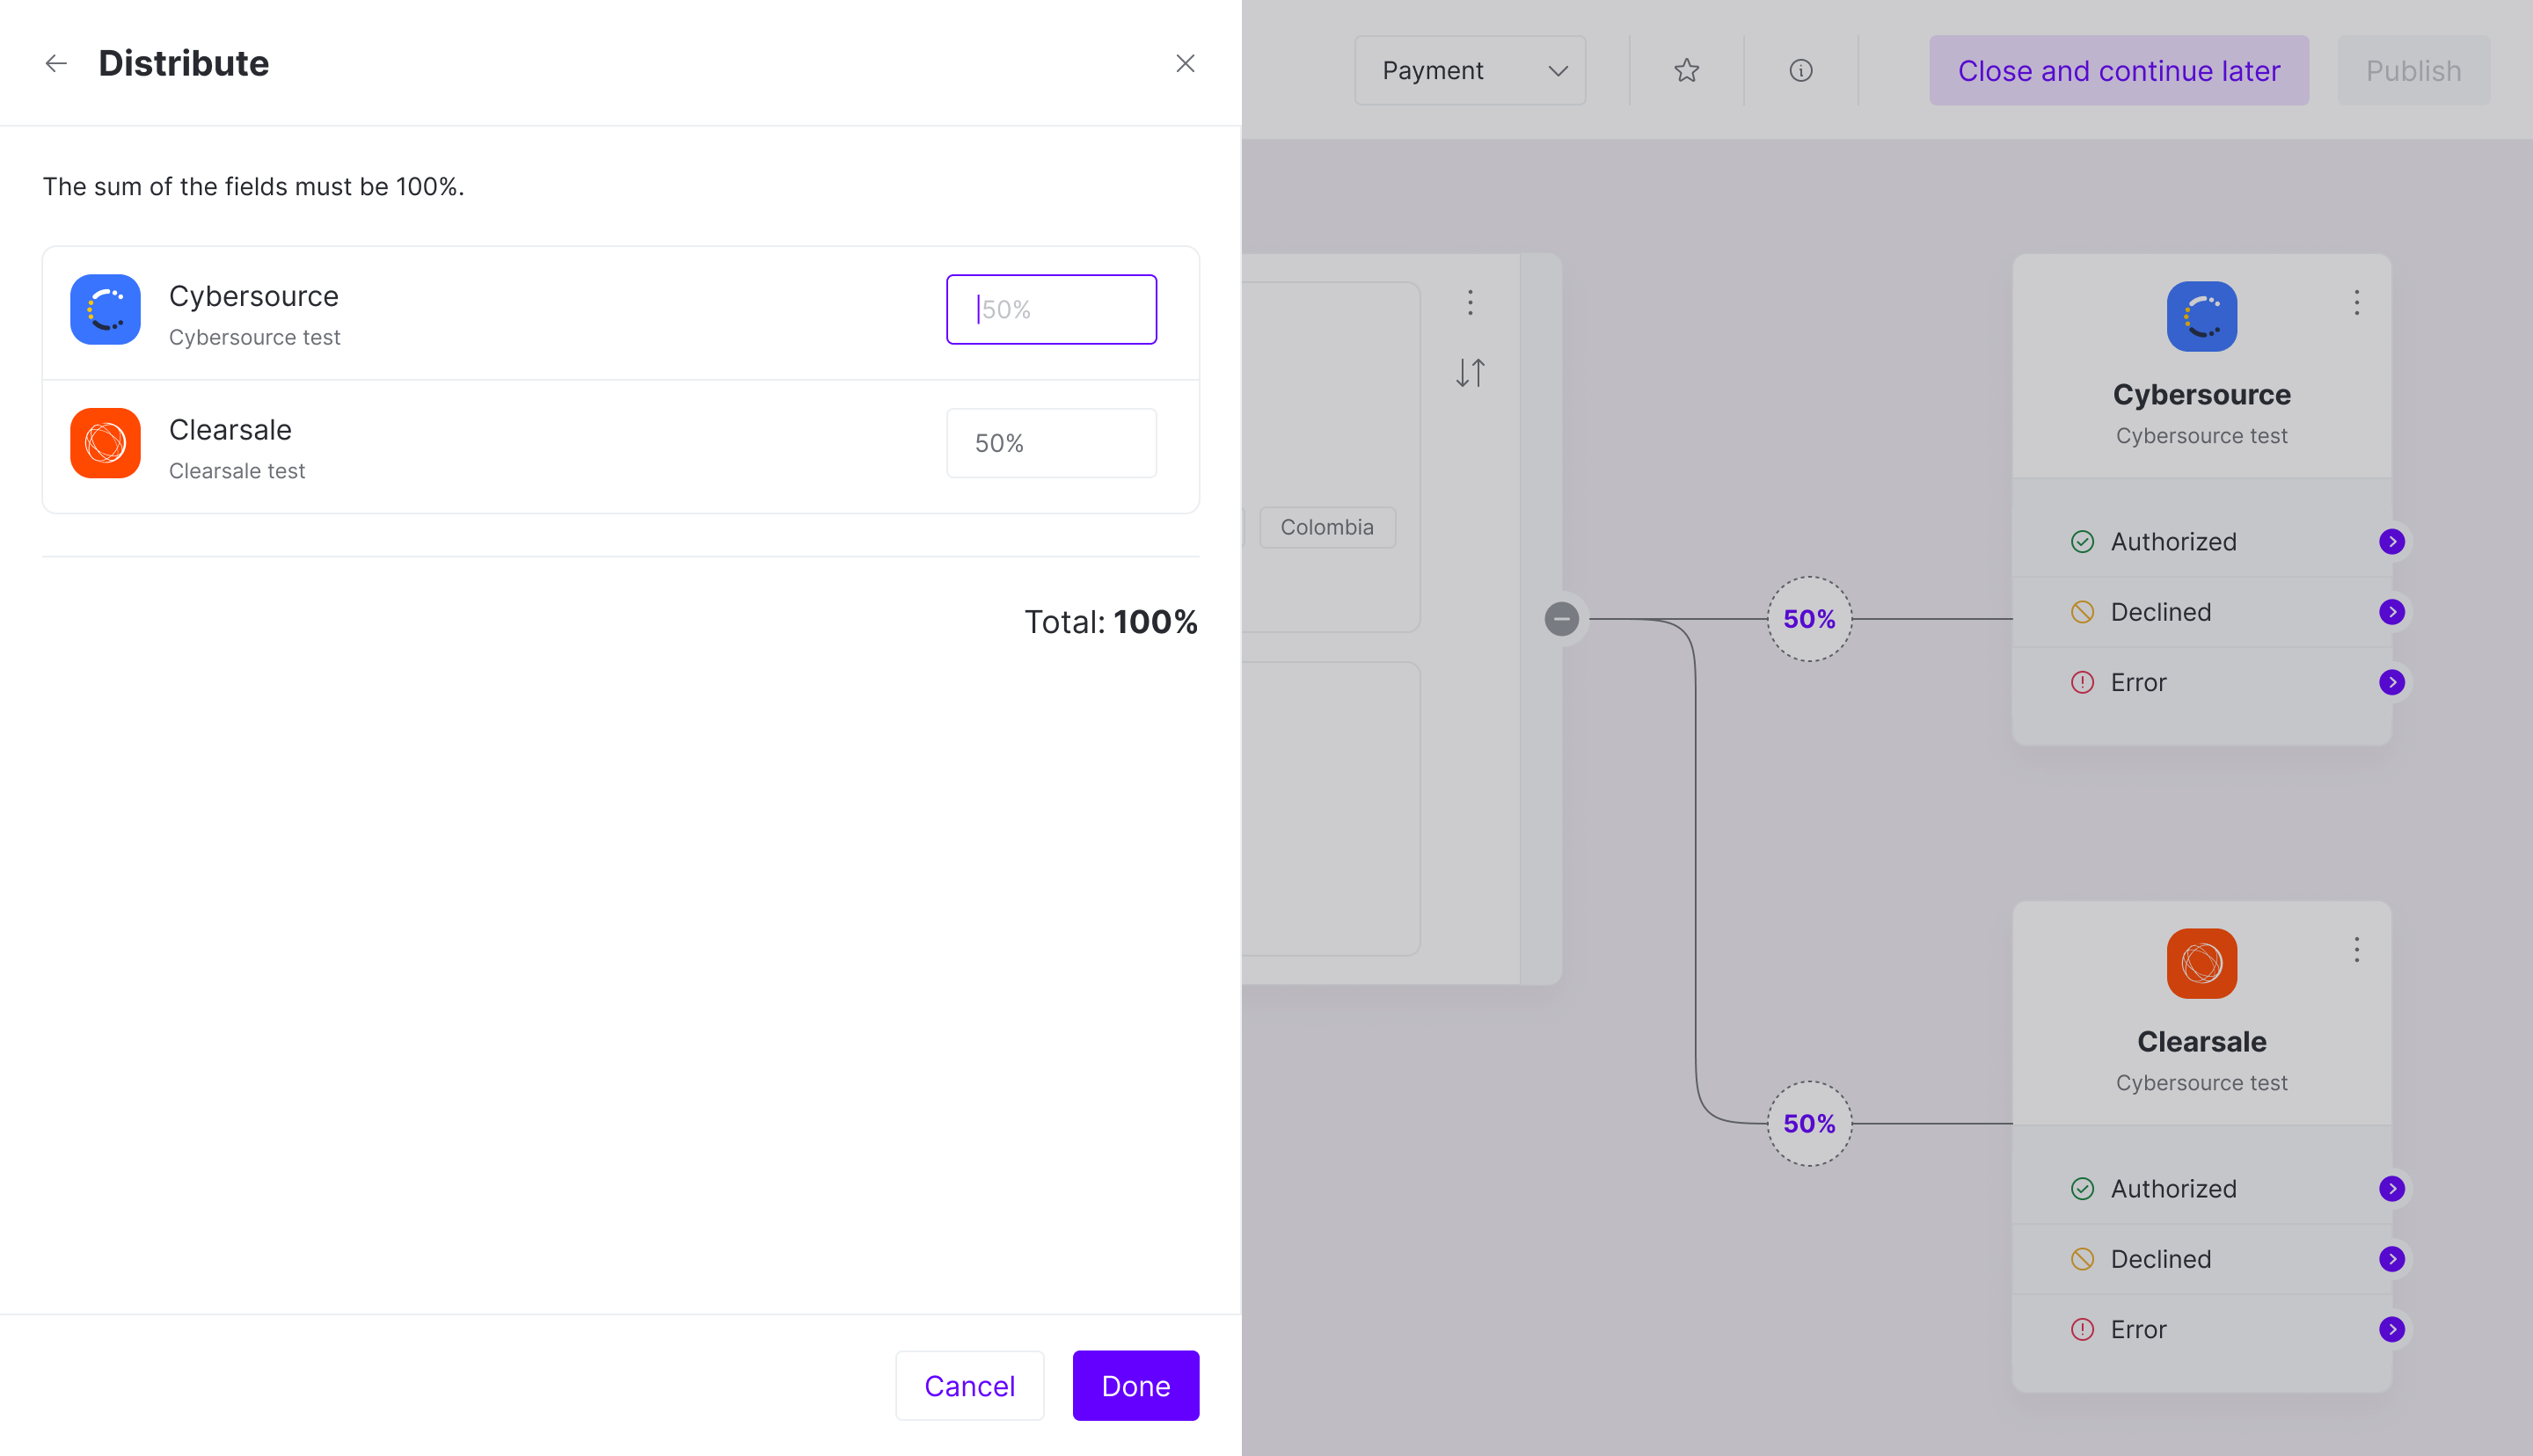
- Then, you need to define the percentage distribution between the selected connections. In the example, 50% of payment data will be validated using Cybersource, and the other 50% will be validated using ClearSale. After defining the distribution, click on Done.
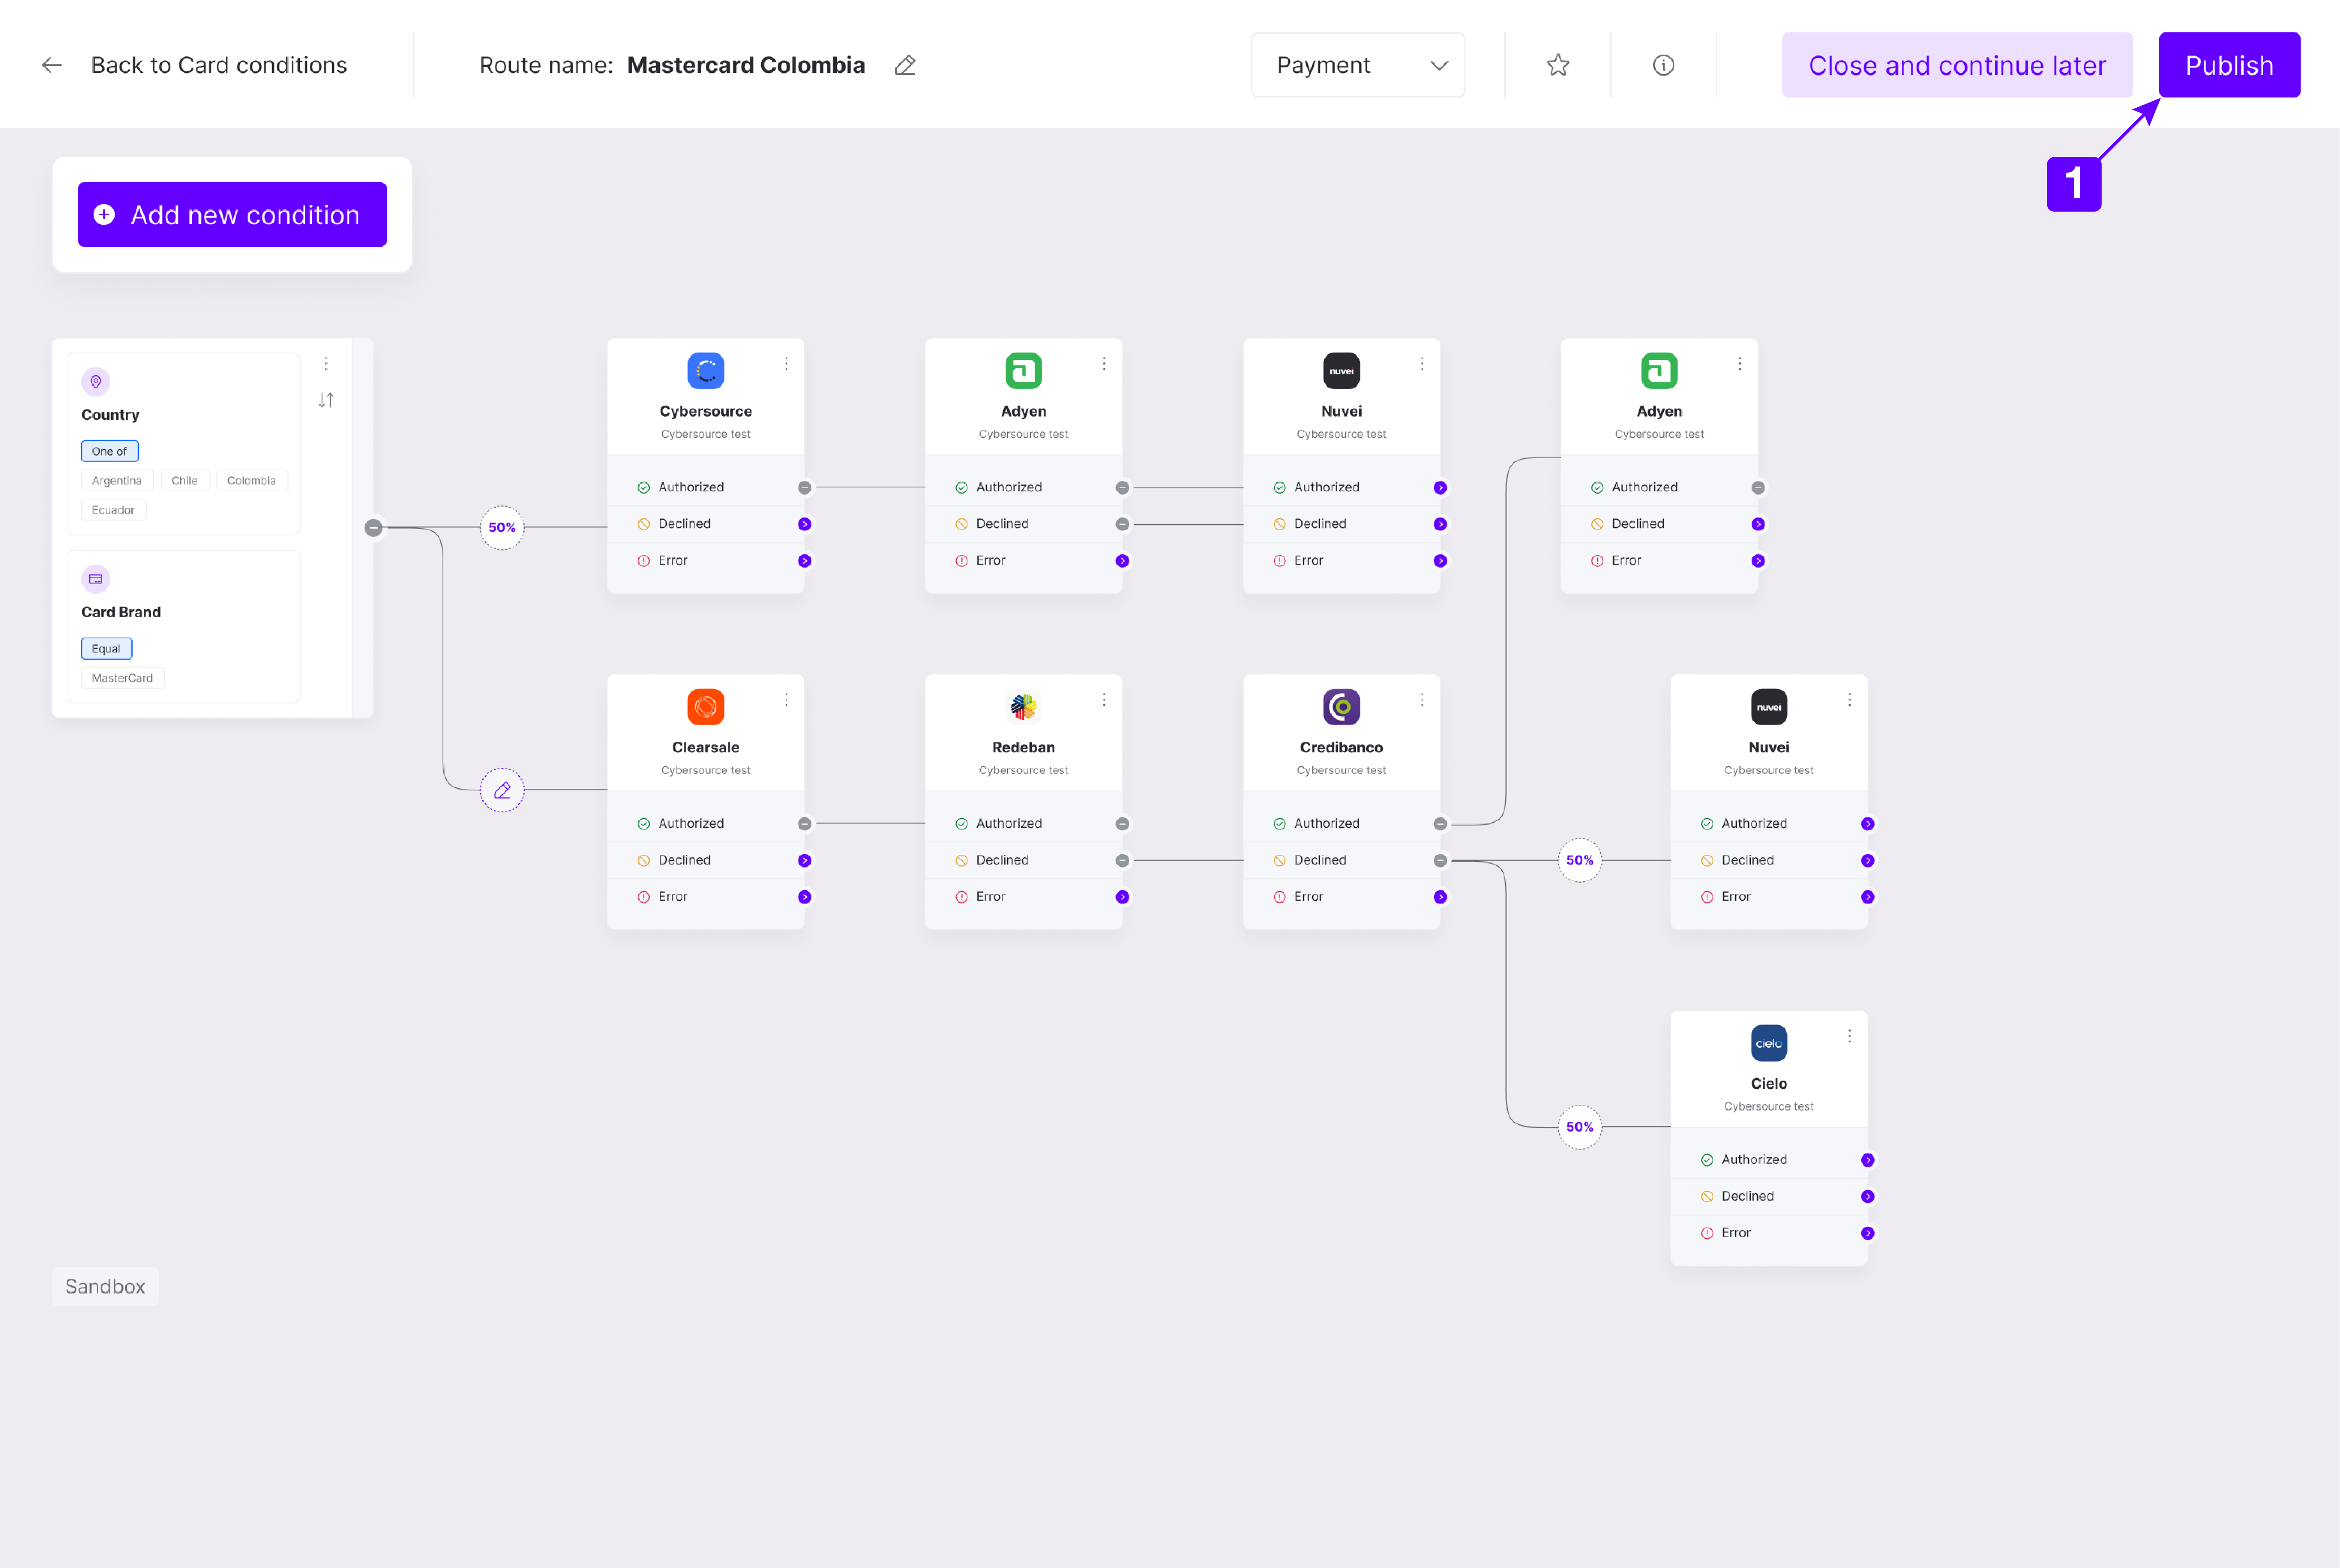
- After configuring a connection, it will appear on your screen, providing paths for each possible case: Authorized, Declined, and Error. New steps can be connected to each case to build a complete routing that meets your demands. Below you will find an example of a complete route. After adding all steps of the payment process route, you can publish it using the Publish button, making it available for the respective payment method. Alternatively, you can click on the Close and continue later to save the route as a draft anytime.
The payment method is moved to the Published tab if you have published the route. When selecting the payment method, the right panel will present a list of Published and Draft routes. You can favorite, edit, and clone routes in this panel.
One payment method can have several routes active to cover all your necessities. The use of each route will depend on the conditions you define when creating a route. You can always edit or archive an existing route if a problem arises.

With the routing configured and the checkout selected, you are now ready to test a payment.