Lite SDK implementation
This page provides a step-by-step guide to implement and enable Yuno's Lite Web SDK functionality in your application.
Changelog Reference:This guide covers the current SDK version. For details on previous versions, see the changelog.
Step 1: Include the library in your project
Add the following script tag to your HTML file to include the Yuno Web SDK:
<script src="https://sdk-web.y.uno/v1.3/main.js"></script>Alternatively, you can install it via npm:
npm install @yuno-payments/sdk-webAfter completing the SDK integration, proceed with the following steps to implement the lite checkout functionality.
TypeScript LibraryIf you are using TypeScript, Yuno provides a library to see all methods available in the Yuno Web SDK.
Step 2: Initialize SDK with the public key
Create an instance of the Yuno class by providing a valid PUBLIC_API_KEY. See the credentials page for more information.
Initialize the SDK with your public API key:
const yuno = await Yuno.initialize(PUBLIC_API_KEY);Step 3: Start the checkout process
Use the yuno.startCheckout function to start the checkout process with the necessary parameters.
See the Parameters table below for all the options you can use with startCheckout.
For further customization or advanced/optional settings, see the Complementary Features section.
Parameters
The following table lists all the available parameters for the startCheckout method with descriptions:
| Parameter | Description |
|---|---|
checkoutSession | Refers to the current payment's checkout session. Example: 438413b7-4921-41e4-b8f3-28a5a0141638 |
elementSelector | The element where the SDK will be mounted. |
country_code | Determines the country for which the payment process is being configured. See Country coverage for supported countries and their codes. |
language | Defines the language for payment forms. Options:
|
onLoading | Callback function to receive notifications about server calls or loading events during the payment process. |
showLoading | Controls visibility of Yuno loading/spinner page during payment process. Default: true. |
issuersFormEnable | Enables the issuer's form. Default: true. |
showPaymentStatus | Shows Yuno Payment Status page. Can be used when continuing a payment. Default: true. |
card.isCreditCardProcessingOnly | Optional. When true, ensures all card transactions are processed as credit only. Useful in markets where cards can act as both credit and debit. |
yuno.startCheckout({
  checkoutSession: "438413b7-4921-41e4-b8f3-28a5a0141638",
  elementSelector: "#root",
  country_code: "FR",
  language: "fr",
  showLoading: true,
  issuersFormEnable: true,
  showPaymentStatus: true,
  onLoading: (args) => {
    console.log(args);
  },
  async yunoCreatePayment(oneTimeToken) {
    await createPayment({ oneTimeToken, checkoutSession });
    yuno.continuePayment({ showPaymentStatus: true });
  },
});
Transaction TypesPayments can be initiated by the customer (CIT) or by the merchant (MIT). You can find more information about their characteristics in Stored credentials.
The step-by-step on this page refers to a customer-initiated transaction without the recurrence option. Typically, it's used in one-time online purchases, in-store purchases, ATM withdrawals, etc.
Step 4: Mount the SDK
Mount the SDK to present the checkout based on the payment method selected by your customer. Remember, when using the Lite SDK, you're responsible for displaying the payment methods and capturing the customer's selection. See Lite SDK (Payment) for additional information.
Use the yuno.mountCheckoutLite() function to display the checkout for the selected payment method:
yuno.mountCheckoutLite({
  paymentMethodType: PAYMENT_METHOD_TYPE,
  vaultedToken: VAULTED_TOKEN,
});
After mounting the SDK, the selected payment method flow will start automatically.
Step 5: Initiate the payment process
Call yuno.startPayment() to initiate the payment flow after the user selects a payment method:
const PayButton = document.querySelector("#button-pay");

PayButton.addEventListener("click", () => {
  yuno.startPayment();
});
Step 6: Get the OTT (one-time token)
After the customer fills out the requested data in Yuno's payment forms, the SDK provides the one-time token. The configuration function yunoCreatePayment(oneTimeToken) is then triggered with the one-time token.
yunoCreatePayment(oneTimeToken);You can also use tokenWithInformation to receive additional information provided by the customer in the checkout, such as installments or document type/number:
yunoCreatePayment(oneTimeToken, tokenWithInformation);
Loader ManagementThe merchant is responsible for managing the loader. Yuno provides a default loader option, but merchants may implement their own loader if preferred. In that case, they are responsible for making the necessary configurations.
Step 7: Create the Payment
After completing the previous steps, proceed to create a payment. Back-to-back payment creation must be performed using the Create Payment endpoint. The merchant's backend should call this endpoint to create the payment in Yuno using the one-time token and checkout session.
Complete the IntegrationAfter Step 7, you have successfully implemented the basic payment flow. To test your integration, create a test payment using the checkout session and one-time token. For additional features and advanced configurations, see the Complementary Features section below.
ContinuePaymentmethodAfter creating a payment, Yuno requires you to integrate the
continuePaymentmethod from the SDK. This is necessary because some asynchronous payment methods require additional customer actions to complete the process. The API response will indicate this scenario by setting thesdk_action_requiredfield to true. When this occurs, you must callyuno.continuePayment(), which will automatically present the necessary screens to the customer, allowing them to complete the payment flow without requiring you to handle each case manually.
Complementary features
Yuno Web SDK provides additional services and configurations you can use to improve customers' experience:
Form loader
Control the use of the loader:
| Parameter | Description |
|---|---|
showLoading | You can hide or show the Yuno loading/spinner page. Enabling this option ensures that the loading component remains displayed until either the hideLoader() or continuePayment() function is called. The default value is true. |
yuno.startCheckout({
  showLoading: true,
});
Issuer's form
| Parameter | Description |
|---|---|
issuersFormEnable | Configure the SDK to enable the issuer's form (bank list): |
yuno.startCheckout({
  issuersFormEnable: true,
});
Render mode
Enhanced Render Mode in Lite SDK v2.0.0The enhanced Lite SDK v2.0 provides advanced render mode capabilities that embed Yuno's checkout forms directly within your interface. This gives you complete control over the checkout journey, including loading, status, and payment input screens, with full visual customization and seamless UX integration.
Parameter | Description |
|---|---|
| This optional parameter determines how payment forms are displayed. |
| |
| |
| Required when |
| |
| |
| |
|
yuno.startCheckout({
  renderMode: {
    type: "modal",
    elementSelector: {
      apmForm: "#form-element",
      actionForm: "#action-form-element",
    },
  },
});
Card form configurations
Parameter | Description |
|---|---|
| Define specific settings for the credit card form: |
| |
| |
| |
|
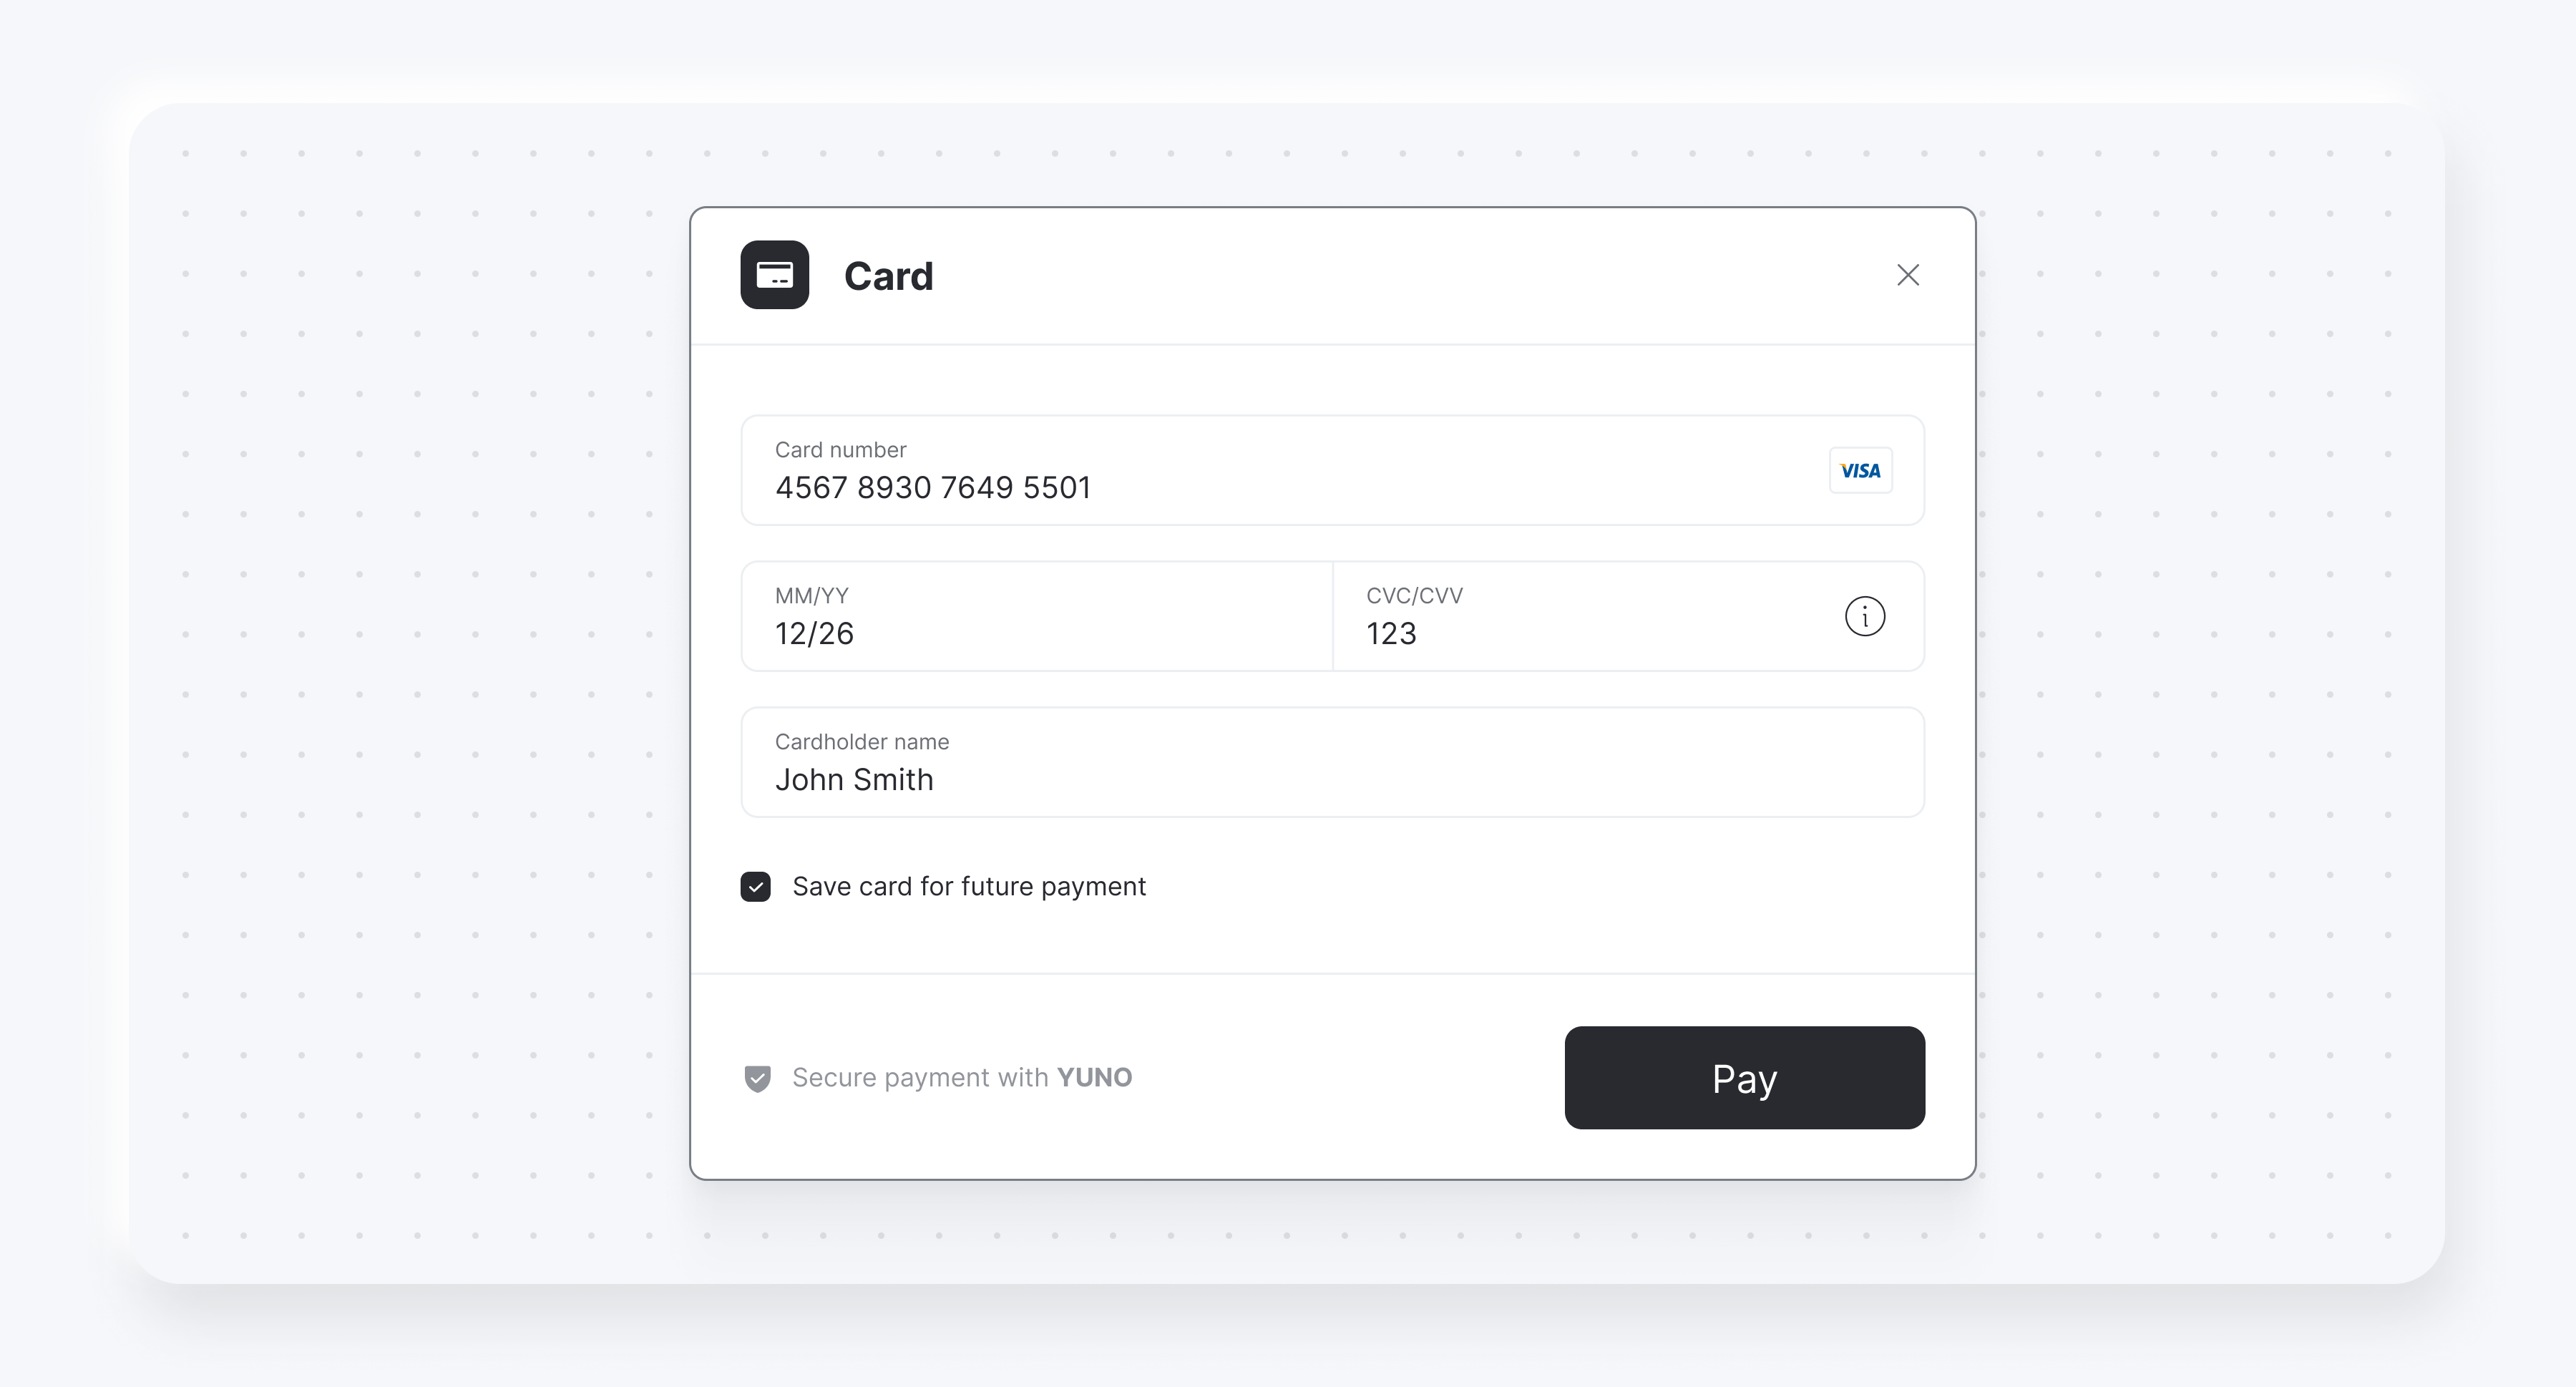
Save card for future payments
You can display a checkbox for saving or enrolling cards using cardSaveEnable: true. The following examples show the checkbox for both card form renders:
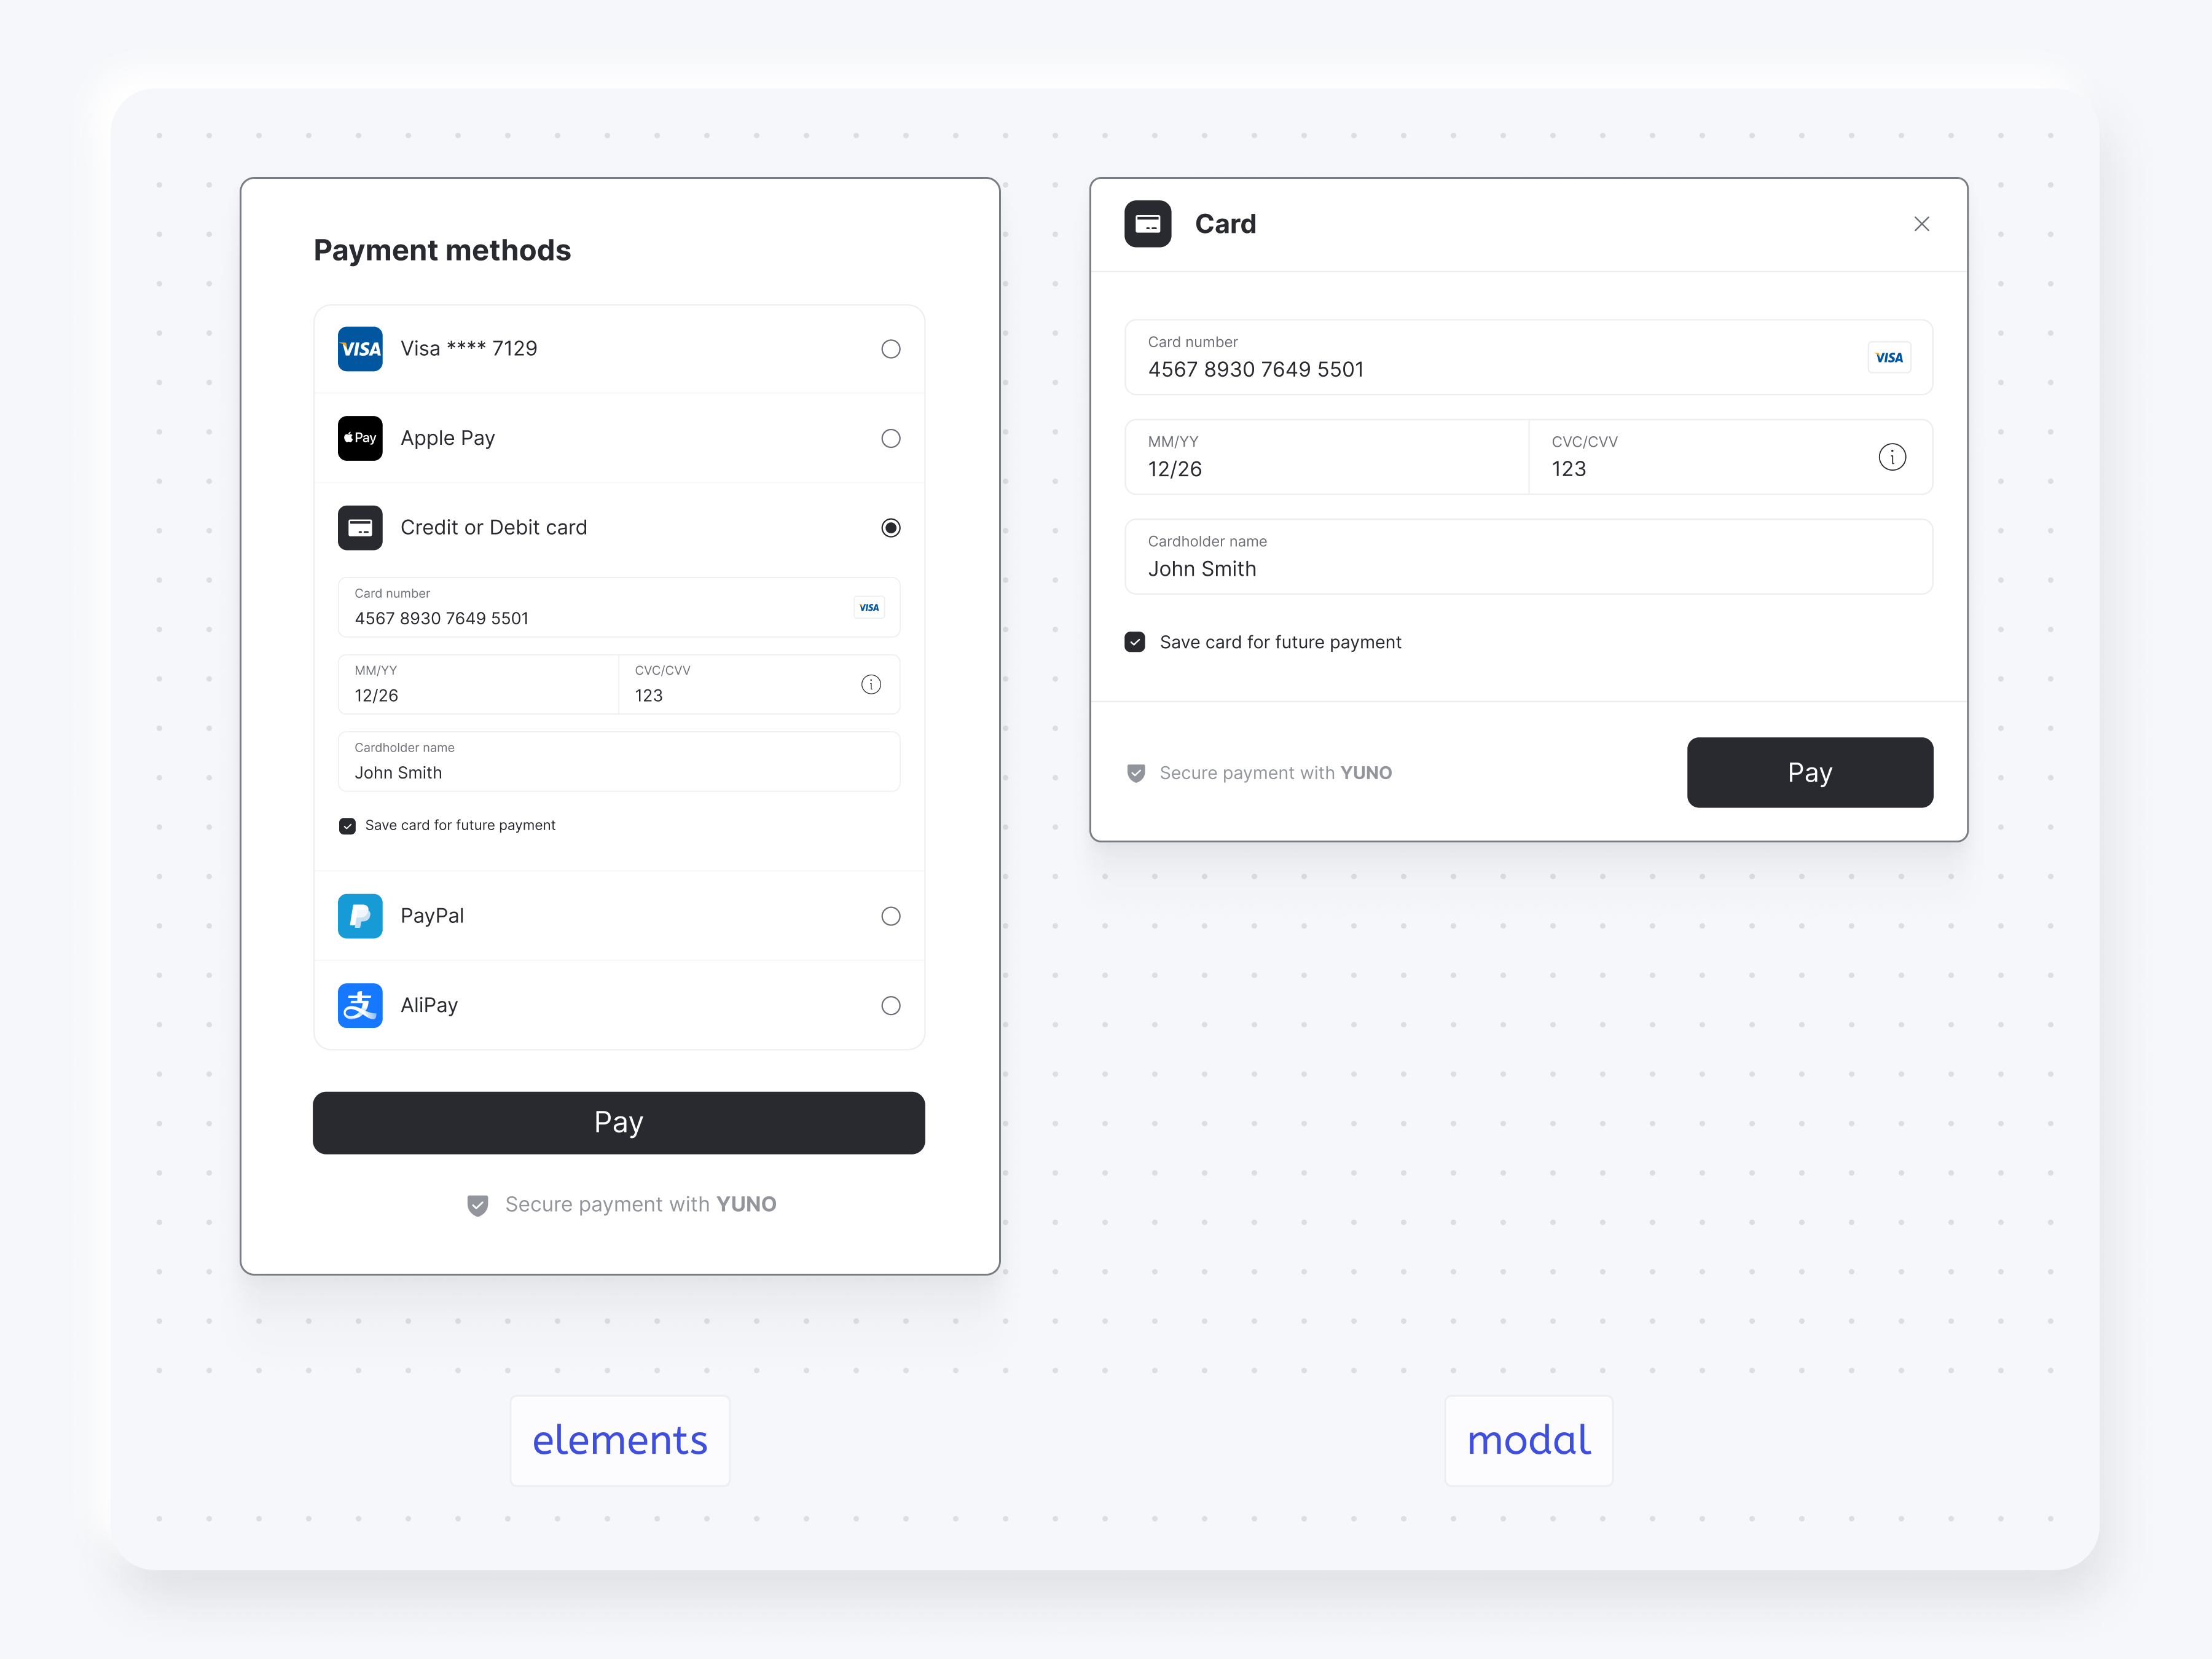
Rendering modes
The following screenshots show the difference between:
- Render modes
modalandelementsfor the payment method list - Render modes
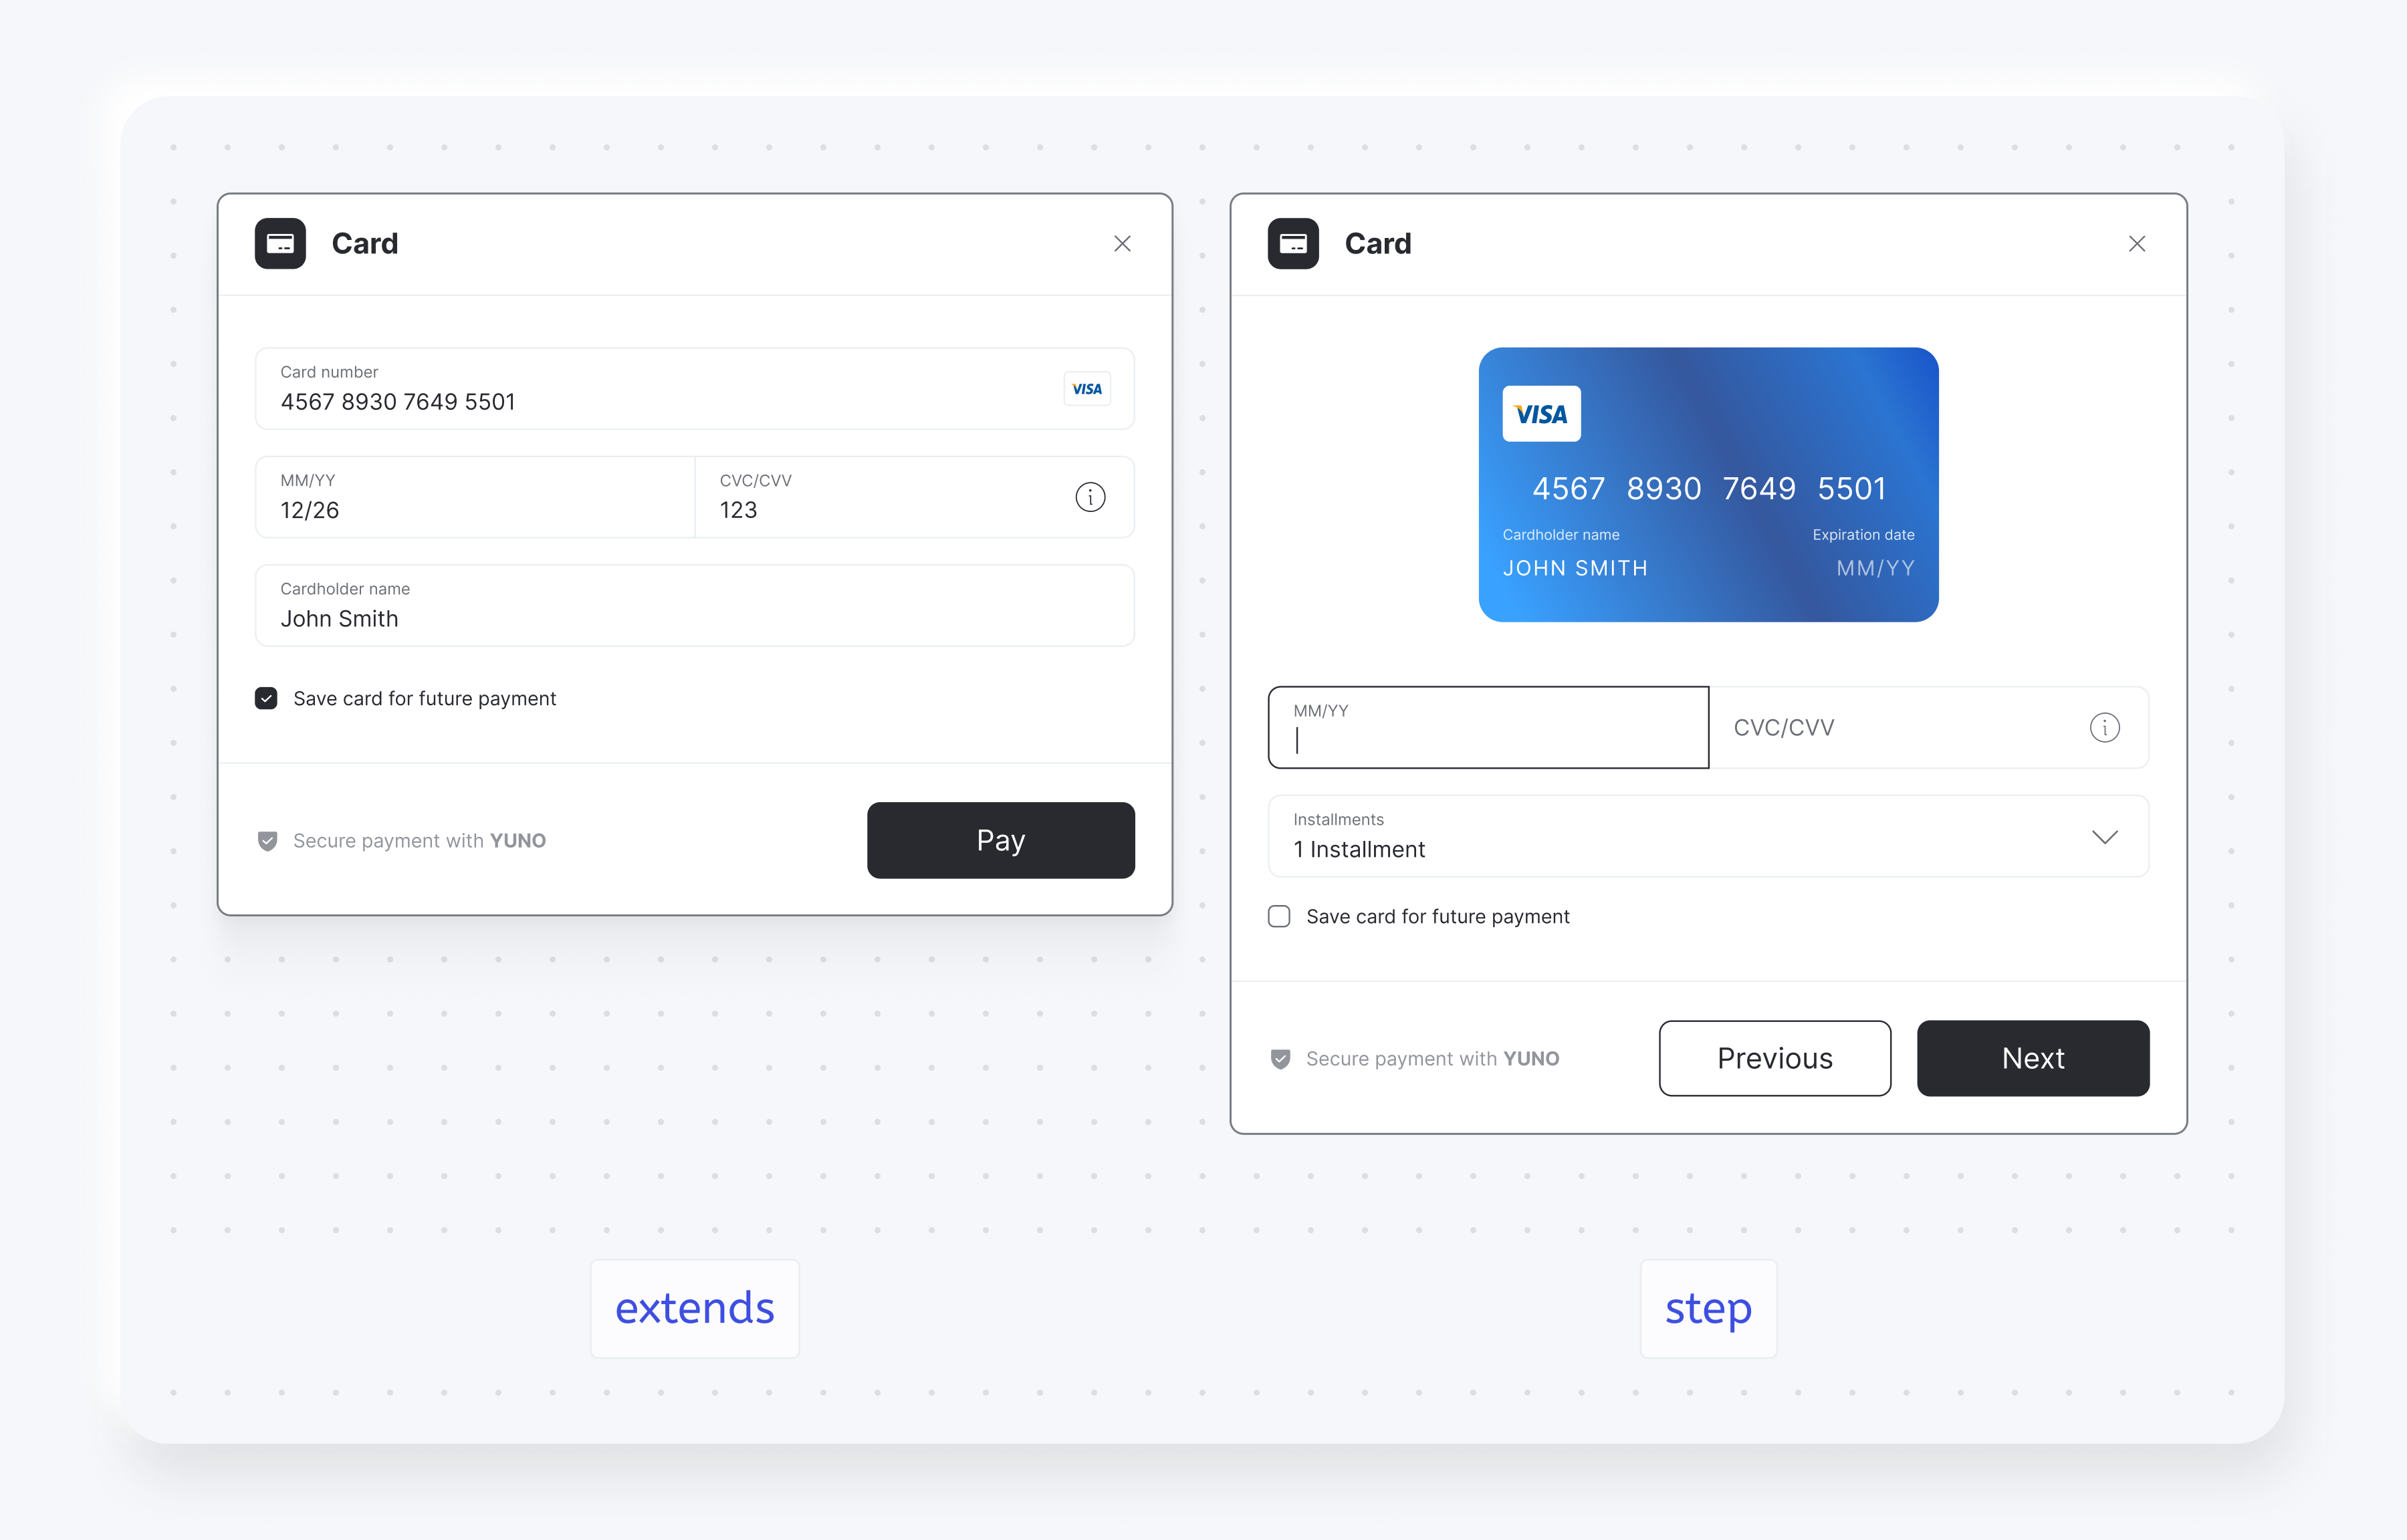
stepandextendsfor the credit card form
You can also choose one of the render options for the card form, step and extends:
Text payment form buttons
| Parameter | Description |
|---|---|
texts | Provide custom text for payment form buttons to match your application's language or branding: |
yuno.startCheckout({
  texts: {
    customerForm?: {
      submitButton?: string;
    }
    paymentOtp?: {
      sendOtpButton?: string;
    }
  }
})
Persist credit card form to retry payments
If a transaction is rejected, you can use the credit card form to retry a payment after the customer has entered the credit card details. To do this:
- Add the following parameter while initializing the SDK to persist the credit card form after the one-time use token is created:
yuno.startCheckout({ automaticallyUnmount: false, }); - If the transaction is rejected:
- Execute the method
yuno.notifyError()to delete the previously entered CVV for the first transaction. - Create a new checkout session and update the SDK with the new one by executing
yuno.updateCheckoutSession(checkoutsession)
- Execute the method
- Continue with the new checkout and one-time use token with the regular payment flow.
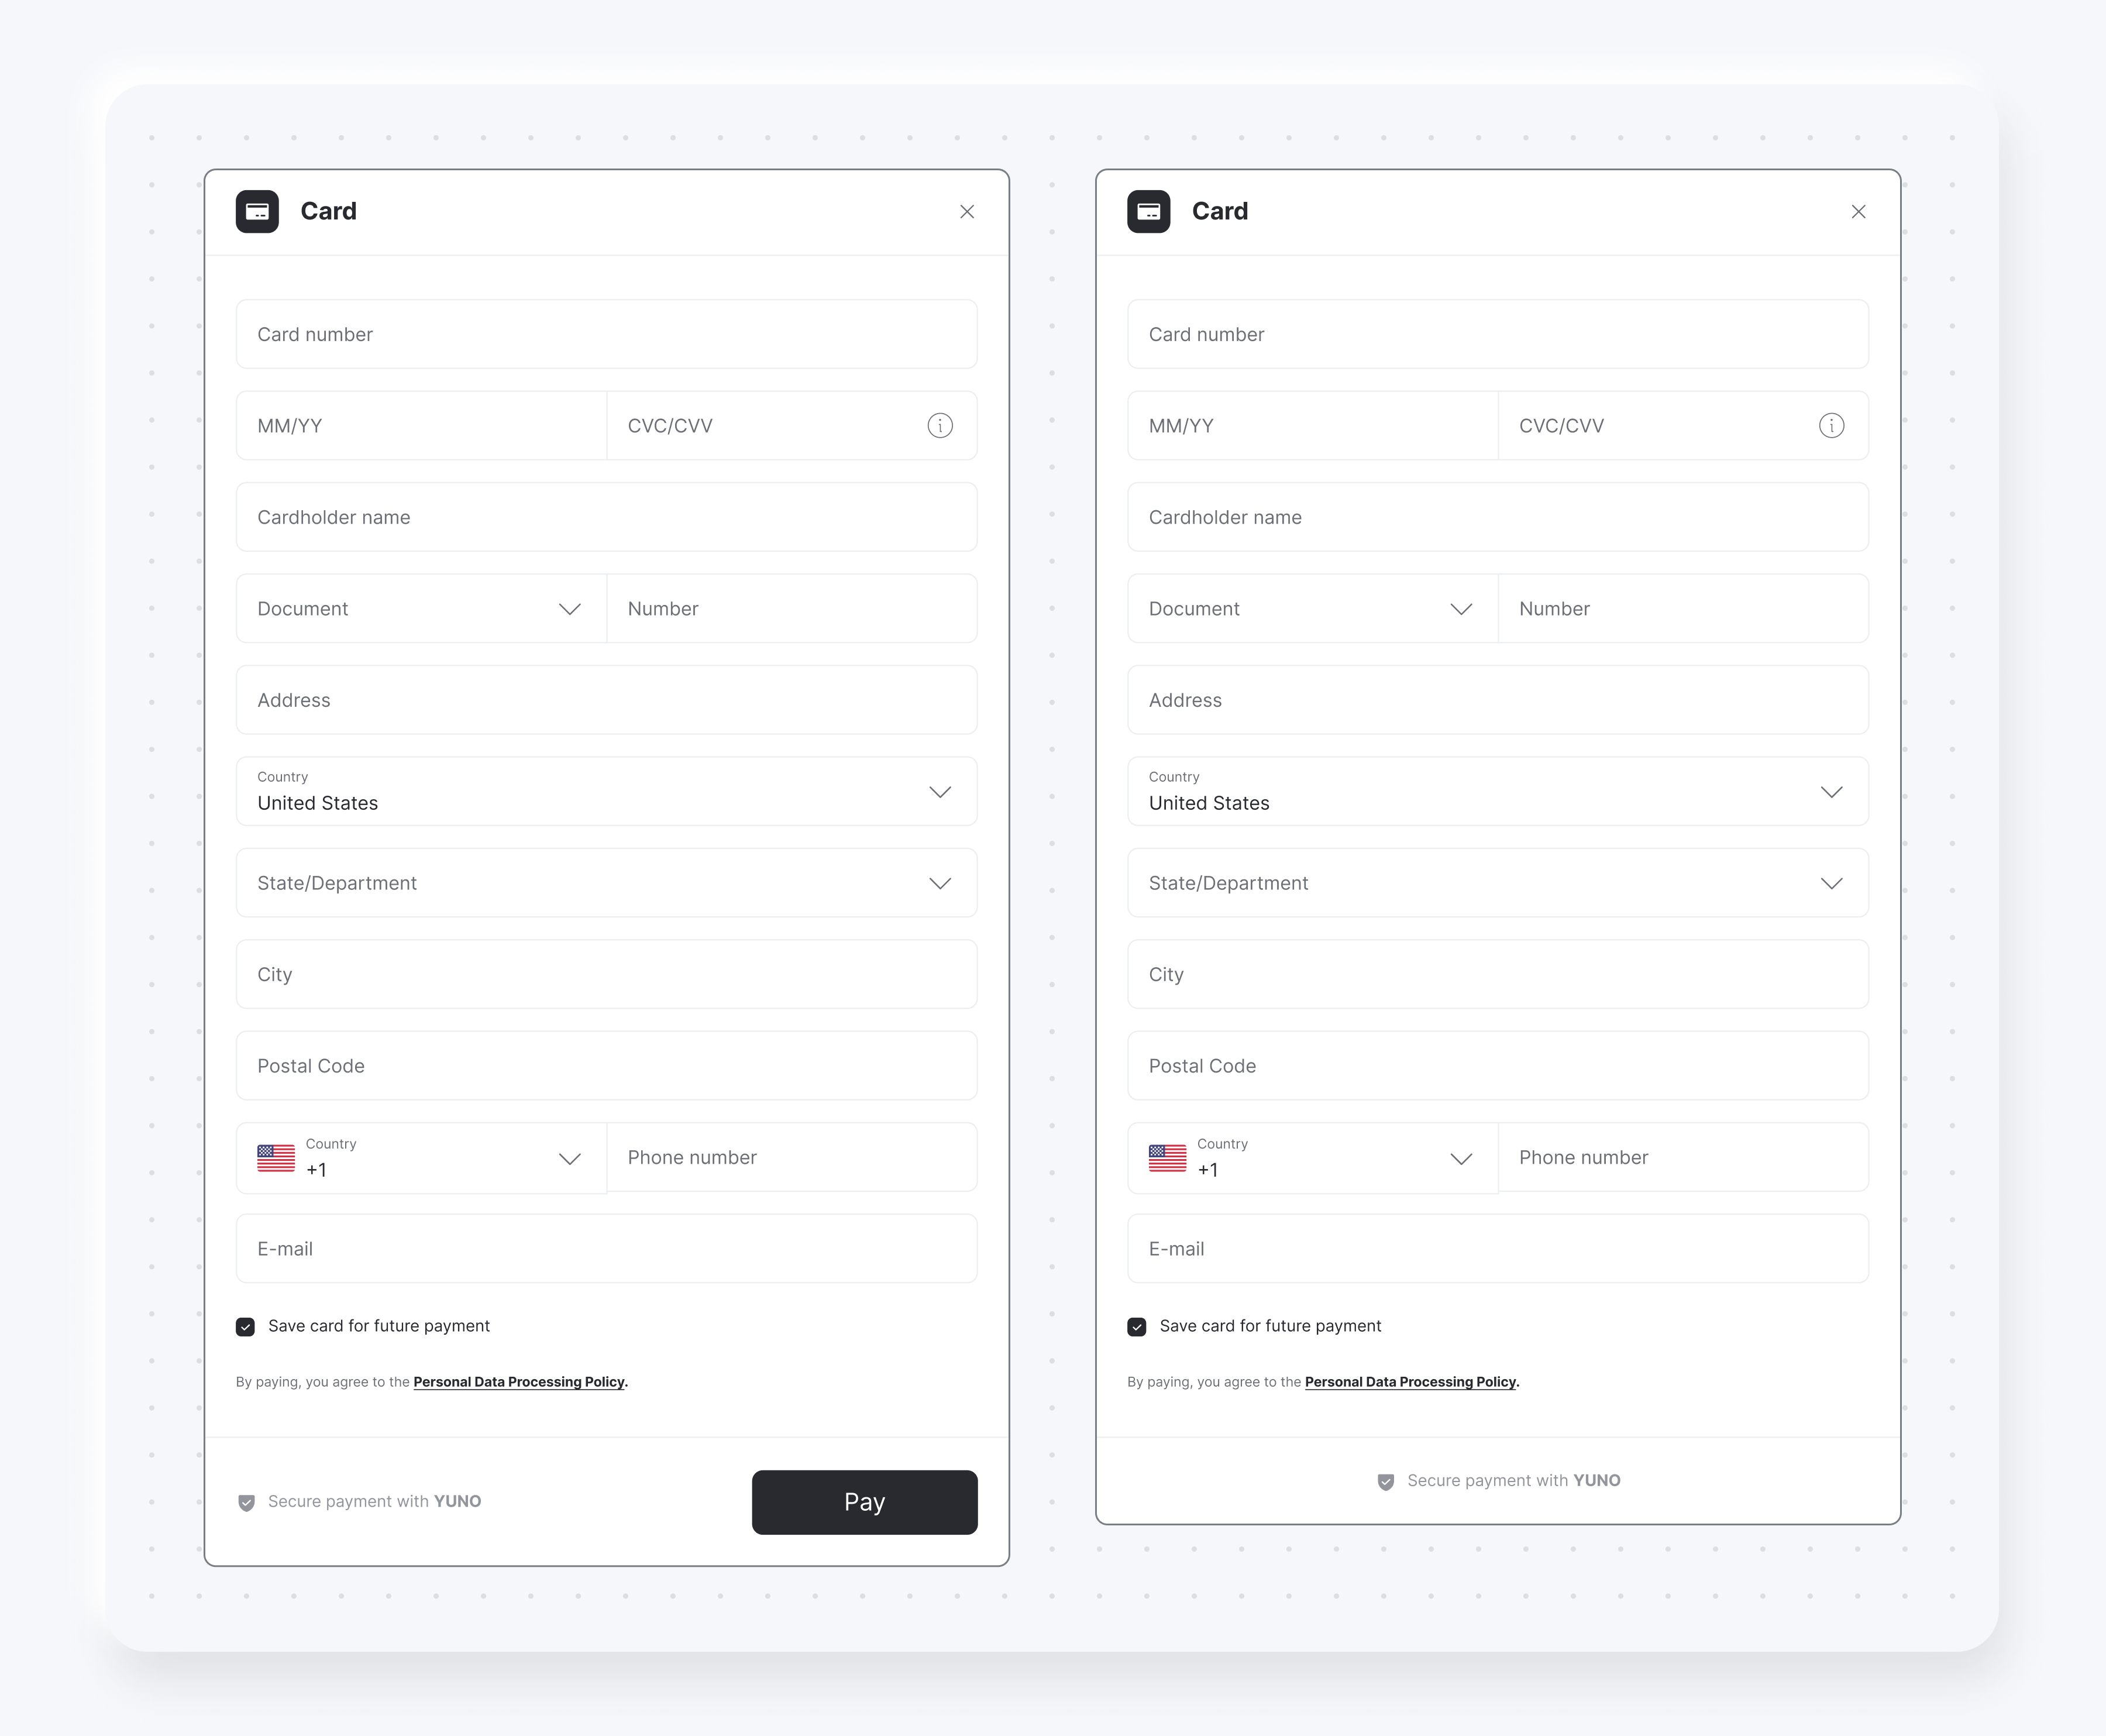
Hide Pay button
You can hide the Pay button when presenting the card or customer data form. Set showPayButton to false when starting the checkout with the startCheckout function:
yuno.startCheckout({
  showPayButton: false,
});
The following images show examples of the Customer Data Form with and without the Pay button:
The following images show examples of the Card Form with and without the Pay button:

If you hide the Pay button, you need to start the one-time token creation through your code. To create the one-time token and continue the payment in your backend, call the submitOneTimeTokenForm function:
yuno.submitOneTimeTokenForm();Optional initialization options parameter
options parameterThis optional feature is intended for advanced use cases where you need to customize how device identification is handled via cookies.
Starting from Yuno SDK v1.2, the Yuno.initialize function supports a new optional parameter called options. This allows for advanced configuration such as customizing the cookie name used for device identification.
Initialization options
The updated function signature is:
const yuno = await Yuno.initialize(publicApiKey, applicationSession, options);publicApiKey(string): Your public API key.applicationSession(string | undefined): Optional session ID.Recommendation: Leave this as
undefinedso the SDK can generate and manage its own session internally. Only set this if you require a custom session management strategy.options(object | undefined): Optional object for advanced configuration.
Options structure
The options object supports the following structure:
const options = {
  cookies: {
    deviceId: {
      name: "customCookieName",
    },
  },
};
If
deviceId.nameis not specified, the SDK defaults to"yuno"as the cookie name.
Implementation example
const publicApiKey = "your-public-api-key";
const options = {
  cookies: {
    deviceId: {
      name: "custom-device-id",
    },
  },
};

const yuno = await Yuno.initialize(publicApiKey, undefined, options);
What's next?
Learn about the additional configurations from the Lite SDK by accessing Complementary Features. You can also access other functions available on the Yuno Web SDK:
- SDK Customizations: Change the SDK appearance to match your brand
- Payment Status: Update the user about the payment process
Related Links
Find more information and version history for the Web SDK below:
- Web SDK v1.3: The latest version with improved UI grouping and multilingual support.
- Web SDK v1.2: Updated
continuePaymentmethod and optional initialization parameters.
Updated 30 minutes ago