Prerequisites
- An Okta account
- An application for use with Yuno
- Admin privileges in Okta to manage SSO settings
- Access to the Yuno dashboard
Create a SAML application in Okta
In Okta, go to:Applications → Create App Integration → SAML 2.0 → NextSelect a name for your application and, optionally, upload a logo. You will then see the SAML configuration form.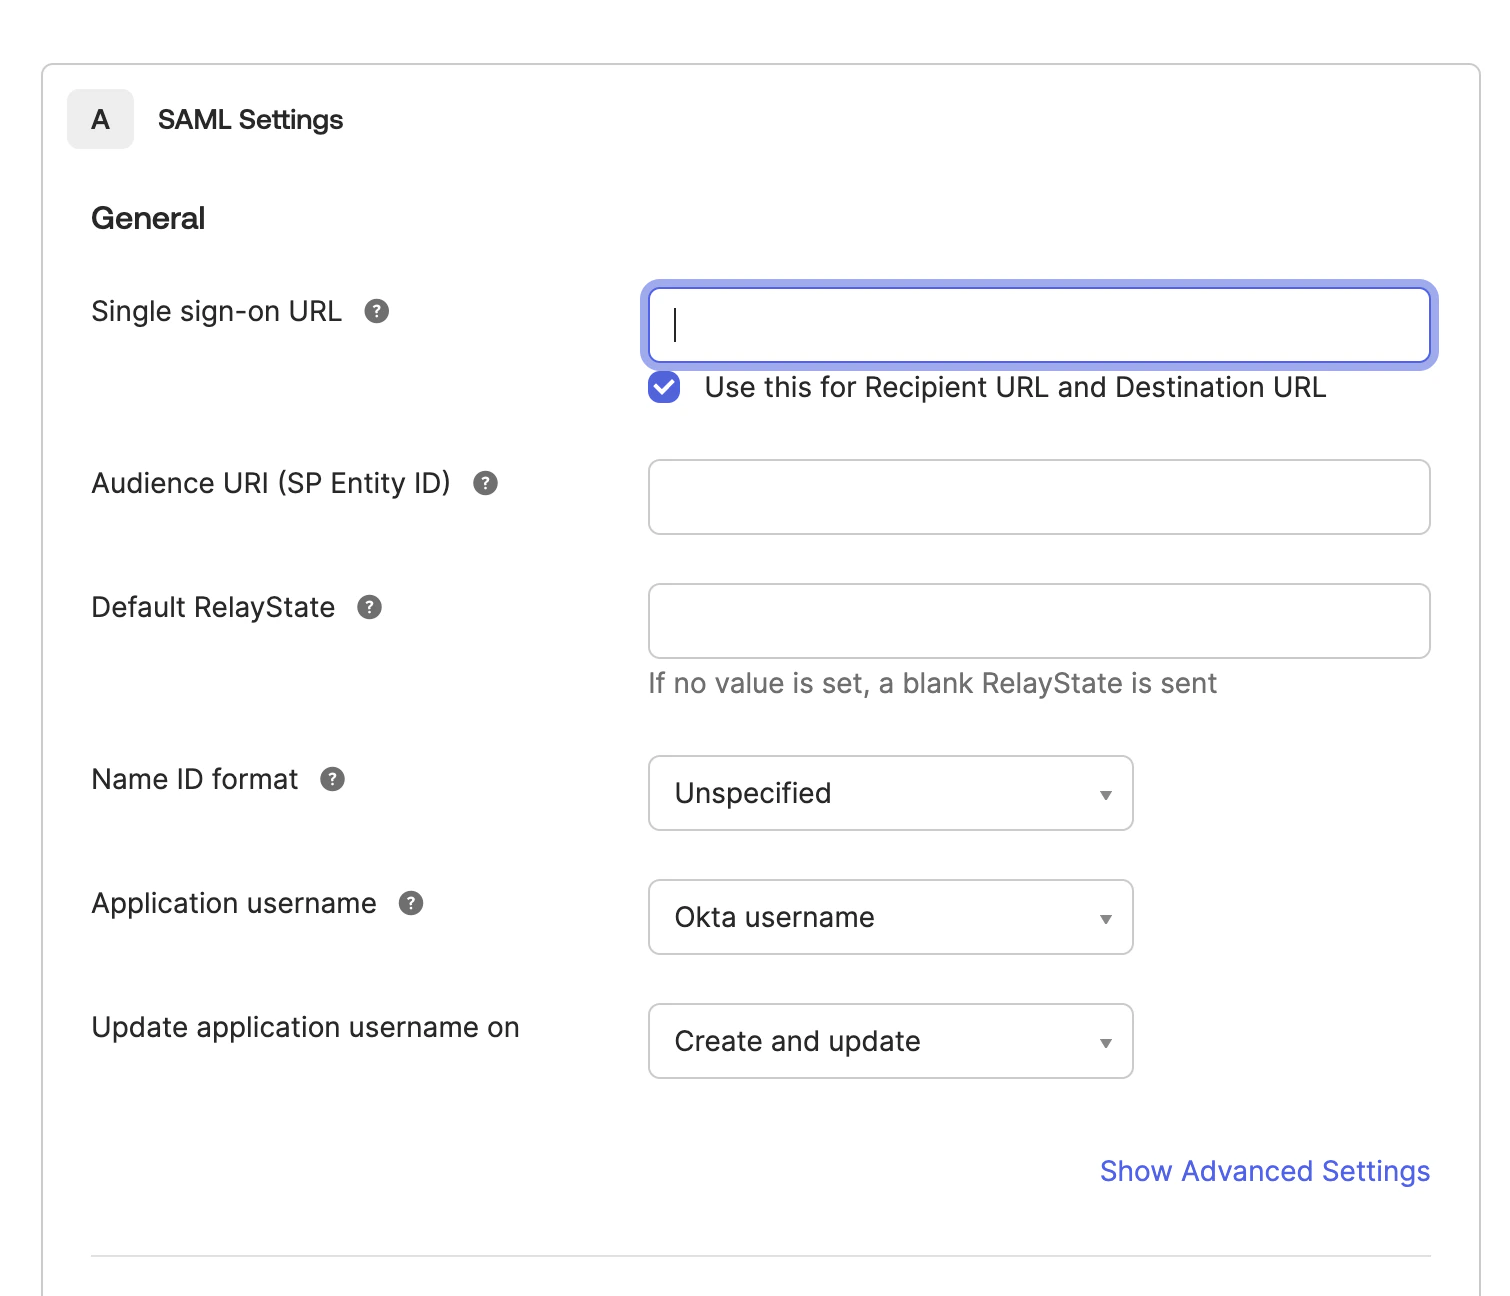
Configure SAML settings using Yuno values
Open the Yuno dashboard, click your profile image, then open Security. Navigate to the Single Sign-On (SSO) tab, click Set up, and gather this info:
- Identifier (Entity ID)
- Assertion Consumer Service URL
- Audience URI (SP Entity ID) → Identifier (Entity ID)
- Single sign-on URL → Assertion Consumer Service URL
Export and upload the metadata XML
In Okta, locate the Metadata URL under the application’s settings and open it. Save the file as 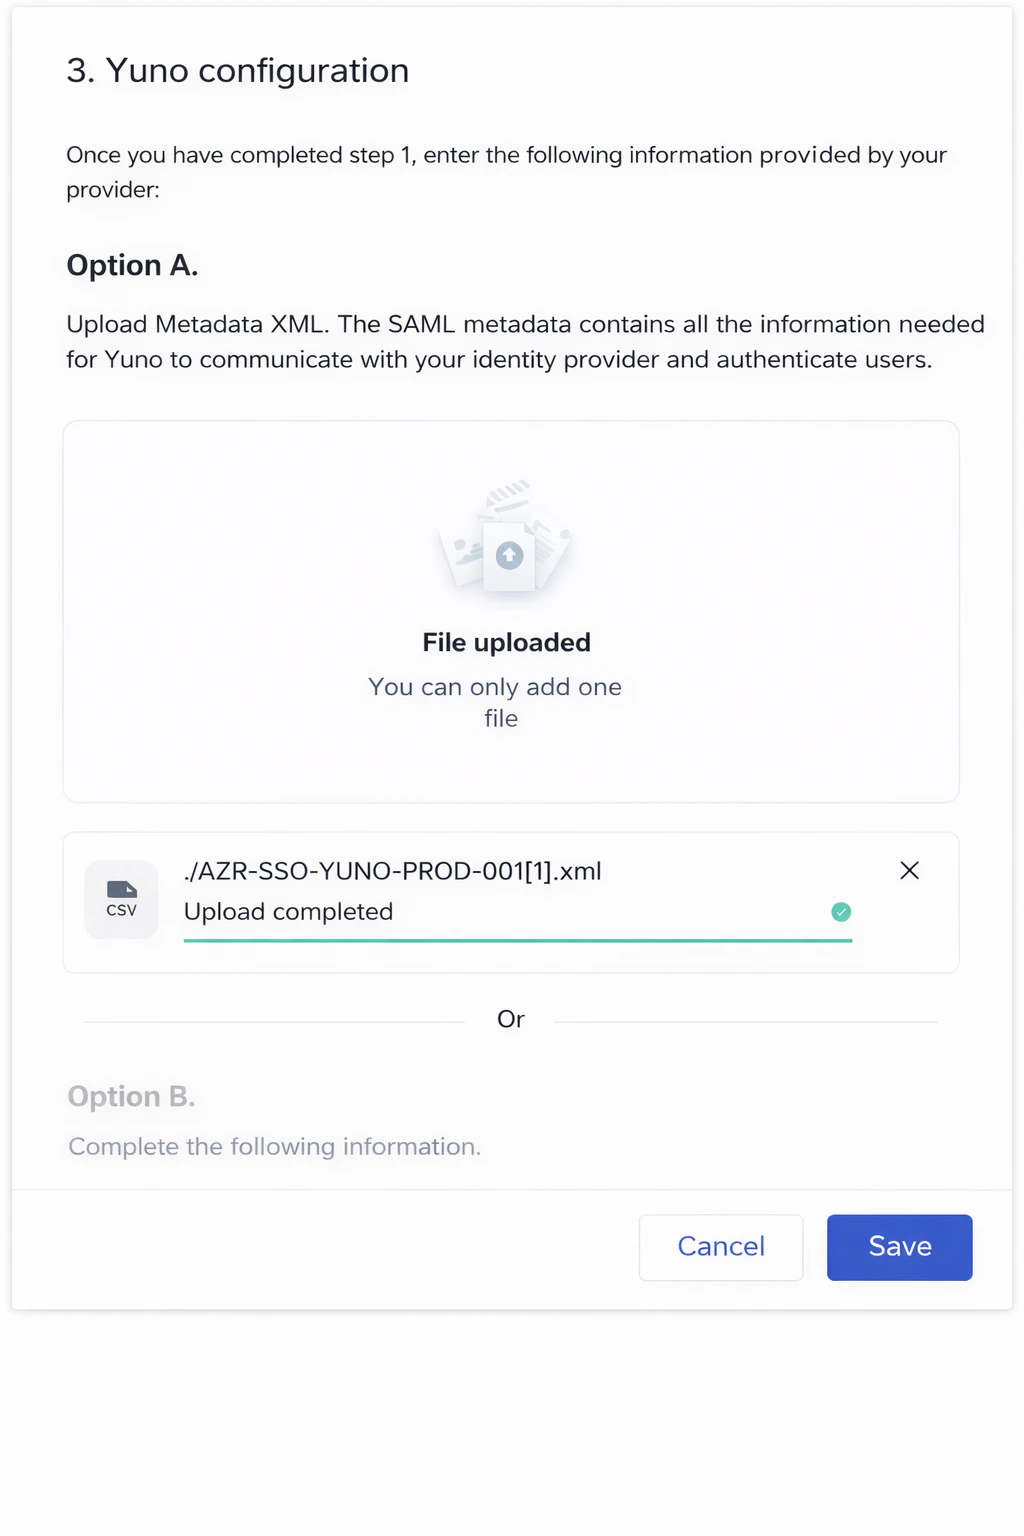
metadata.xml.Then, in the Yuno dashboard:- Upload the
metadata.xmlfile under Yuno configuration → Option A: Upload metadata XML - Wait for the Upload completed confirmation
- Click Save
Troubleshooting
If you cannot set up the SSO connection or run into issues after initial configuration:- Yuno requires signed SAML responses, check:
- Both the SAML response and the assertion are signed
- The signing algorithm configured in Okta is SHA-256
- The certificate used for signing matches the one included in the metadata
- Review SSO logs in the Yuno dashboard under Security → Single sign-on (SSO)