This guide explains how to connect Yuno to Microsoft Entra ID (formerly Azure Active Directory) using SAML 2.0.Documentation Index
Fetch the complete documentation index at: https://docs.y.uno/llms.txt
Use this file to discover all available pages before exploring further.
Prerequisites
- A Microsoft Entra ID tenant
- An application for use with Yuno
- Entra ID admin privileges to manage SSO settings
- Access to the Yuno dashboard
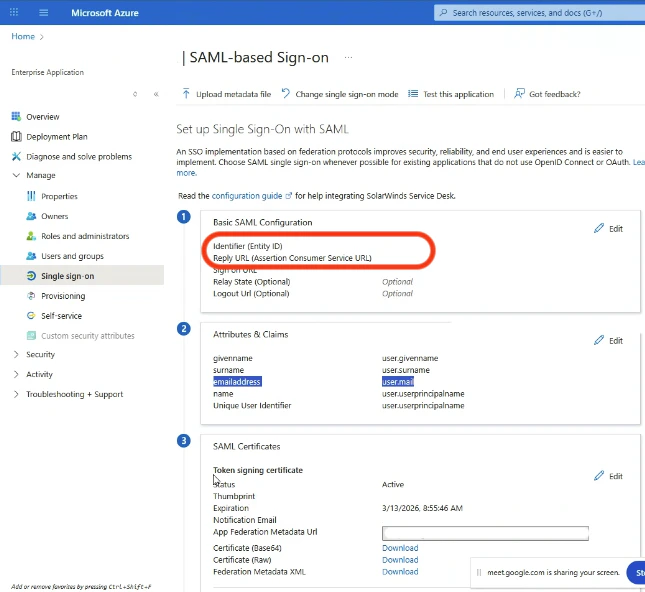
Configure the basic SAML settings
First, go to the dashboard and click your profile image, then open Security. Navigate to the Single Sign-On (SSO) tab, click Set up and gather this info: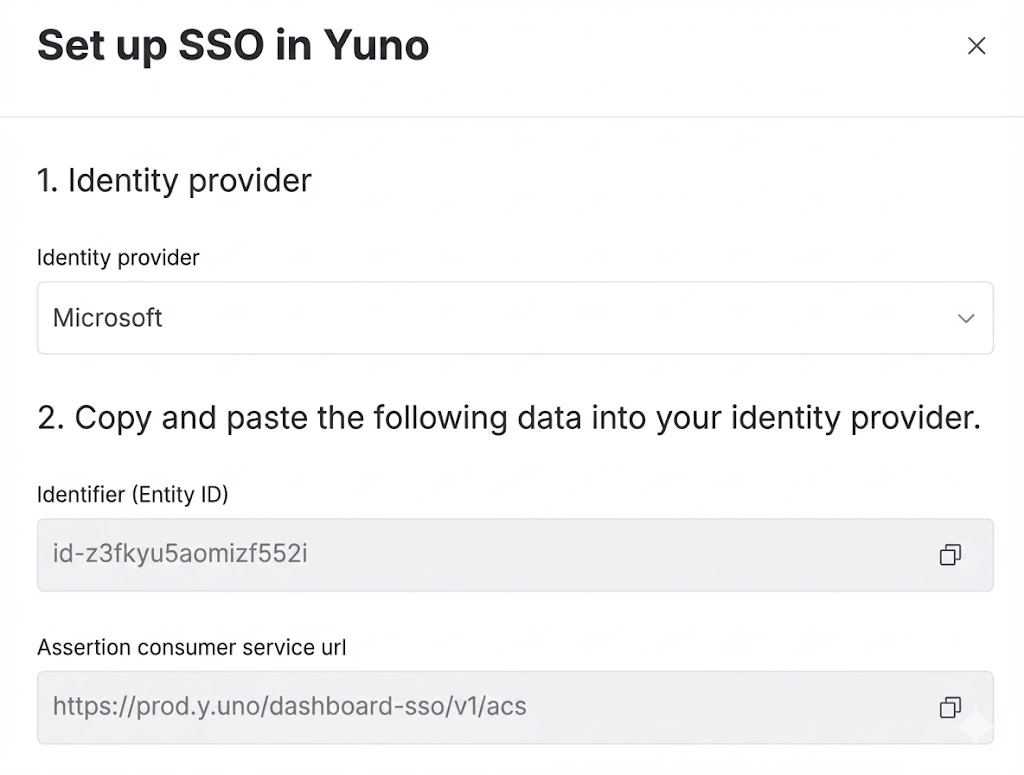
- Identifier (Entity ID)
- Assertion Consumer Service URL
Export and upload the federation metadata XML
In Microsoft Entra ID, navigate to the SAML certificates section and download the Federation Metadata XML file.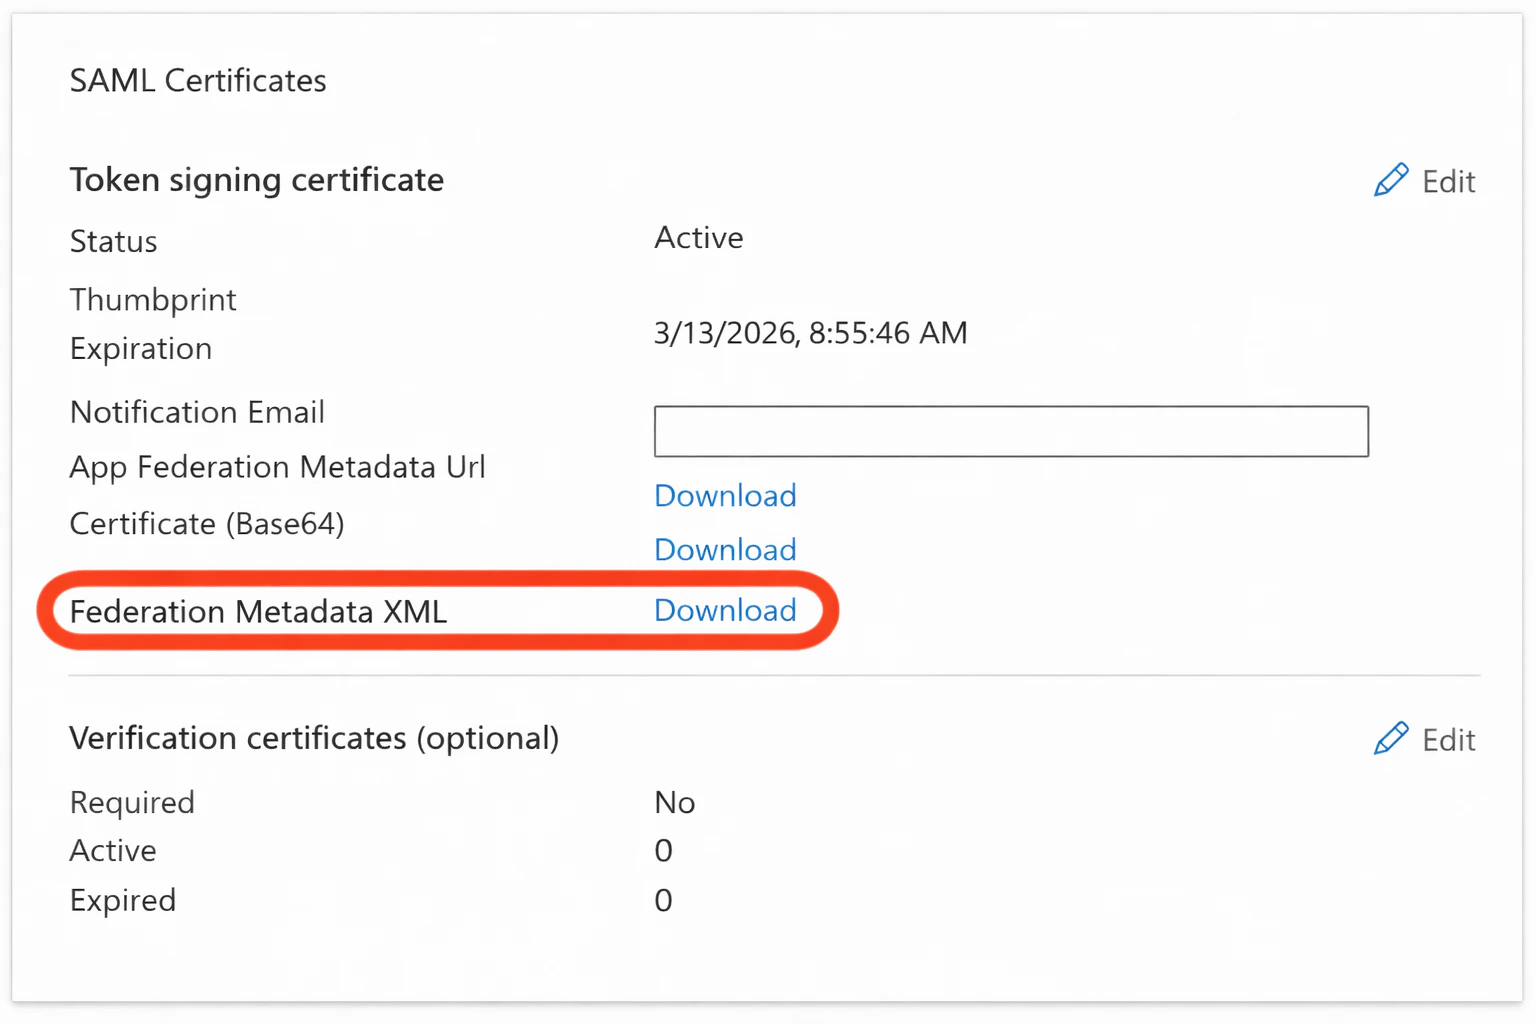
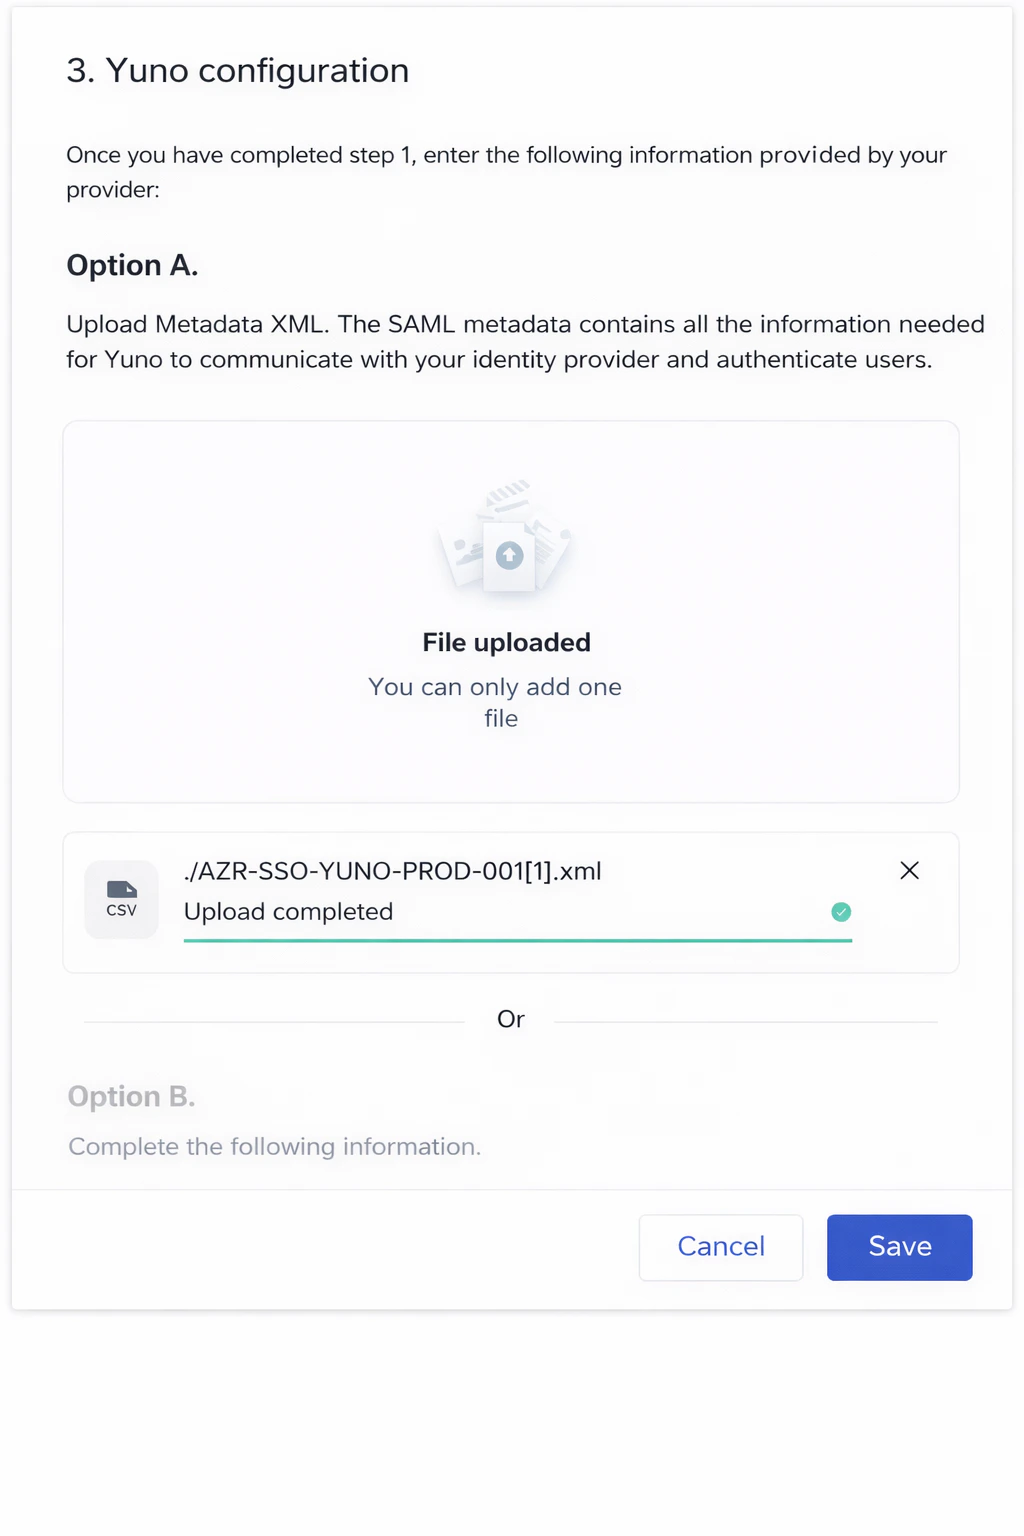
- Upload the XML file under Yuno configuration → Option A: Upload metadata XML
- Wait for the Upload completed confirmation
- Click Save
Troubleshooting
If you cannot set up the SSO connection or run into issues after initial configuration:- Remember Yuno requires signed SAML responses, check:
- Both the SAML response and the assertion are signed
- The signing algorithm is SHA-256
- The signing certificate matches the one uploaded to Yuno
- Review SSO logs in the Yuno dashboard under Security → Single sign-on (SSO)