> ## Documentation Index
> Fetch the complete documentation index at: https://docs.y.uno/llms.txt
> Use this file to discover all available pages before exploring further.
# Single Sign-On (SSO)
**Single Sign-On (SSO)** lets your team log in to the Yuno dashboard using your company's existing identity provider (IdP), instead of creating separate credentials for Yuno. SSO centralizes authentication, simplifies onboarding and offboarding, and ensures that only authorized users from your organization can access the dashboard.
Yuno supports SSO through the **SAML 2.0** standard and is compatible with a wide range of identity providers, including Google Workspace, Microsoft Entra ID (Azure AD), Okta, OneLogin, JumpCloud, ADFS, Ping Identity, Auth0, Keycloak, and any SAML 2.0–compliant provider. Configuration is handled through a dedicated hosted portal — you do not need to paste SAML metadata, entity IDs, or certificates inside the Yuno dashboard.
This page describes the current SSO setup flow, which uses a hosted portal for both domain verification and SSO configuration. If your organization set up SSO using the previous in-dashboard approach, reconfigure it using the steps below.
## Prerequisites
**Before you begin**
* **Admin role** in every account that belongs to your organization.
* **DNS access** to add a TXT record during domain verification.
* **IdP admin access** to complete the SAML configuration in your identity provider's console.
## Setting up SSO
The **Security → Single sign-on** tab contains two cards: **Domain Verification** and **Single Sign-On**. Complete them in order — SSO configuration is locked until your domain is verified.
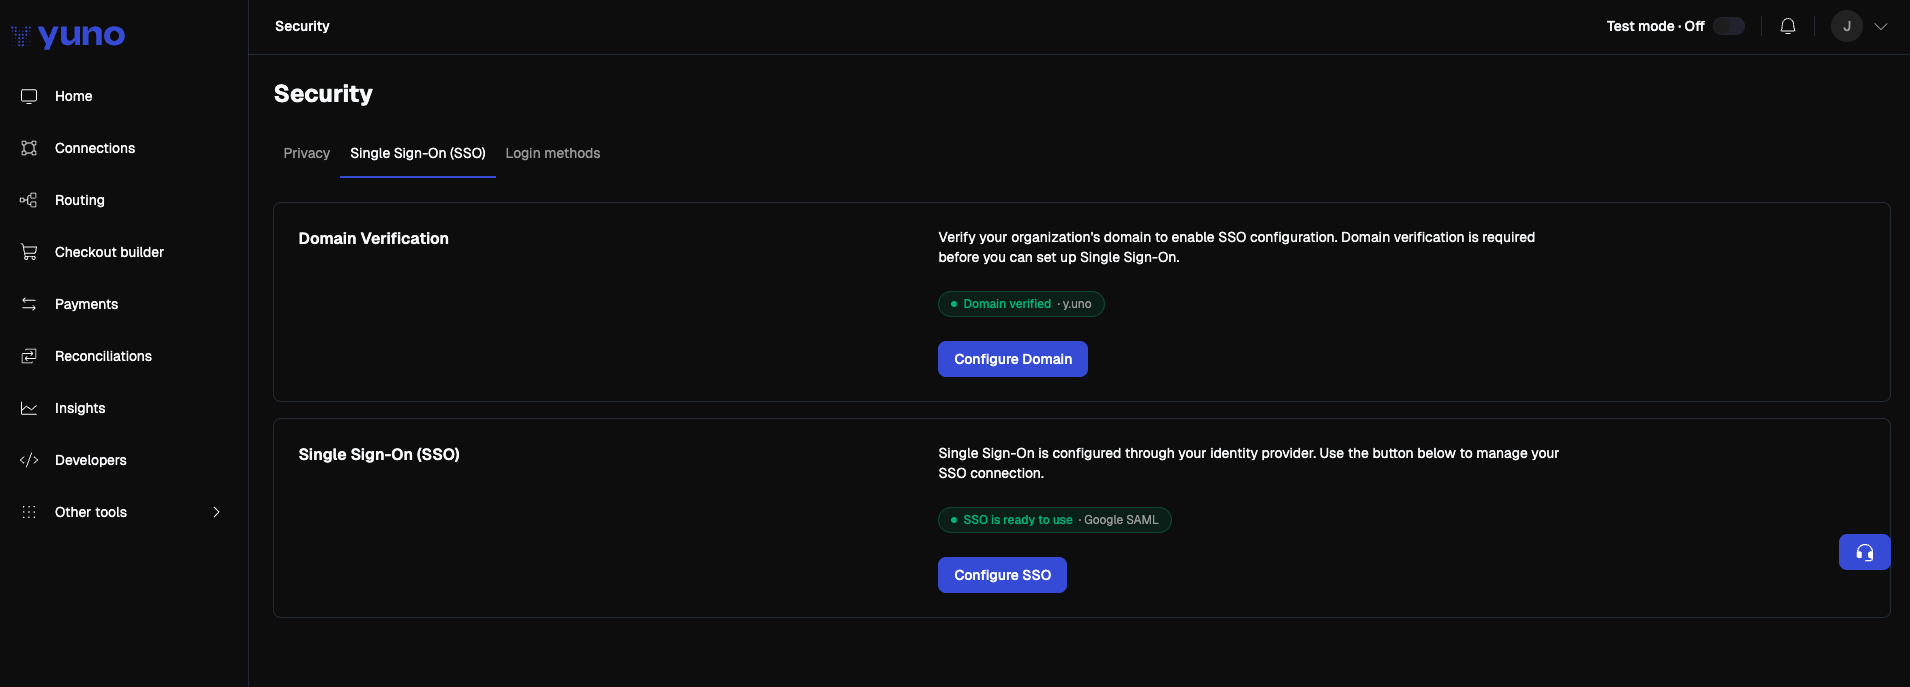 Domain verification proves that your organization owns the email domain its users will sign in with (for example, `acme.com`).
1. In the Yuno dashboard, go to your profile menu → **Security** → **Single sign-on**.
2. In the **Domain Verification** card, click **Configure Domain**.
3. A new browser tab opens with Yuno's domain verification portal.
Domain verification proves that your organization owns the email domain its users will sign in with (for example, `acme.com`).
1. In the Yuno dashboard, go to your profile menu → **Security** → **Single sign-on**.
2. In the **Domain Verification** card, click **Configure Domain**.
3. A new browser tab opens with Yuno's domain verification portal.
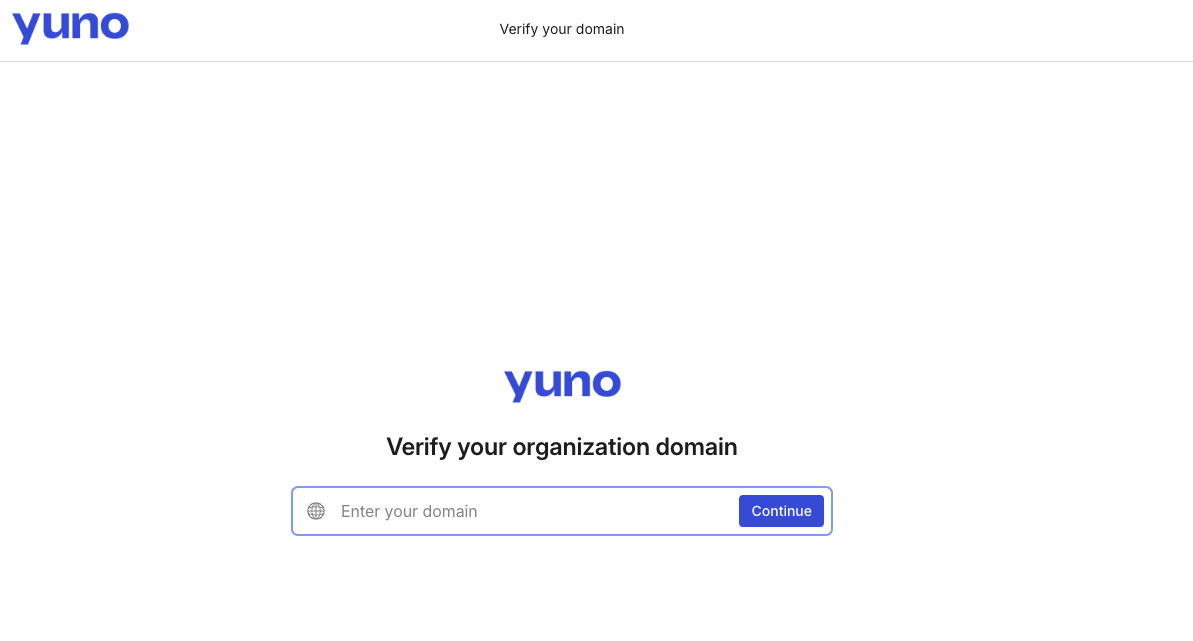 4. Enter the email domain you want to verify and click **Continue**.
5. Copy the TXT record the portal provides, then add it to your DNS provider exactly as shown — no extra quotes or whitespace.
6. Return to the portal and click **Verify**.
7. Return to the Yuno dashboard. Once the record propagates and the portal validates it, the Domain Verification card displays a green **Domain verified · your-domain.com** pill.
DNS propagation can take a few minutes to a few hours. The verification status updates automatically when you reopen the page.
Once your domain is verified, the **Configure SSO** button on the Single Sign-On card becomes active. If your domain is not yet verified, the button is disabled and the card shows the message *"You must verify a domain before configuring SSO."*
1. Click **Configure SSO**. A new browser tab opens with the hosted SSO setup portal.
2. Choose your identity provider from the catalog (Google, Microsoft Entra ID, Okta, OneLogin, JumpCloud, Generic SAML, and others).
3. The portal walks you through the connection setup with provider-specific instructions. The typical fields are:
| Field | Direction |
| -------------------------------------------- | -------------------------------------------- |
| **ACS URL** (Assertion Consumer Service URL) | Provided by the portal — paste into your IdP |
| **SP Entity ID** | Provided by the portal — paste into your IdP |
| **IdP Sign-In URL** | Provided by your IdP — paste into the portal |
| **IdP X.509 Certificate** | Provided by your IdP — paste into the portal |
4. Save the connection in the portal. The portal validates the connection end-to-end before it goes live.
4. Enter the email domain you want to verify and click **Continue**.
5. Copy the TXT record the portal provides, then add it to your DNS provider exactly as shown — no extra quotes or whitespace.
6. Return to the portal and click **Verify**.
7. Return to the Yuno dashboard. Once the record propagates and the portal validates it, the Domain Verification card displays a green **Domain verified · your-domain.com** pill.
DNS propagation can take a few minutes to a few hours. The verification status updates automatically when you reopen the page.
Once your domain is verified, the **Configure SSO** button on the Single Sign-On card becomes active. If your domain is not yet verified, the button is disabled and the card shows the message *"You must verify a domain before configuring SSO."*
1. Click **Configure SSO**. A new browser tab opens with the hosted SSO setup portal.
2. Choose your identity provider from the catalog (Google, Microsoft Entra ID, Okta, OneLogin, JumpCloud, Generic SAML, and others).
3. The portal walks you through the connection setup with provider-specific instructions. The typical fields are:
| Field | Direction |
| -------------------------------------------- | -------------------------------------------- |
| **ACS URL** (Assertion Consumer Service URL) | Provided by the portal — paste into your IdP |
| **SP Entity ID** | Provided by the portal — paste into your IdP |
| **IdP Sign-In URL** | Provided by your IdP — paste into the portal |
| **IdP X.509 Certificate** | Provided by your IdP — paste into the portal |
4. Save the connection in the portal. The portal validates the connection end-to-end before it goes live.
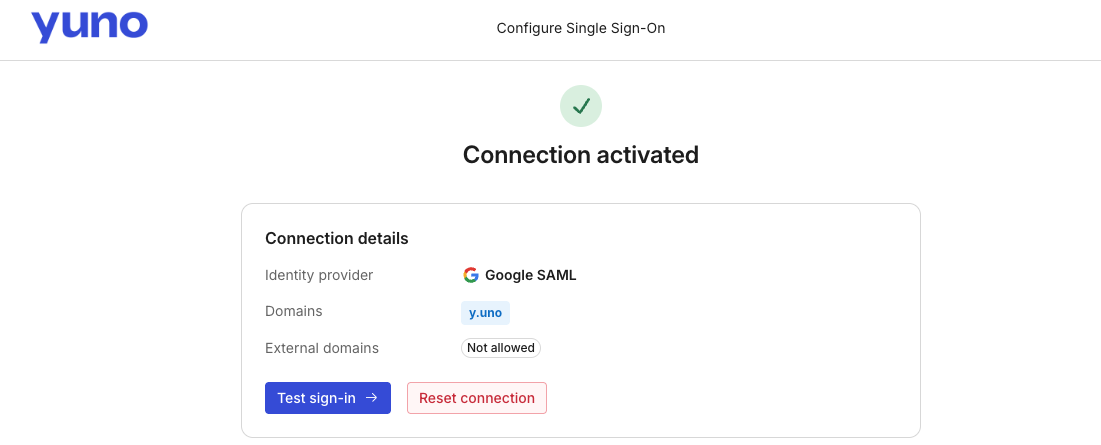 5. Return to the Yuno dashboard. The **Single Sign-On** card displays one of the following statuses:
| Status | Meaning |
| -------------------------------------------------------------- | ---------------------------------------------------------------------------------------------- |
| **SSO is ready to use** · `Google SAML` / `Okta SAML` / `SAML` | Connection is active and users can sign in with SSO. The pill includes the connection type. |
| **SSO connection active** | Connection exists and is functional but not yet marked ready for general use |
| **SSO connection not configured** | No connection exists or the connection is inactive — click **Configure SSO** to complete setup |
You do not need to upload XML metadata, paste an entity ID, or upload a certificate inside the Yuno dashboard. All SAML configuration lives in the hosted portal.
## Signing in with SSO
Once the connection is active, users can sign in with SSO from the Yuno login page:
1. Open `dashboard.y.uno`. You are briefly redirected through `id.y.uno`, Yuno's authentication domain.
2. Enter your corporate email address and click **Continue with SSO**.
3. You are redirected to your identity provider to authenticate.
4. After your IdP authenticates you, you land back in the Yuno dashboard.
## Managing SSO
* **Disable or re-enable SSO**: Go to **Security** → **Login methods** and toggle SSO on or off.
* **Edit an existing connection**: Go to **Security** → **Single sign-on** and click **Configure SSO** to reopen the hosted portal and update the configuration.
## Troubleshooting
**Users bounce back to the login screen**
Yuno enforces that both the SAML response and assertion are signed using SHA-256. If sign-in fails, confirm in your IdP that both the response and the assertion are signed with SHA-256, and that the certificate registered in the hosted portal matches the one your IdP is currently using.
**Certificate rotation**
When you rotate certificates in your IdP, reopen the hosted SSO portal and update the certificate there. Until the portal reflects the new certificate, SSO sign-ins will fail.
**SSO sign-in logs**
Dashboard users cannot view audit logs for SSO attempts directly. To investigate an authentication issue, contact Yuno Support with the user's email address and the approximate timestamp so the support team can retrieve the relevant logs.
5. Return to the Yuno dashboard. The **Single Sign-On** card displays one of the following statuses:
| Status | Meaning |
| -------------------------------------------------------------- | ---------------------------------------------------------------------------------------------- |
| **SSO is ready to use** · `Google SAML` / `Okta SAML` / `SAML` | Connection is active and users can sign in with SSO. The pill includes the connection type. |
| **SSO connection active** | Connection exists and is functional but not yet marked ready for general use |
| **SSO connection not configured** | No connection exists or the connection is inactive — click **Configure SSO** to complete setup |
You do not need to upload XML metadata, paste an entity ID, or upload a certificate inside the Yuno dashboard. All SAML configuration lives in the hosted portal.
## Signing in with SSO
Once the connection is active, users can sign in with SSO from the Yuno login page:
1. Open `dashboard.y.uno`. You are briefly redirected through `id.y.uno`, Yuno's authentication domain.
2. Enter your corporate email address and click **Continue with SSO**.
3. You are redirected to your identity provider to authenticate.
4. After your IdP authenticates you, you land back in the Yuno dashboard.
## Managing SSO
* **Disable or re-enable SSO**: Go to **Security** → **Login methods** and toggle SSO on or off.
* **Edit an existing connection**: Go to **Security** → **Single sign-on** and click **Configure SSO** to reopen the hosted portal and update the configuration.
## Troubleshooting
**Users bounce back to the login screen**
Yuno enforces that both the SAML response and assertion are signed using SHA-256. If sign-in fails, confirm in your IdP that both the response and the assertion are signed with SHA-256, and that the certificate registered in the hosted portal matches the one your IdP is currently using.
**Certificate rotation**
When you rotate certificates in your IdP, reopen the hosted SSO portal and update the certificate there. Until the portal reflects the new certificate, SSO sign-ins will fail.
**SSO sign-in logs**
Dashboard users cannot view audit logs for SSO attempts directly. To investigate an authentication issue, contact Yuno Support with the user's email address and the approximate timestamp so the support team can retrieve the relevant logs.